How to Photograph Volleyball
copyright 2017, Philip S Zivnuska
Reproducing this tutorial in any form, in whole or in part, without written permission of Philip S. Zivnuska is prohibited.
How to Photograph Volleyball
By Phil Zivnuska
You might think it would be easy. After all, there are only 6 players on each team and the court is not all that big. Indoor volleyball, however, is one of the more challenging sports to photograph. The action is fast, the lighting marginal, players usually face the net and that net gets in the way of focusing. The key elements are the same as in most sports photographs; focus, face (especially the eyes), action, and the ball. “Shoot Tight and Crop Tighter” applies to volleyball too. This tutorial will discuss the elements needed to capture the 7 types of indoor volleyball photographs. A solid knowledge of dslr fundamentals is required. I write as tight as I shoot, so let’s start.
Your efforts will be far more successful if you learn the game, scout the teams, and study the players. Volleyball photography doesn’t follow the ball, it constantly anticipates where the ball is going to be and sets up for the shot ahead of time. Where will the serve be aimed? Why? Who will set the ball up for a spike? What direction will she (he) be facing? Which positions (players) will be doing the spiking and how do they approach the net from their respective positions? Don’t try to capture every hit of the ball. It can’t be done. Think one or two volleys ahead. Consider where you should be positioned to get the best capture of a particular position. Frame and focus on the player who will be hitting the ball before the ball gets there. The more you know about the game, the higher your capture rate will be. The examples here will be from ladies high school volleyball. If you shoot at this level, you will see that players who are novices will be unpredictable due to a lower skill level. Better teams will have a predictable strategy and the best teams will be sophisticated in strategy and disguise their intentions in order to fool the opposition and often you too!
The Prime Directive--Remember that the game is about the student athletes on the court, not about you, not about your pictures. The hierarchy of courtesy has the student athletes, AD, coaches, officials, parents, and fans all above the photographer. Stay out of harms way, blend into the background, be respectful, and if you are told to do something by an official or administrator, do it. If you disagree, comply now and discuss it at a later date. Build cooperative relationships with those who have authority/responsibility for conducting the game. Contact the AD ahead of time and learn the local rules for access. Get permission well in advance of the event. Talk to the refs before the contest to see where you may and may not go to photograph. Don’t push the limits. Did I mention building cooperative relationships with those who have authority/responsibility for conducting the game?
Philosophy--In my view, the best galleries are those which capture a variety of action from changing perspectives using different focal lengths. In order to accomplish that, I will go high, go low, go long (long focal length lenses), go wide (wider angle lenses), go to the side and go to the ends of the court. Here is a gallery of 8 shots using 8 different lenses at 8 different focal lengths from an assortment of elevations:
http://photography-on-the.net/forum/showthread.php?t=1091324
For the lowest perspective, the camera was resting on the floor. To gain a high perspective, I will haul a 400mm f/2.8L to the top of the rafters (as in the LR Event illustration) if it results in a better image. Obviously, the gear available, the venue, and the access permitted will affect what is possible. The complete photographer will be able to adjust to a variety of circumstances and still get the job done.
We will talk about the gear, the light, camera settings and the venue later. Let’s look at and analyze the 7 types of volleyball images now.
Serve, Pass, Set, Spike, Block, Jube, and Event Images
The Serve
The first image to consider is the serve. This shot is usually easy to focus, repeatable and readily available for capture. Sports photographers often attempt to photograph the moment of impact with the ball and they end up with a shot where the hitting arm blocks the view of the face. Consider the images on the left side of the illustration below. This moment is easy to capture and is often very flattering to the player as the arms provide a beautiful frame for the face. Shoot tight. Let the parents know about your photo. Sell them a print.
Since this position is predictable and repeated several times, it allows the photographer to vary his background. On the upper left, the fans and bleachers provide the setting. The lower left shot uses the scoreboard. Look for a pleasing backdrop and change your position to get a good view of the player and have the crowd, scoreboard or perhaps the flag complete the scene.
The movement is slower at this moment, so a one stop slower shutter speed and lower ISO can be used, if needed, to gain image quality. Taking a moment to think through the settings and background will help give you a winning image.
On a jump serve like on the right, getting low will emphasize the athleticism involved. Shooting from a balcony high on the opposite end of the court with a long telephoto will allow you to look straight at the player and give you a better chance to get a good view of the face. The venue, access and/or lenses available may determine which approach you choose to take.
UL-- 1D X, f/3.2, 300mm, 1/800 sec, ISO 6400
LL-- 1D Mark III, f/4.0, 135mm, 1/250 sec, ISO 400, Strobed with 4 Alien Bee B800s
R -- 1D Mark III, f/3.2, 70mm, 1/320 sec, ISO 400, Strobed with 4 Alien Bee B800s
The Pass (Bump, Bump Pass, Overhand pass)
These can be dramatic shots that are often easy to focus and capture. Choose a back row player whose face you can see clearly and who you determine is likely to return the serve (or spike). Good teams will pick an opposing player they want to force to return their serves and they will hit the ball to that person. Lesser teams are happy just to serve the ball inbounds. A weak player may be unable to make the return at all. Even if they can make a play on the ball, a poor pass may compromise the resulting set and therefore impair the opportunity for a successful attack. Here’s where knowledge of the teams can improve your chance of success as a photographer. A good coach will scout the opposition to gain an edge. So can you!
Note: a ‘Bump’ is an underhand pass.
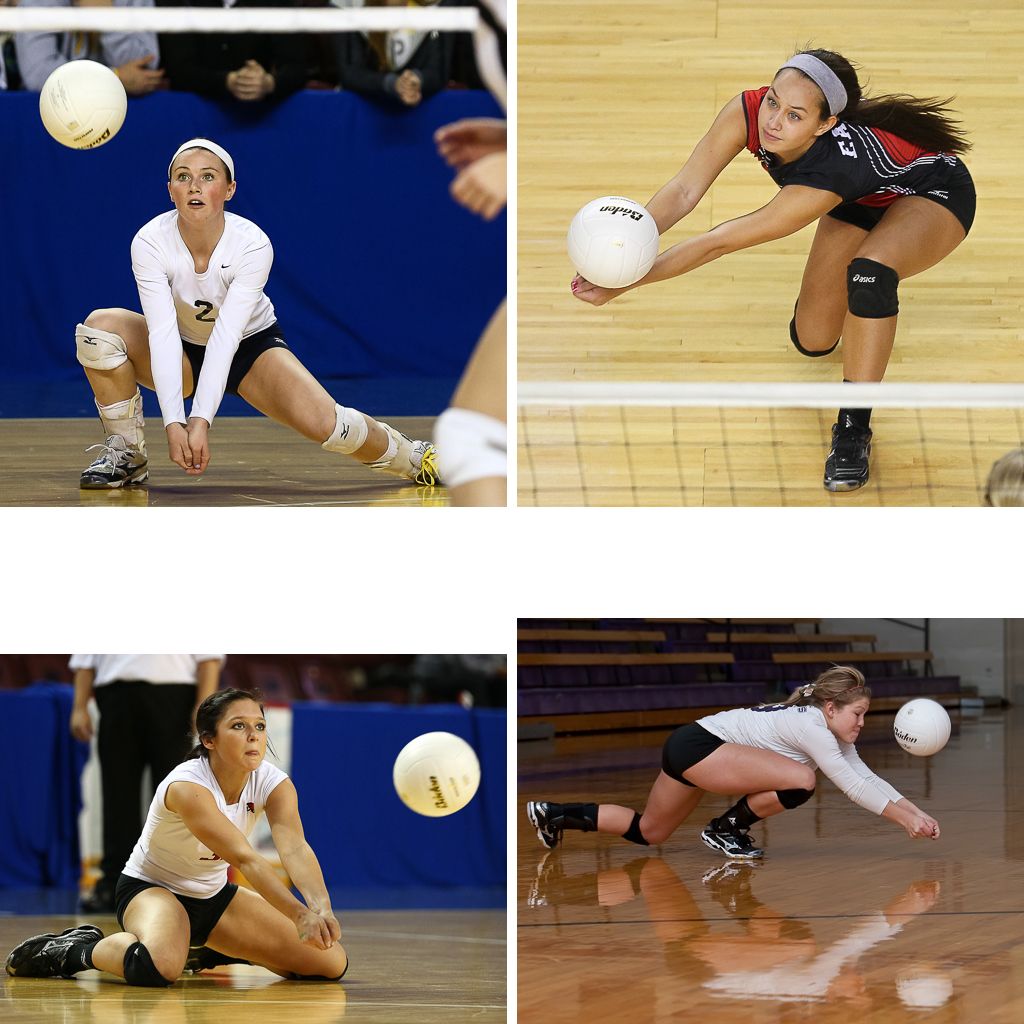
Consider the following images of players digging for the return:
Three of the shots were taken from a vantage point quite close to the floor and the fourth (upper right) was shot from a very high angle looking down on the athlete. The image gains drama if the camera is at or near the floor.
The image on the lower right was taken almost abeam the player and the result is a profile shot. Moving to a 45 degree angle (lower left) gives a improved view of the face and both eyes are visible. Shooting under the net from the opposite side of the court (upper left) gives the best view of the face and especially the eyes. This is a superior quality shot but the sight line will often be blocked by another player. If you are positioned at the end of the court and the serve is being made from near you toward the opposite side, see if you have a clear view to a possible returner, pre-focus on that player, and with a bit of luck, you will get a shot of that player similar to the photograph on the upper left. Try it. As you frame this shot, remember that the players will often move forward and down to the floor as they dig to get a short serve or spike. Get low. Anticipate. Change the focus point if it will help frame the shot and capture the ball in the image. You will often guess incorrectly and focus on the wrong player as you anticipate the return. That’s OK. It’s part of the challenge. Welcome to volleyball photography.
UL-- 1D X, f/3.5, 200mm, 1/1000, ISO 3200, 70-200mm f/2.8L IS II
LL-- 1D X, f/2.8, 182mm, 1/1000, ISO 3200, 70-200mm f/2.8L IS II
UR-- 1D Mark IV, f/2.8, 400mm, 1/1000, ISO 1600
LR-- 1D Mark III, f/4.5, 85mm, 1/250, ISO 400, Strobed with 4 Alien Bee B800s
The set
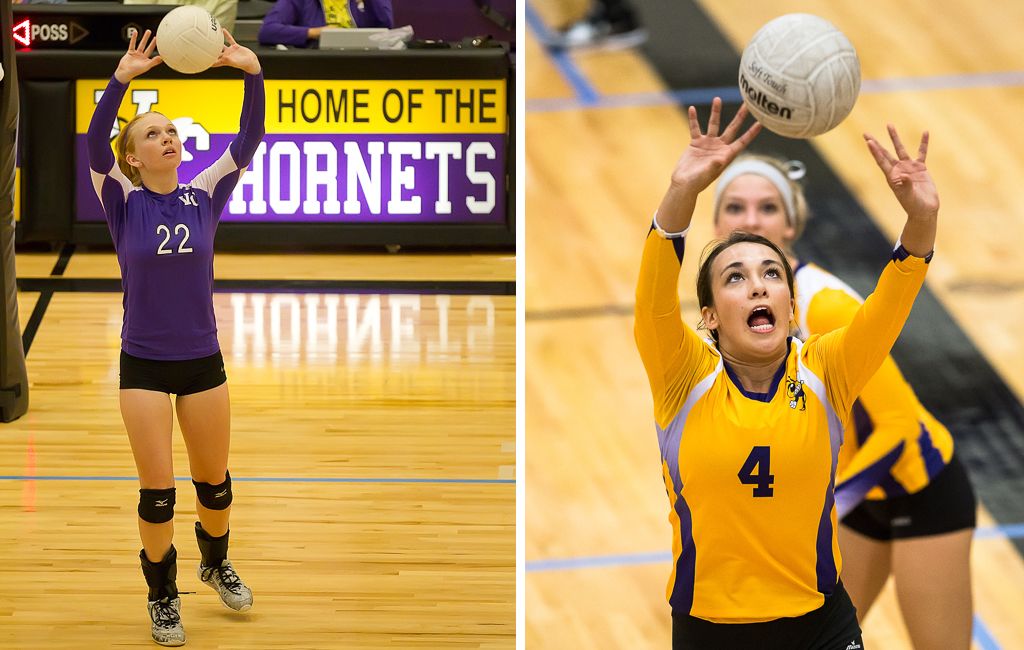
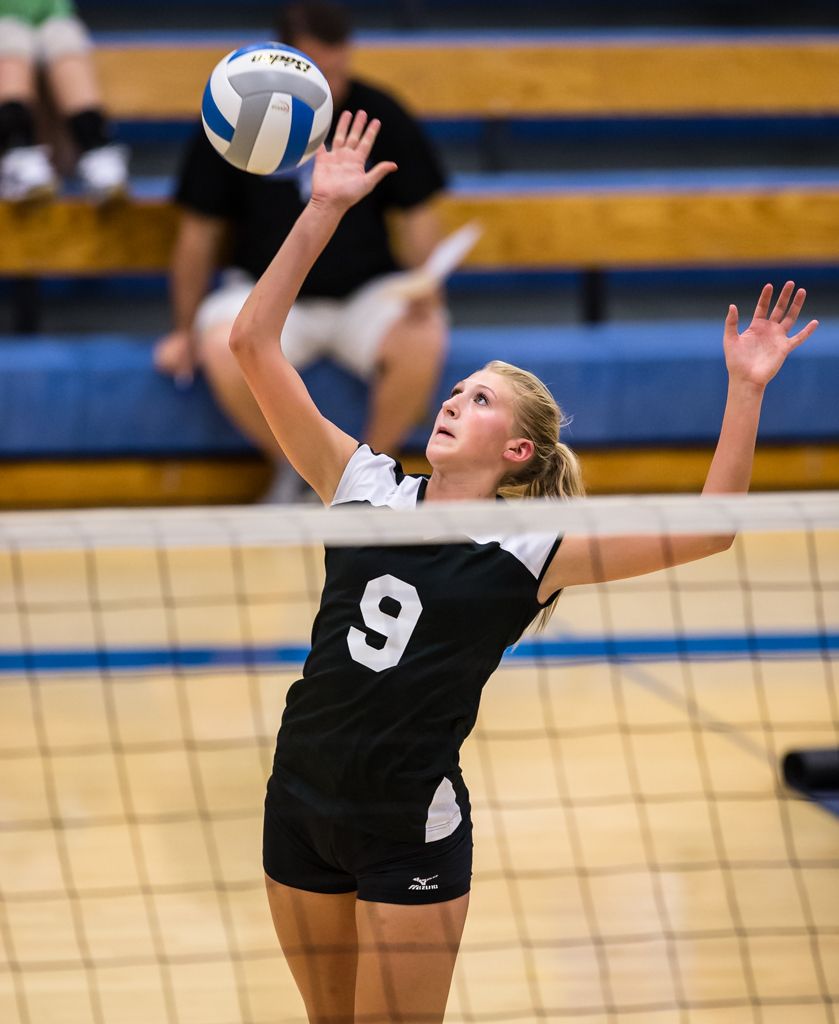
The setter typically faces the same side of the court every time which is toward the strong side outside hitter (left front for right handed outside hitters). She is most often looking up to see the ball (if it is to be an overhand pass). Position yourself to see her face. Since the setter is looking up, a high vantage point is preferred to capture the action and the eyes. I’ll usually use a center focus point, center it on the face, and try to shoot tight as in the image on the right. The full body shot on the left side was framed to capture the sign on the scorers table for context because this was the very first match held at a new high school.
A wider angle will often capture the spiker preparing her move to the net. Both types of images can work.
Left: looking down from the bleachers. Coach’s daughter, brand new “Home of the Hornets.” I knew the paper would love this shot and use it. [Wrong again!]
Right: looking down from a balcony. Note the eyes of the right outside hitter (weak side) locked on the ball to see if the set is coming to her.
L-- 1D Mark IV, f/2.8, 200mm, 1/1000, ISO 4000
R-- 1D X, f/3.2, 300mm, 1/1250, ISO 12,800
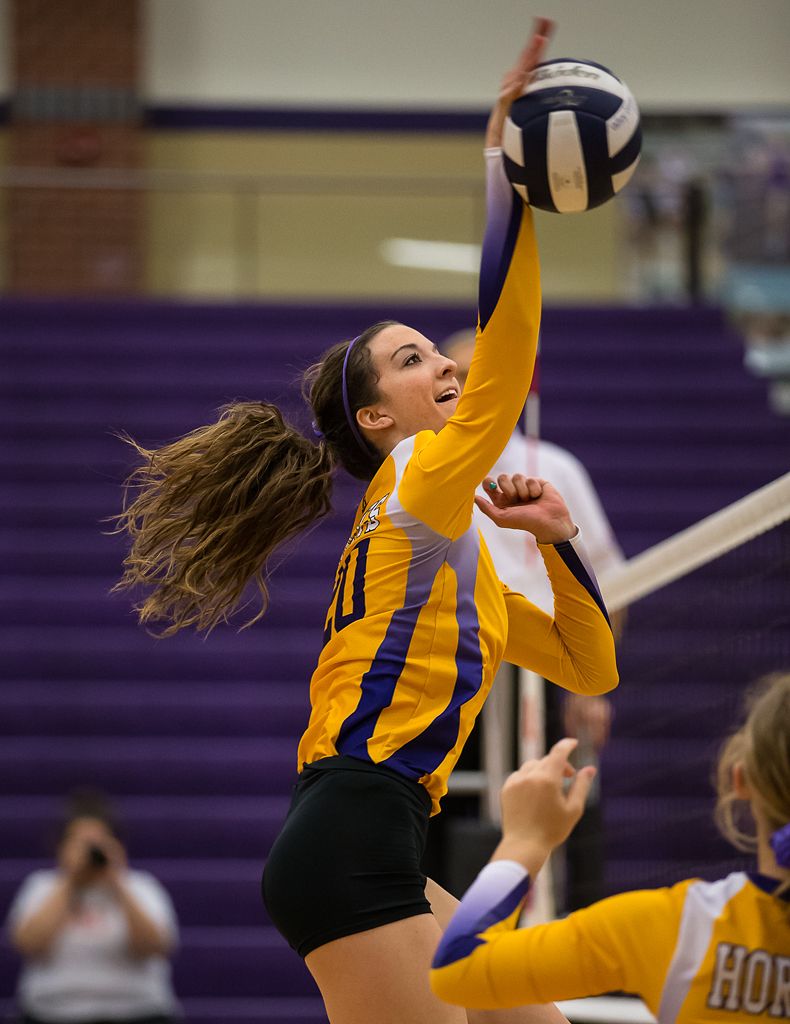
The Spike (Hit, Attack)
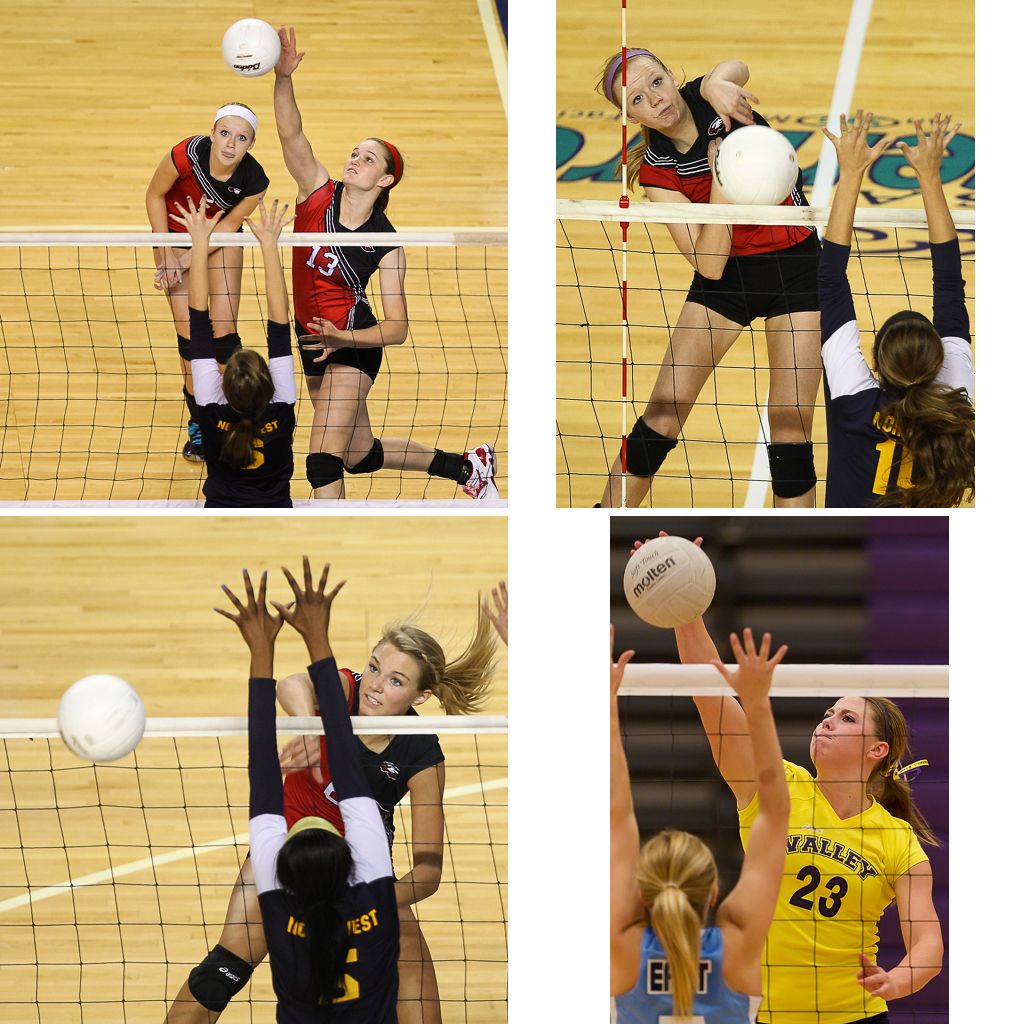
The spike is considered the pinnacle of action and no gallery is complete without some images of it. Gyms with a balcony and most arenas will offer the opportunity for the photographer to get high and shoot down on the play. This yields views of offensive players where the faces are not obstructed by the top tape of the net, hitters seem to be jumping higher, and focusing is far simpler. The three hitters pictured in the red/black uniforms below were all shot from the top of an arena (see LL event image below) with a 400mm lens on a 1.3 crop factor camera body .
The players on the offensive left and right front are the outside hitters. For right handed attackers (the majority), the left front is the key position and left side hitter is hitting from her strong side. She is often the best spiker and most athletic. The other front row players are the middle and the right. Shoot these three tight enough to see the intensity/emotion of the players. Full bodies are not required. Strong side (left side for right handers) outside hitters usually approach the net from about 3 steps back. Track them through their approach and hit. Middles and weak side rights will sometimes have set plays to get them in position to attack. Study your team’s front row strategies.
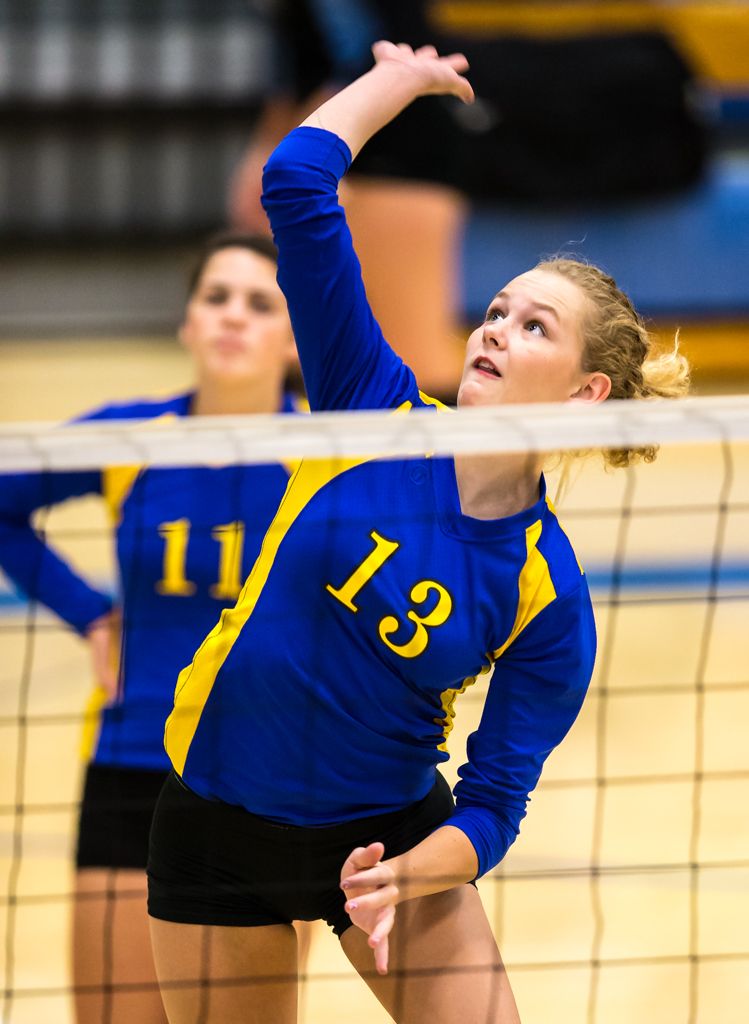
Spikers hitting on their strong side will start out looking toward the setter/ball and their faces will rotate with their bodies as they strike the ball (UL). Positioning yourself 30 to 80 degrees to the net is ideal. Any less and you risk having the hitting arm blocking the face. The face will follow the flight of the ball. Middles will often hit sets that are lower and have more tempo than the typical higher set to strong side outside. They may aim left or right with their spikes to avoid a blocker.
If you can’t get high, you’ll have to focus through the net. The white tape on top of the net is often problematic for obscuring the face. Get higher or lower if you need to. In the LR shot below, the background is dark and the black netting is almost invisible against it. This helped me be able to focus on yellow #23. If the netting is interfering with auto focus, first try adjusting the cameras focus settings (number of aux points, location of focus point, sensitivity etc). Sometimes you can use a low focus point aimed on the legs below the net to get a good result. Every camera model is different and you may need to experiment to see which settings track best. Remember in your framing that hitters will jump and reach up to hit the ball. Allow room at the top of the frame and choose your focus points accordingly. Tight, properly focused images of spikers are challenging to capture but worth the effort.
The dof at 300mm and 50 feet is 1 to 1 1/2 feet at f/2.8 depending on crop factor.
Tighter is better. Tighter is more challenging. Lots more.
LL, UL, UR-- 1D Mark IV, f/2.8, 400mm, 1/1000, ISO 1600 High vantage point looking down.
LR-- 1D Mark IV, f/2.8, 300mm, 1/1000, ISO 4000--Camera is net high so face is close to getting obscured by the tape.
UR, LL: eyes follow the ball on the spike follow through
http://photography-on-the.net/forum/showthread.php?t=1242386
Block
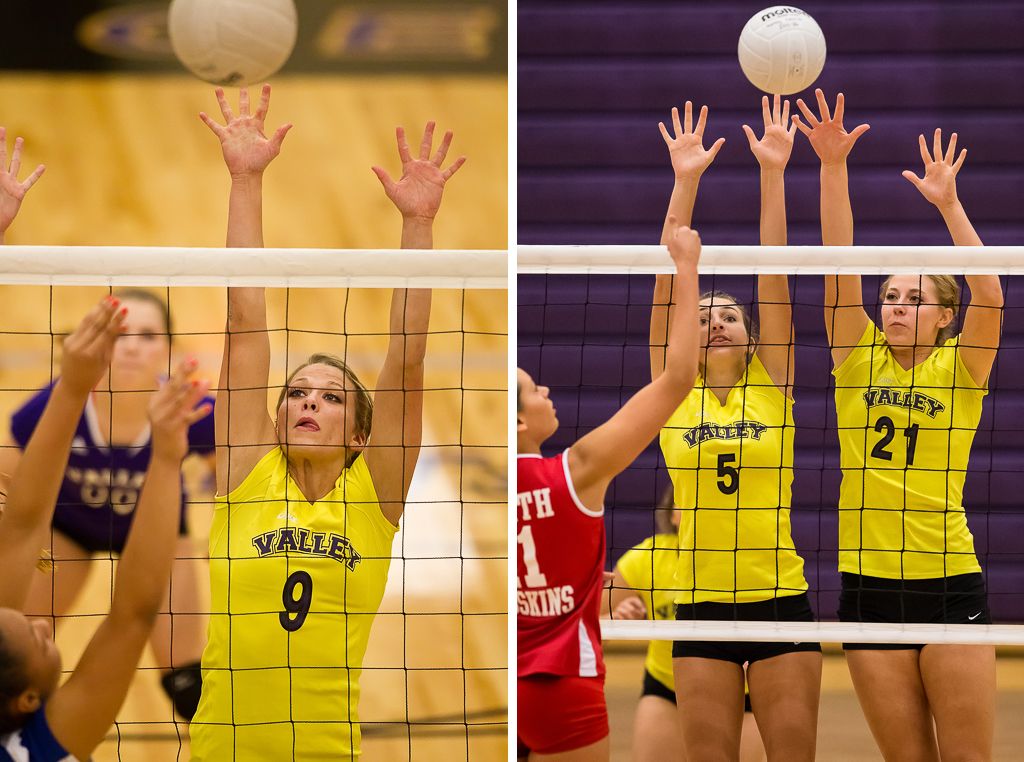
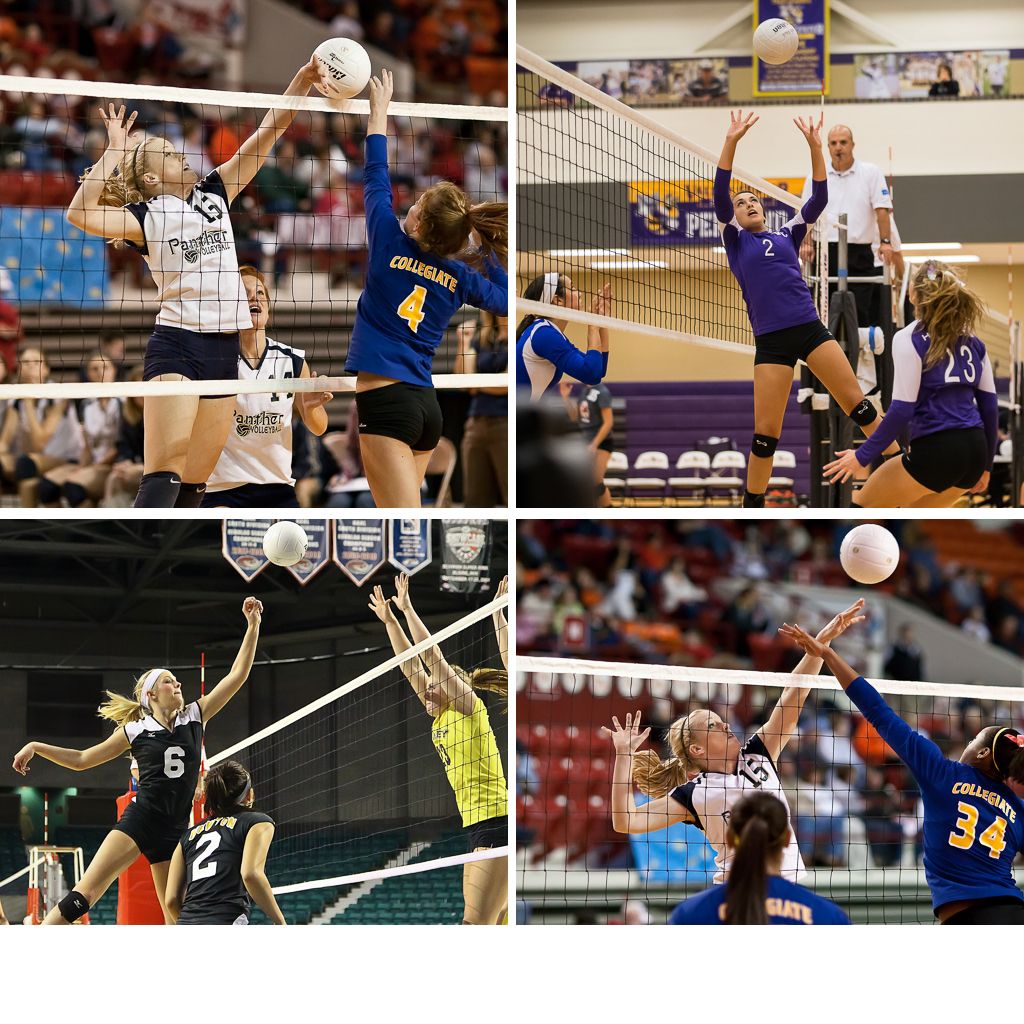
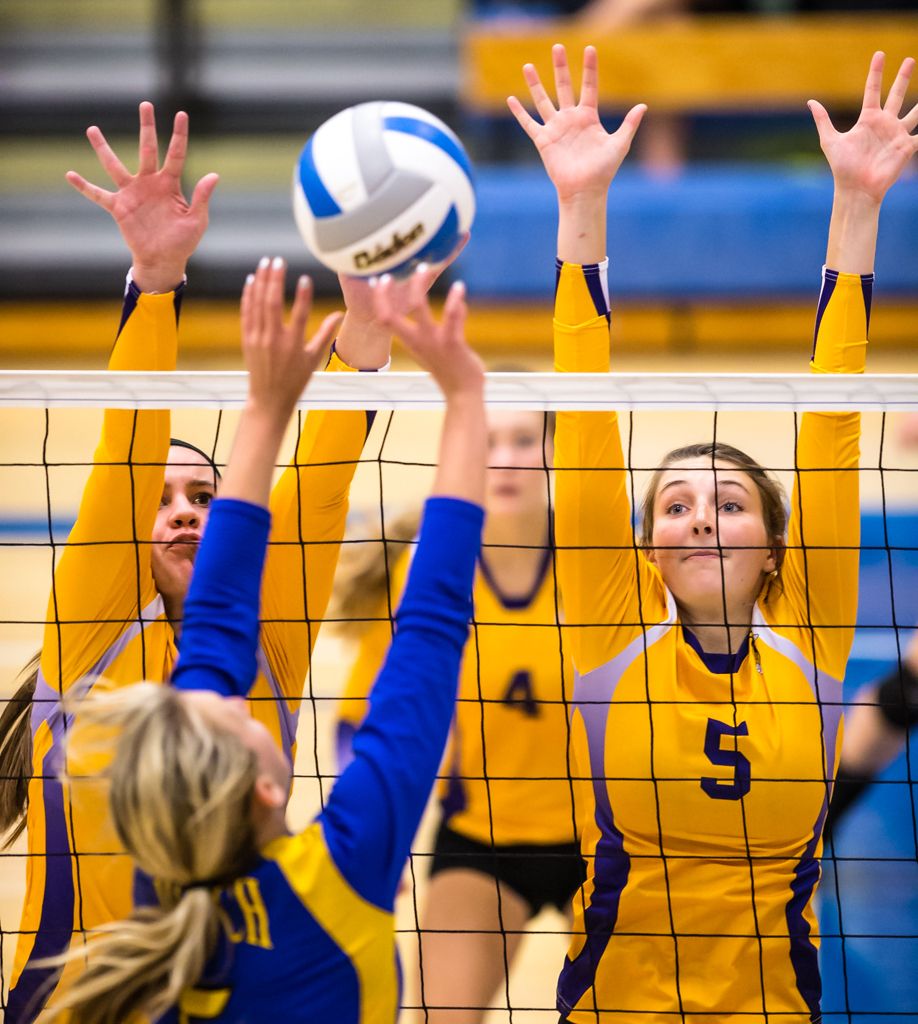
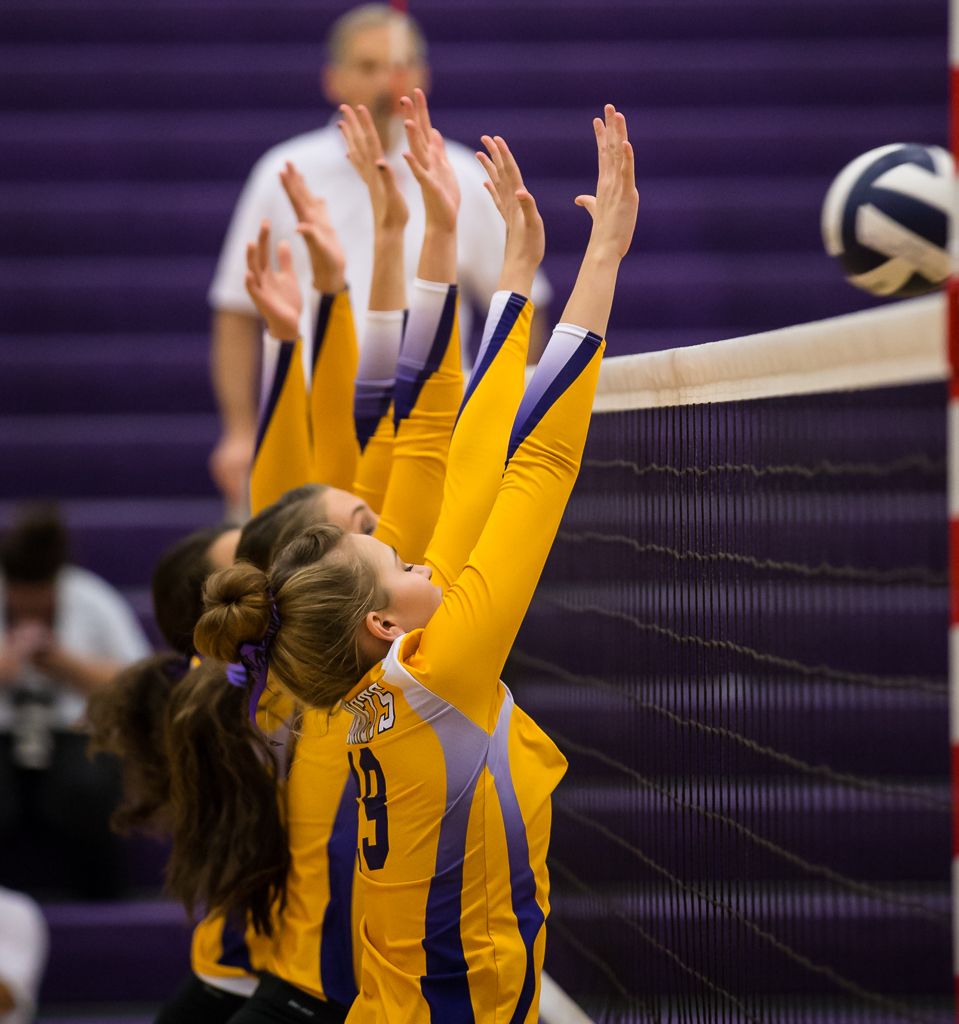
The block has challenges similar to the spike. Try focusing through the net. However, since the blockers are positioned at the net, using a low focal point to focus on the legs may work in a pinch if the auto focus locks on the netting. Use back button focus to pre-focus (use the leg trick only if necessary) and adjust as needed. Don’t forget to frame the shot with space at the top. Blockers often come in pairs and rarely, a trio. Middles are often key blockers. They are usually tall and part of the strategy is to have the middle join an outside to block a spike. A good offense will try to deceive the middle into being out of position. Their goal is to have the spiker hitting against a single blocker rather than a pair of defenders. The tempo and direction of the set is part of that deception.
L-- 1D Mark IV, f/2.8, 400mm, 1/1250, ISO 6400
R-- 1D X, f/3.5, 300mm, 1/1250, 12,800
Jube
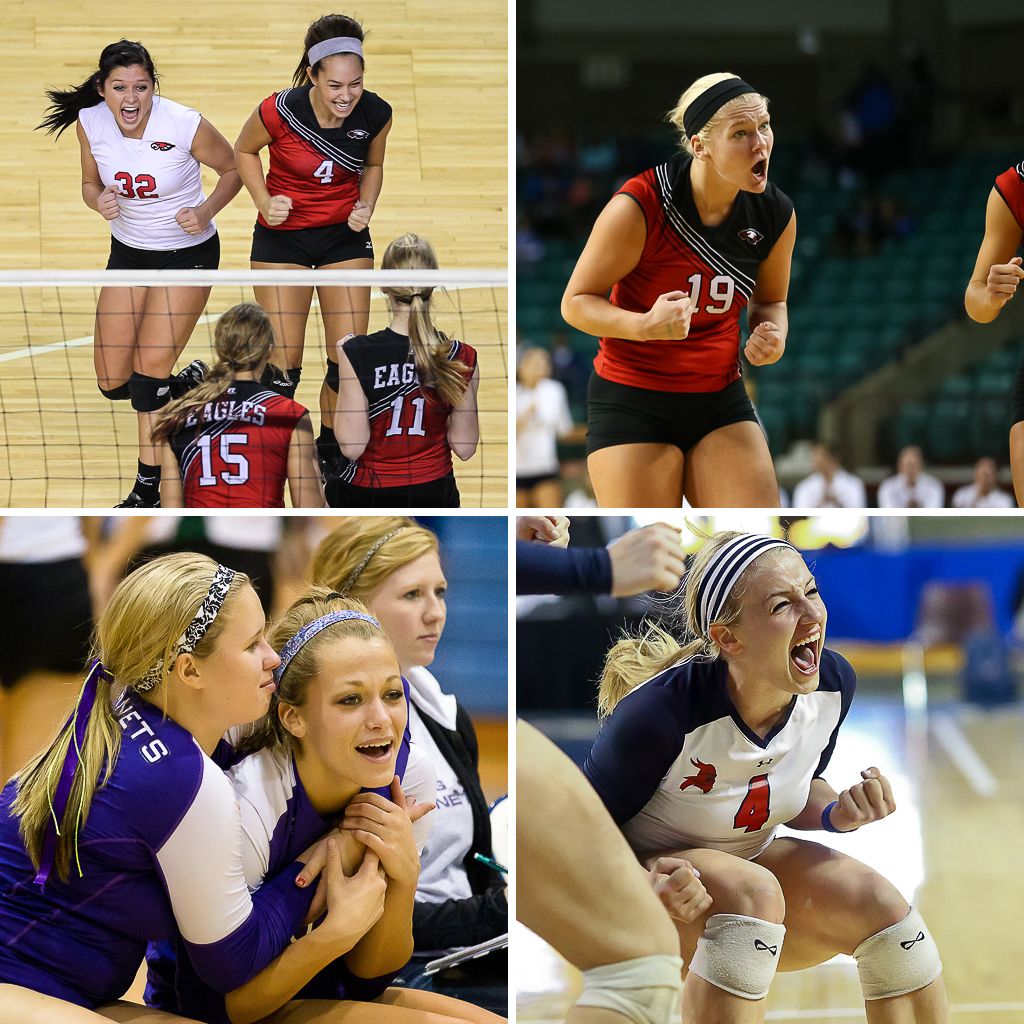
Volleyball has jube (jubilation or celebration) that is as good or better than any high school sport. Capturing that jube isn’t hard, it just requires the photographer seek it out. Every team will have one or more players who are exceptionally expressive. Take note of who they are during the games. When it gets to the final 2-4 points in a close game, I will stop shooting action and begin focusing almost exclusively on emotional jube shots. The proper time to switch will be marked by a soaring intensity that is unmistakable. Sometimes the celebrations will be directed at teammates and other times toward the coach/bench. Try positioning yourself behind the bench (emotion is often expressed in that direction), track the most animated player(s) and get those emotional peaks and valleys recorded. Get close and fire away in short bursts. After that last point, move around. Include the coaches if possible. Group and individual shots both work. Make the viewer of your images feel the joy and excitement. These shots are a must have.
UL-- 1D Mark IV, f/2.8, 400mm, 1/1000, ISO 1600
UR-- 1D X, f/2.8, 140mm, 1/1000, ISO 3200
LL-- 1D Mark IV, f/2.8, 200mm, 1/1000, ISO 6400
LR-- 1D Mark IV, f/2.8, 135mm, 1/1000, ISO 6400
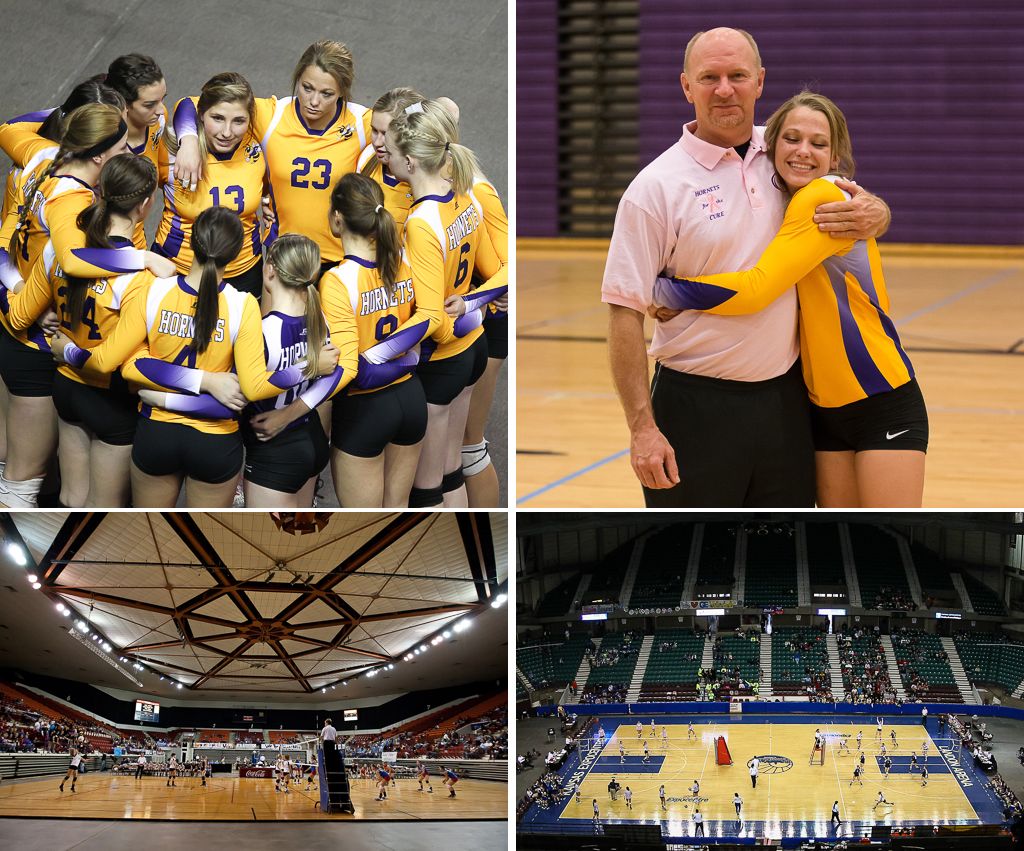
The Event
There is a photo story behind and around every match. The venue, cheerleaders, fans, timeouts, faces in the crowd, anything associated with the contest can be a source for an image. Supply the viewer with an experience of the event.
UL-- 1D Mark IV, f/2.8, 400mm, 1/640, ISO 2000
UR-- 1D X, f/2.8, 70mm, 1/1000, ISO 6400
LR-- 1D Mark IV, f/4.0, 15mm, 1/800, ISO 3200
LL-- 1D Mark III, f/2.8, 16mm, 1/800. ISO 3200
Nitty Gritty
The tutorial so far has covered great ways to get the typical shots in volleyball.
BUT... ... . Something’s missing.
What’s missing is the heart, the soul, the hand to hand combat aspect of the game. There is something powerful, vibrant and dynamic about images where you get physically close to the action and capture net play when two or more players are battling at or above the net. Get low to the floor, be as close as permitted, use medium focal lengths and shoot when the peak action is in close quarters at the net. Focus can be tough, faces difficult to see, other players can block your view, access can be hard or impossible to get, plus there is no guarantee you’ll get a great shot anyway. Nonetheless, it is worth the try--especially on teams that have active, talented, middle hitters. The action will be fast and a responsive camera body and lens really help. Don’t try to shoot the outside hitter on the far side of the court. Too far away. Find closer action. If you are sitting on the side next to the strong side outside hitter, try a wide angle view of her spike when the opponents are doing a double block. You won’t see the face of the spiker but she will seem to be 10 feet in the air and the blockers will be prominent in the image. It’s fun to try this shot.
You can tell I love the nitty gritty part of the game. Just know that it can be frustrating to capture. Start with the conventional shots. Add these for spice.
UL, LR-- 1D Mark III, f/2.2, 135mm, 1/1000, ISO 3200
UR-- 1D X, f/2.8, 102mm, 1/800, iSO 6400
LL-- 1D Mark IV, f/4.5, 65mm, 1/1000, ISO 12,800
Lighting, Gear, Camera Settings, and Venues
Light has a huge role in determining which camera bodies and lenses can be used as well as affecting the final image quality. There is rarely any excess quantity of light and that drives the exposure settings. Use f/2.8 lenses (or faster) if at all possible. An f/4.0 lens will have half as much light to focus, require either a slower SS or higher ISO, and have a wider depth of field (dof). A 70-200mm f/2.8 lens is a great place to start for volleyball and much of sports photography in general. Since I use a variety of focal lengths, my lenses for volleyball are now all f/2.8. Shooters on a tight budget may want to try the 85mm f/1.8, the wonderful 135mm f/2.0 or other fast primes they already own. Ultra large apertures bring in more light but at the expense of a very shallow depth of field. My images are made exclusively with Canon gear but Nikon makes excellent products as well. Don’t change brands to chase the latest offering from a manufacturer. Trading lenses to match the body is far too large a hassle. I prefer a SS of 1/1000 and that speed will allow you to read the ball. Slightly slower is OK, especially for non-telephoto focal lengths. Use a SS of at least 1/640 unless you choose slower speeds for artistic reasons or because low light and high ISO noise force it. Camera bodies that have good image quality at ISO 6400 are wonderful and increasingly available for modest budgets. ISO 3200 at f/2.8 will work if the lighting is above average. Take a few test shots to determine your exposure settings and then enter those in Manual mode. I use the histogram and chimp on the lcd to evaluate the exposure. Expose to the right but don’t burn out the highlights. If you don’t use the histogram or don’t know how to use it, learn and use it now. That knowledge will help in all of your photography, not just volleyball, to properly expose and post process your images.
Mandates for energy efficiency have been a boon to lighting advances. Light is getting brighter with improved color rendering at many facilities in the US. Notice the photos on the right side of the jube shots above. They were shot at the same venue (a large arena), at almost exactly the same spot but a year apart. The LR image was taken in 2011 and the UR 2012. Improved lighting not only added a full stop of light but the improvement in skin tones (and other colors) is unmistakable. It was obvious to me just walking in the door that something had changed for the better. The skin tones in the earlier year appeared jaundiced even to the naked eye. The next year was great. Too many sports photographers consider only the quantity of light but not the quality of the light spectrum. We all know that golden hour light produces superior image quality when shooting outdoors but fail to consider that indoor light quality can vary as well.
These improvements are happening in high schools both old and new. Many of my older 1D Mark III images here were taken using 4 Alien Bee B800 strobes bounced off the ceiling. With the combination of improved lighting and camera sensor technology, I haven’t shot VB with strobes since 2010. Hurray! Some leagues never allowed flash anyway. That strobing experience has been helpful to me because timing the one exposure is crucial with strobes. Skillful timing helps even if you shoot in a 2 or 3 frame burst. Prior to the season, I’ll attend a practice or two and shoot single shots just to work on my timing. A Canon 70D will have a shutter lag of 65 milliseconds compared to a 1D X at only 36 milliseconds. That lag, along with your reaction time, must be accounted for in your technique. The adjustment will come quickly but if you don’t practice, you might find the exposures in your first match are just a tad too late.
All my shooting is done in RAW. I know some of you shoot for a newspaper on a deadline and need jpeg and if so, fine. If you have a choice, shoot RAW. Light cycling, noise, lighting spectra and changes in light because of brightly illuminated electronic billboards can all demand correction is post and RAW will do that best.
When you are focusing through the net, be sure to experiment with the number of auxiliary focus points, sensitivity, and switching speed for your auto focus. Since you are likely to be using large apertures, the shallow dof will reveal when the focus is on the net rather than the player. The brightness of the background and uniforms compared to the black netting can also affect which setting will track players best. Be sure the camera dioptric adjustment is set for your eyes so you can tell, in the viewfinder, when the focus strays. Being able to discern when focus leaves a player and locks on the net isn’t easy but it is hugely helpful in boosting your ‘keeper’ rate.
At a new venue, take a minute to assess where you can stand/sit/kneel, the backgrounds available, and what types of shots you can get. Most likely, you can’t get them all. Optimize the backgrounds for color, cleanliness, and setting. Nobody captures every type of shot at a single match. Capture what you can. Make a plan. Since it is unlikely that you will have access to both sides of the court, the setter will face your side for one game and have her back to you during the other game when the teams switch sides. The same issue (reversed) will apply to the serve shots. Decide when/how you want to capture those shots and front line action vs back row and remember to get some jube if the games are tight. Study your results, learn from them, modify your plan for next time, and keep shooting.
Don’t forget to have fun! You are there to capture young people totally alive and fully engaged during an event conducted for sport. Let their joy and enthusiasm infuse you and your images.
Phil Zivnuska
Samples: Find the types of images you like and replicate them in your gym with your team.
http://photography-on-the.net/forum/showthread.php?t=1224971
http://photography-on-the.net/forum/showthread.php?t=1232710
http://photography-on-the.net/forum/showthread.php?t=1226359
http://photography-on-the.net/forum/showthread.php?t=1221560
http://photography-on-the.net/forum/showthread.php?t=938979
http://photography-on-the.net/forum/showthread.php?t=775247
copyright 2013 Philip S. Zivnuska
zivnuska.zenfolio.com
Bonus Tip
Shooting through the net is always a challenge. Here's a tip to help. When you shoot through a net, the net is typically black. Camera focusing systems like to grab onto the contrast between the black net and a bright uniform and shift the focus to that net. Consider the following two photos:
1/1000 sec. f/2.8 400mm ISO 6400
1/1000 sec. f/2.8 300mm ISO 6400
Notice that the net is nearly invisible against the dark blue or the black uniform. At the same time, the netting is clearly visible against the light colored floor. Use that fact as part of your focusing strategy. When there are dark uniforms, place your focus point in the middle of the uniform where there is no contrast with the net and the net is essentially invisible for the camera. The only contrast available is from the bright number of the player and that's good.
Life gets more difficult with light uniforms.
1/1000 sec. f/2.8 300mm ISO 6400
In this case, I will focus on the black shorts, black knee pads or even black shoes just to avoid having the focus jump to the net. This won't work every time (At least not for me!) but it helps improve the odds when focusing is just plain tough.
A few more things. Try using few, if any, auxiliary focus points. I use four. The more aux focus points the more likely the camera will find something other than the player to focus upon. On a blocking shot, like the above, if the blockers are standing in position, I will try to get the focus on the player(s) (in this case I used the black shorts as my target) and then release the back button (thereby holding the focus) as I raise my framing to get the tops of the hands for the block and fire the shutter button.
Please don't think these ideas are fool proof. This photographer has plenty of out of focus shots to prove I've been fooled plenty of times! Volleyball photography is a challenge and it can get extremely challenging when long focal lengths and larger apertures combine to produce a tiny depth of field.
Phil Zivnuska
Once you master the rules, you are ready to break the rules.
