Reproducing this tutorial in any form, in whole or in part, without written permission of Philip S. Zivnuska is prohibited.
How to Photograph Volleyball
By Phil Zivnuska
You might think it would be easy. After all, there are only 6 players on each team and the court is not all that big. Indoor volleyball, however, is one of the more challenging sports to photograph. The action is fast, the lighting marginal, players usually face the net and that net gets in the way of focusing. The key elements are the same as in most sports photographs; focus, face (especially the eyes), action, and the ball. “Shoot Tight and Crop Tighter” applies to volleyball too. This tutorial will discuss the elements needed to capture the 7 types of indoor volleyball photographs. A solid knowledge of dslr fundamentals is required. I write as tight as I shoot, so let’s start.
Your efforts will be far more successful if you learn the game, scout the teams, and study the players. Volleyball photography doesn’t follow the ball, it constantly anticipates where the ball is going to be and sets up for the shot ahead of time. Where will the serve be aimed? Why? Who will set the ball up for a spike? What direction will she (he) be facing? Which positions (players) will be doing the spiking and how do they approach the net from their respective positions? Don’t try to capture every hit of the ball. It can’t be done. Think one or two volleys ahead. Consider where you should be positioned to get the best capture of a particular position. Frame and focus on the player who will be hitting the ball before the ball gets there. The more you know about the game, the higher your capture rate will be. The examples here will be from ladies high school volleyball. If you shoot at this level, you will see that players who are novices will be unpredictable due to a lower skill level. Better teams will have a predictable strategy and the best teams will be sophisticated in strategy and disguise their intentions in order to fool the opposition and often you too!
The Prime Directive--Remember that the game is about the student athletes on the court, not about you, not about your pictures. The hierarchy of courtesy has the student athletes, AD, coaches, officials, parents, and fans all above the photographer. Stay out of harms way, blend into the background, be respectful, and if you are told to do something by an official or administrator, do it. If you disagree, comply now and discuss it at a later date. Build cooperative relationships with those who have authority/responsibility for conducting the game. Contact the AD ahead of time and learn the local rules for access. Get permission well in advance of the event. Talk to the refs before the contest to see where you may and may not go to photograph. Don’t push the limits. Did I mention building cooperative relationships with those who have authority/responsibility for conducting the game?
Philosophy--In my view, the best galleries are those which capture a variety of action from changing perspectives using different focal lengths. In order to accomplish that, I will go high, go low, go long (long focal length lenses), go wide (wider angle lenses), go to the side and go to the ends of the court. Here is a gallery of 8 shots using 8 different lenses at 8 different focal lengths from an assortment of elevations:
http://photography-on-the.net/forum/showthread.php?t=1091324
For the lowest perspective, the camera was resting on the floor. To gain a high perspective, I will haul a 400mm f/2.8L to the top of the rafters (as in the LR Event illustration) if it results in a better image. Obviously, the gear available, the venue, and the access permitted will affect what is possible. The complete photographer will be able to adjust to a variety of circumstances and still get the job done.
We will talk about the gear, the light, camera settings and the venue later. Let’s look at and analyze the 7 types of volleyball images now.
Serve, Pass, Set, Spike, Block, Jube, and Event Images
The Serve
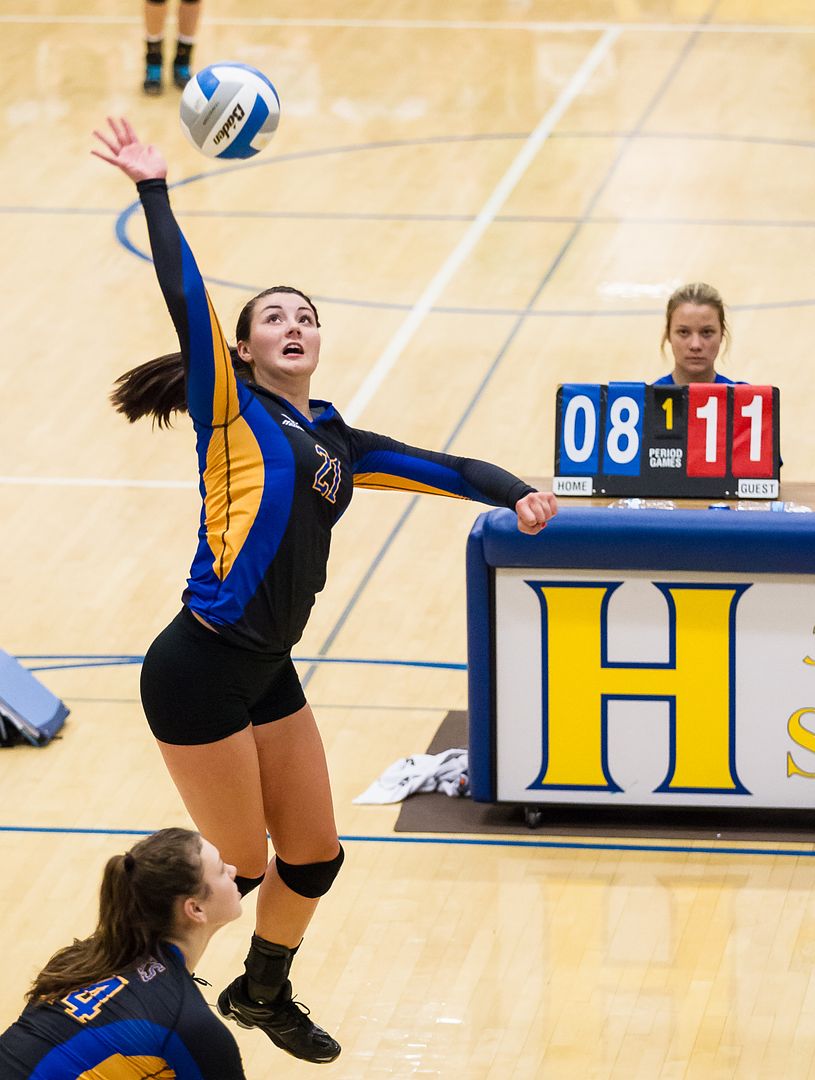
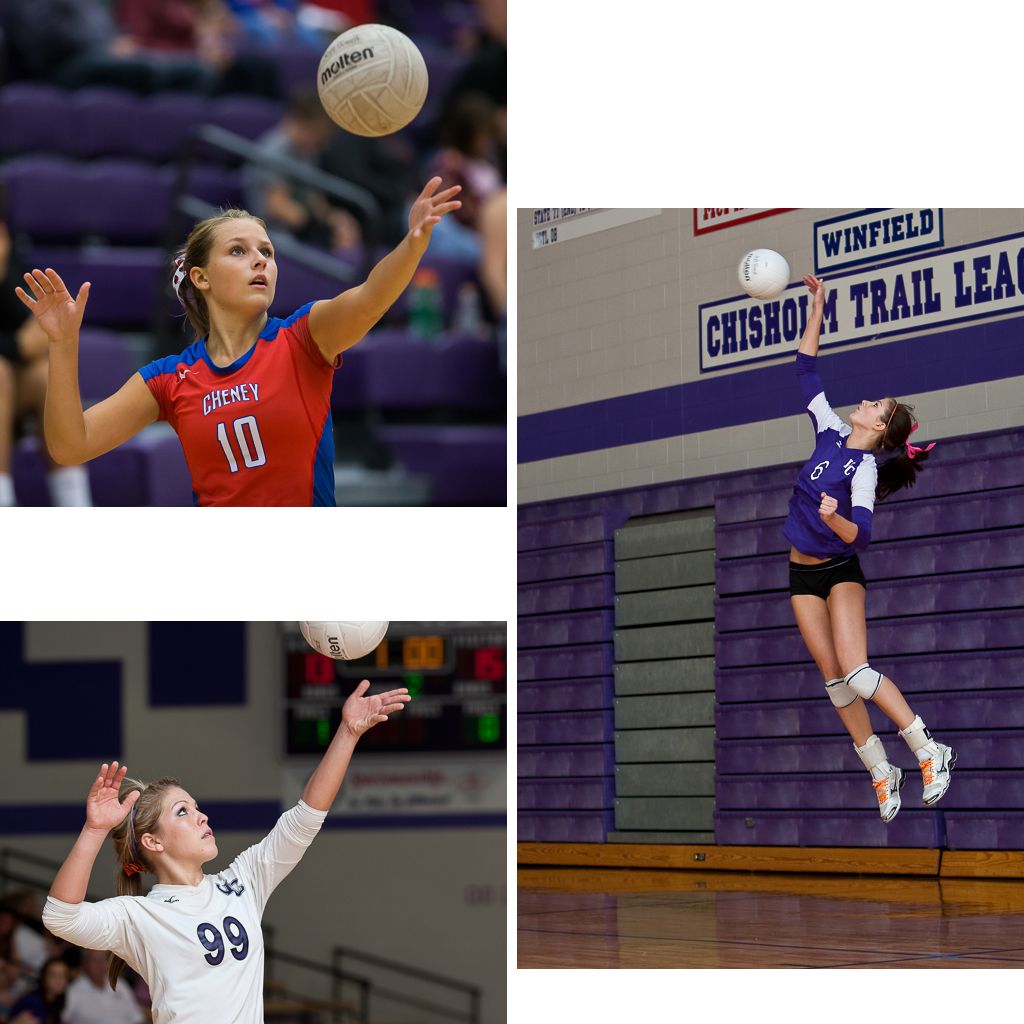
The first image to consider is the serve. This shot is usually easy to focus, repeatable and readily available for capture. Sports photographers often attempt to photograph the moment of impact with the ball and they end up with a shot where the hitting arm blocks the view of the face. Consider the images on the left side of the illustration below. This moment is easy to capture and is often very flattering to the player as the arms provide a beautiful frame for the face. Shoot tight. Let the parents know about your photo. Sell them a print.
Since this position is predictable and repeated several times, it allows the photographer to vary his background. On the upper left, the fans and bleachers provide the setting. The lower left shot uses the scoreboard. Look for a pleasing backdrop and change your position to get a good view of the player and have the crowd, scoreboard or perhaps the flag complete the scene.
The movement is slower at this moment, so a one stop slower shutter speed and lower ISO can be used, if needed, to gain image quality. Taking a moment to think through the settings and background will help give you a winning image.
On a jump serve like on the right, getting low will emphasize the athleticism involved. Shooting from a balcony high on the opposite end of the court with a long telephoto will allow you to look straight at the player and give you a better chance to get a good view of the face. The venue, access and/or lenses available may determine which approach you choose to take.
UL-- 1D X, f/3.2, 300mm, 1/800 sec, ISO 6400
LL-- 1D Mark III, f/4.0, 135mm, 1/250 sec, ISO 400, Strobed with 4 Alien Bee B800s
R -- 1D Mark III, f/3.2, 70mm, 1/320 sec, ISO 400, Strobed with 4 Alien Bee B800s
The Pass (Bump, Bump Pass, Overhand pass)
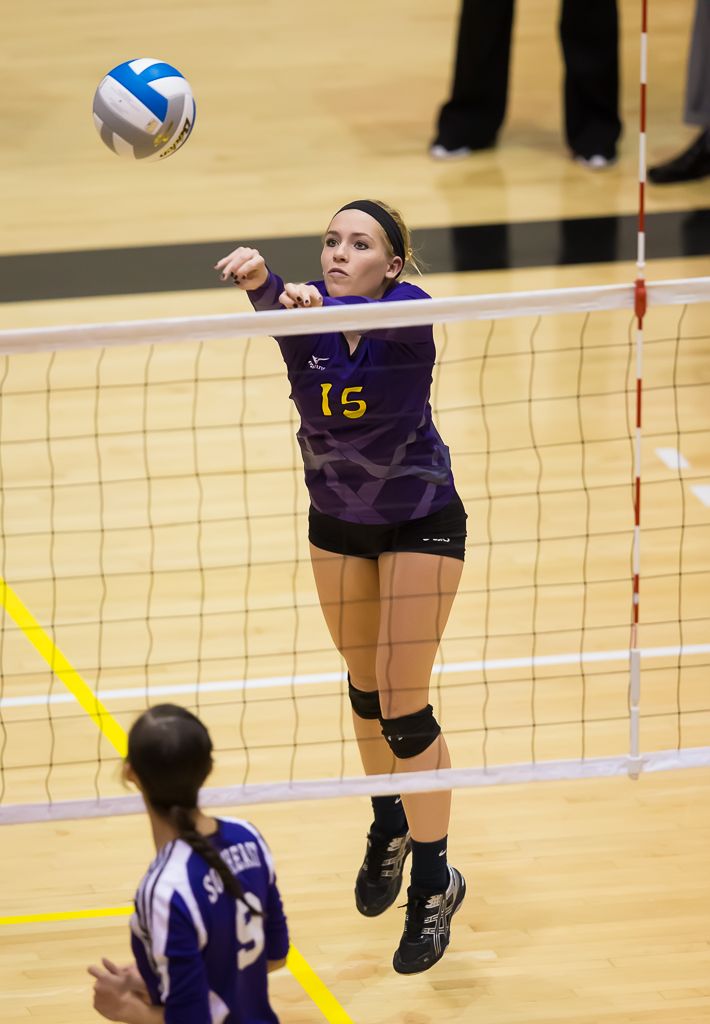
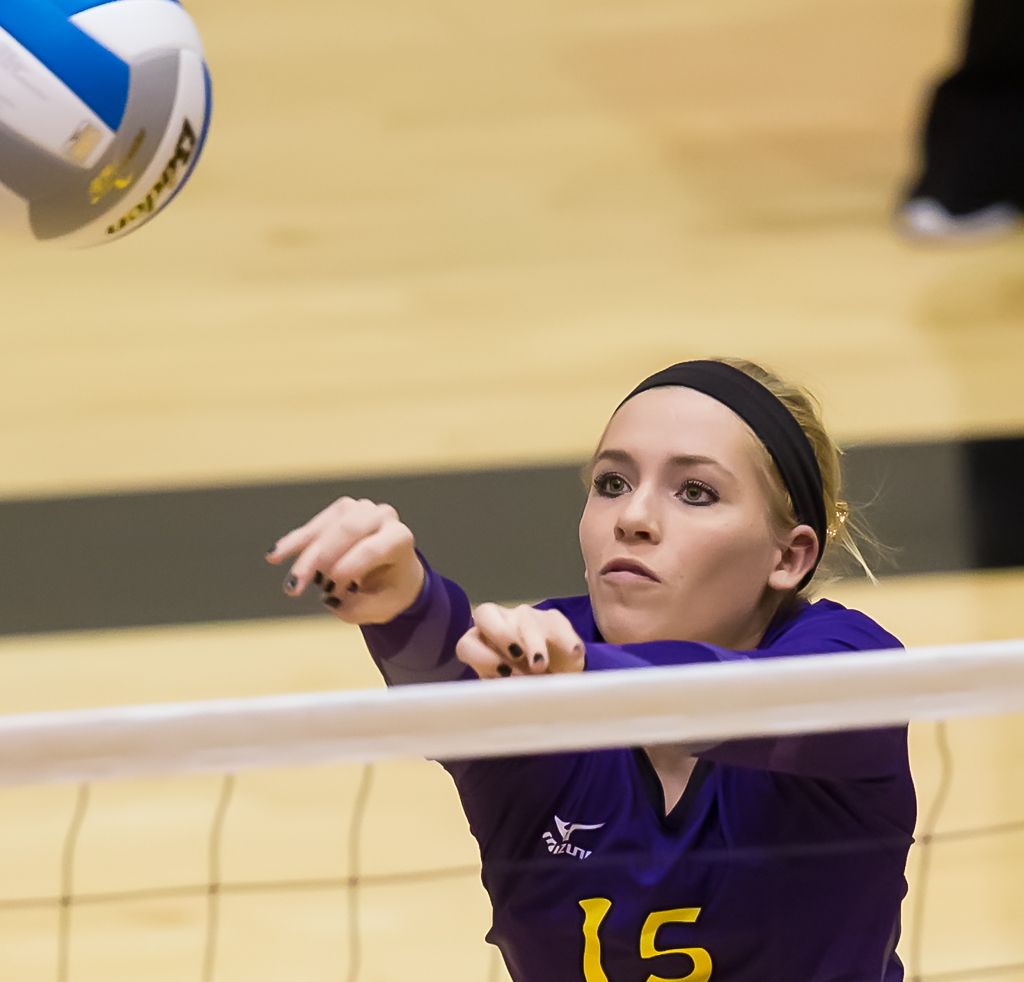
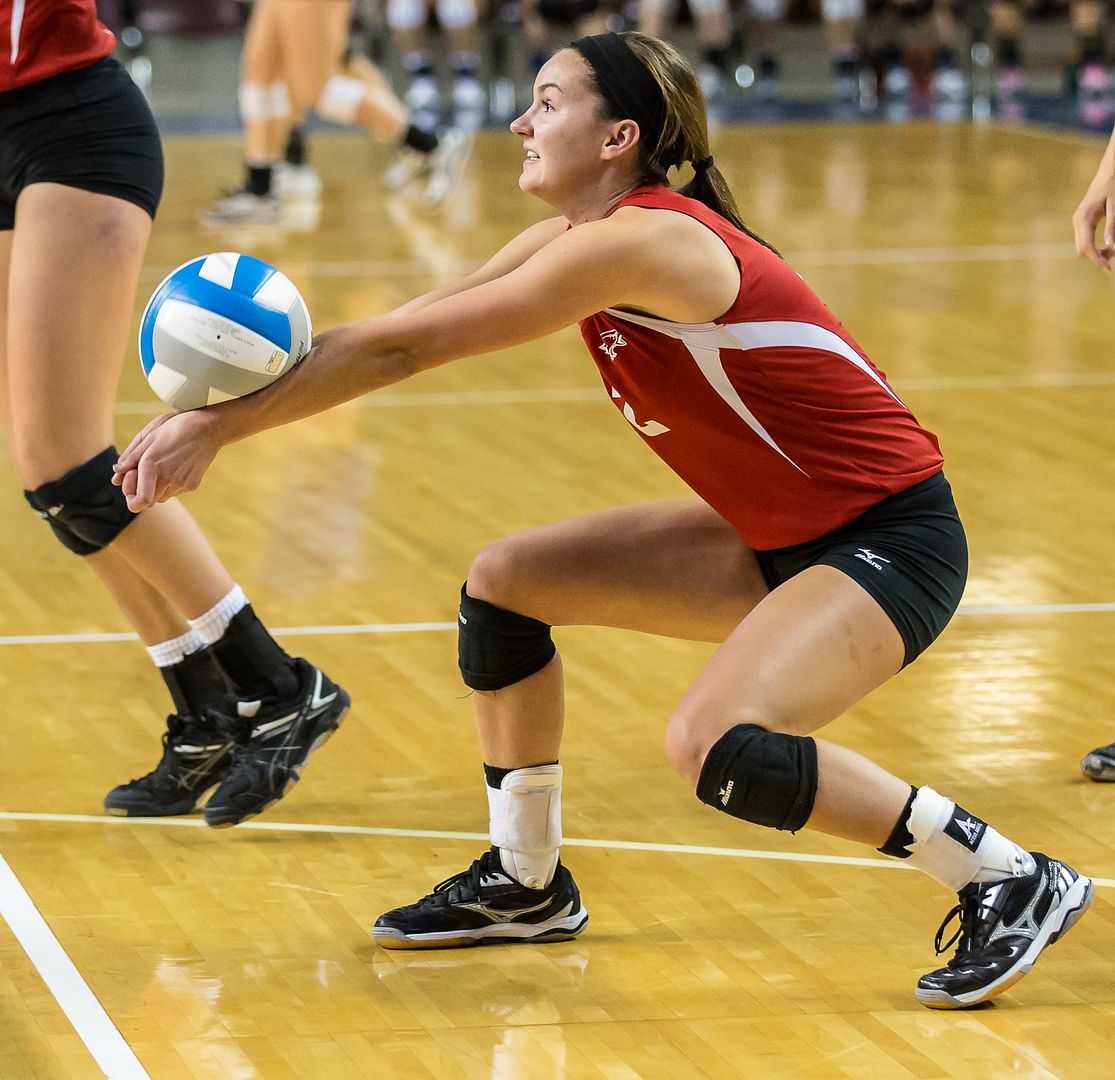
These can be dramatic shots that are often easy to focus and capture. Choose a back row player whose face you can see clearly and who you determine is likely to return the serve (or spike). Good teams will pick an opposing player they want to force to return their serves and they will hit the ball to that person. Lesser teams are happy just to serve the ball inbounds. A weak player may be unable to make the return at all. Even if they can make a play on the ball, a poor pass may compromise the resulting set and therefore impair the opportunity for a successful attack. Here’s where knowledge of the teams can improve your chance of success as a photographer. A good coach will scout the opposition to gain an edge. So can you!
Note: a ‘Bump’ is an underhand pass.
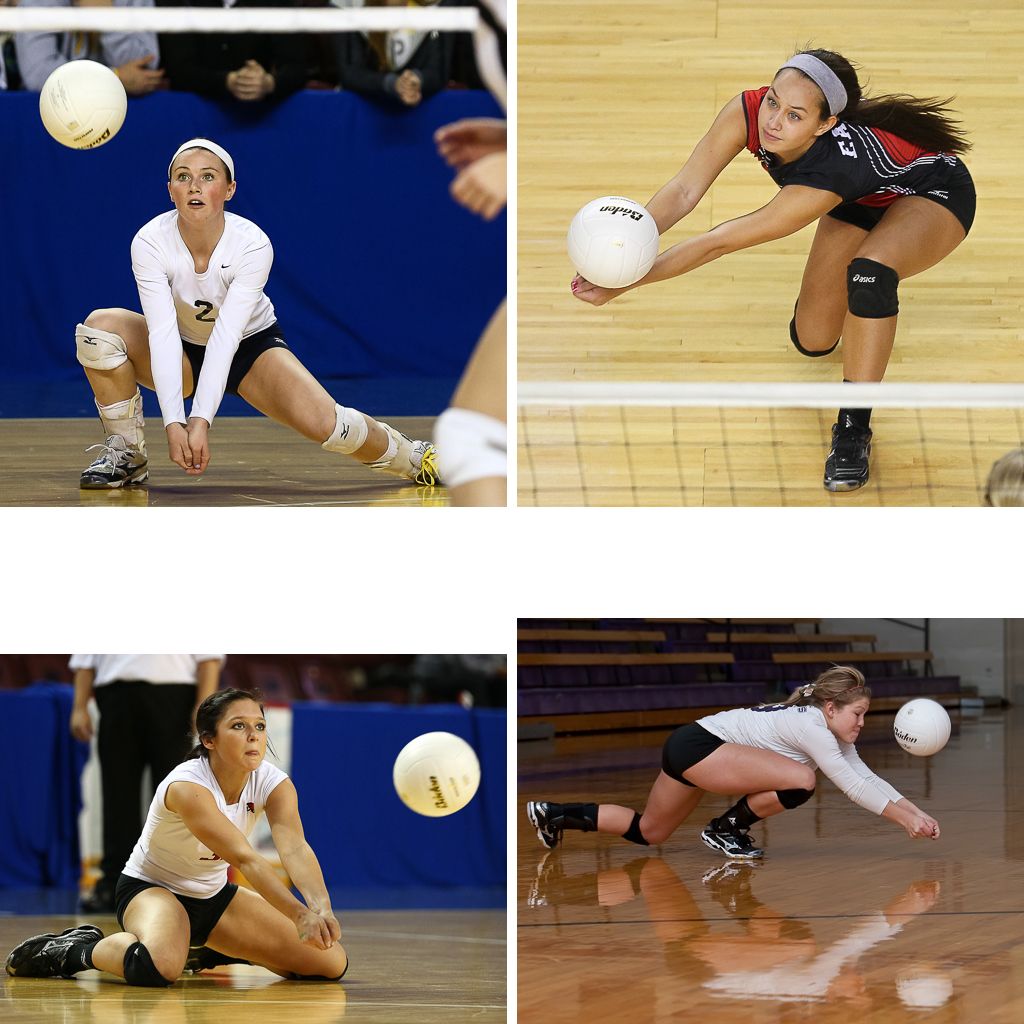
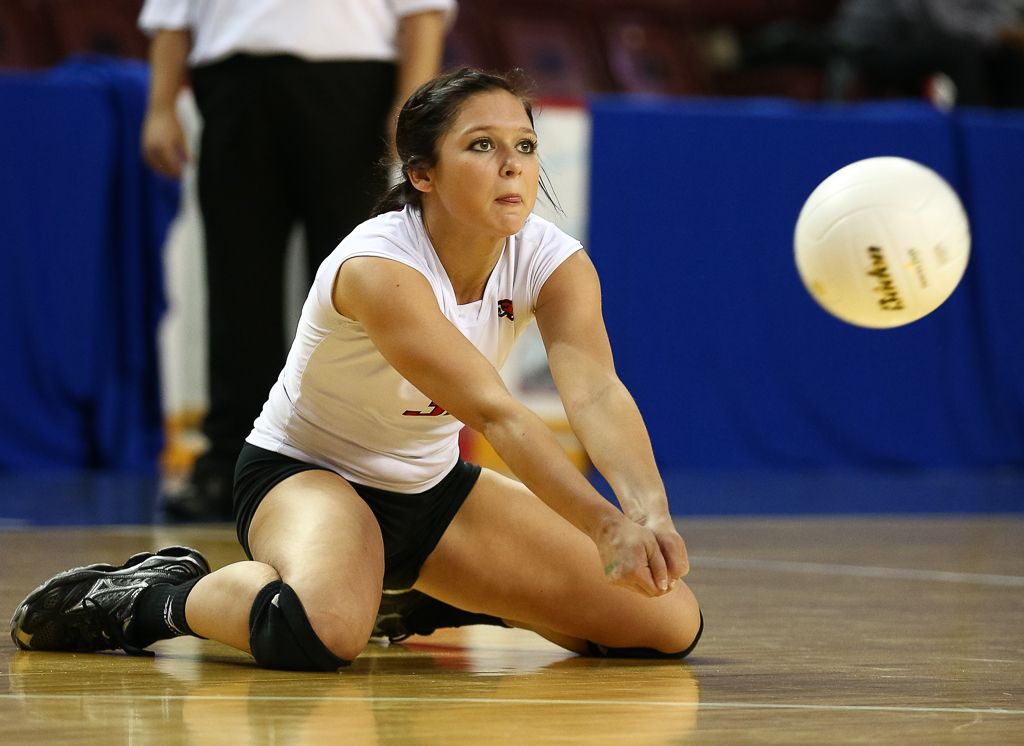
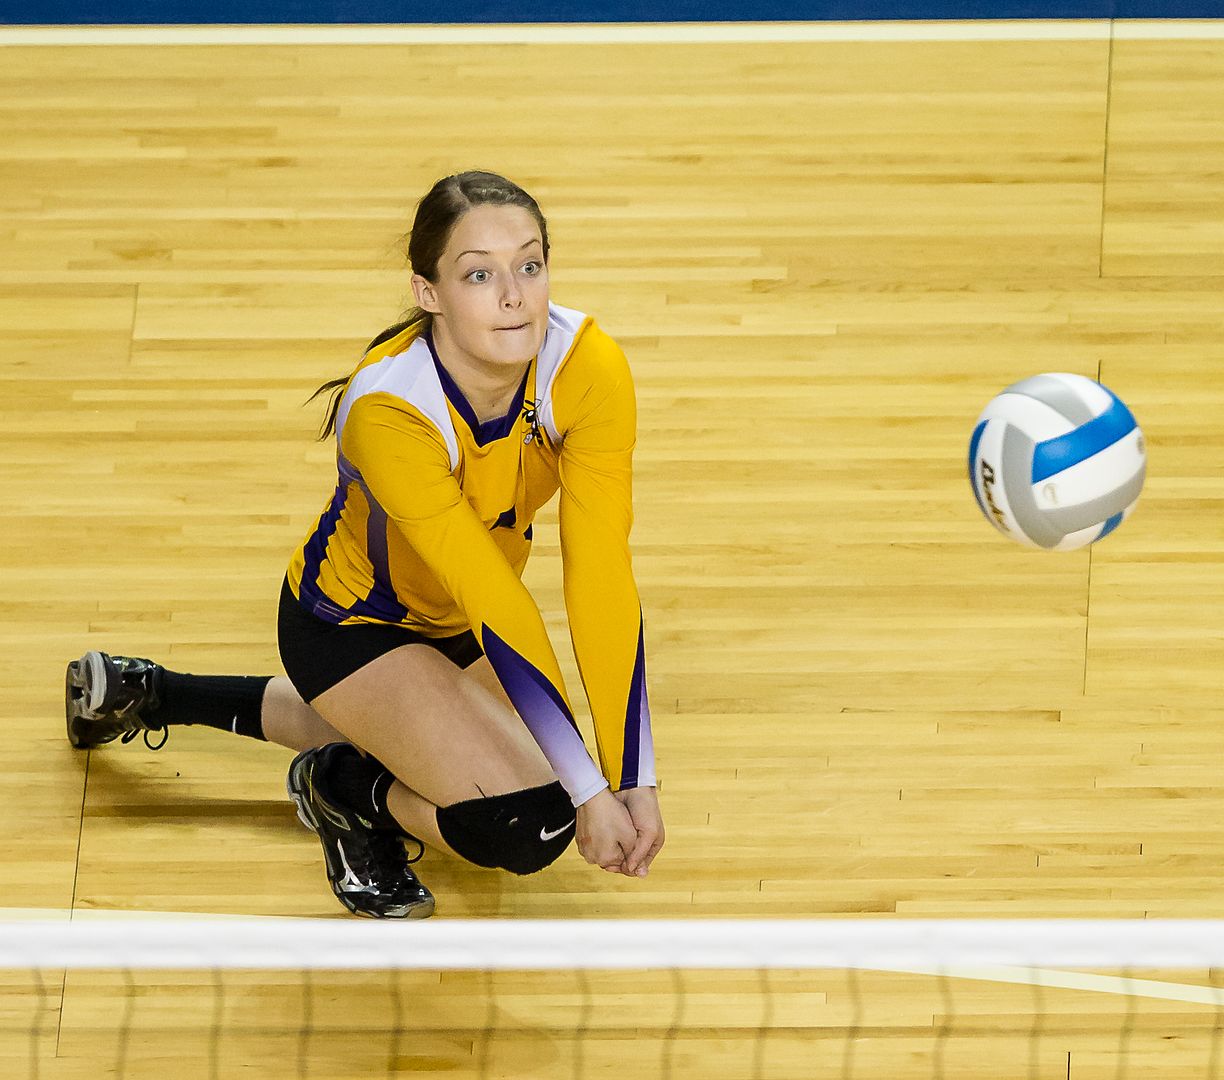
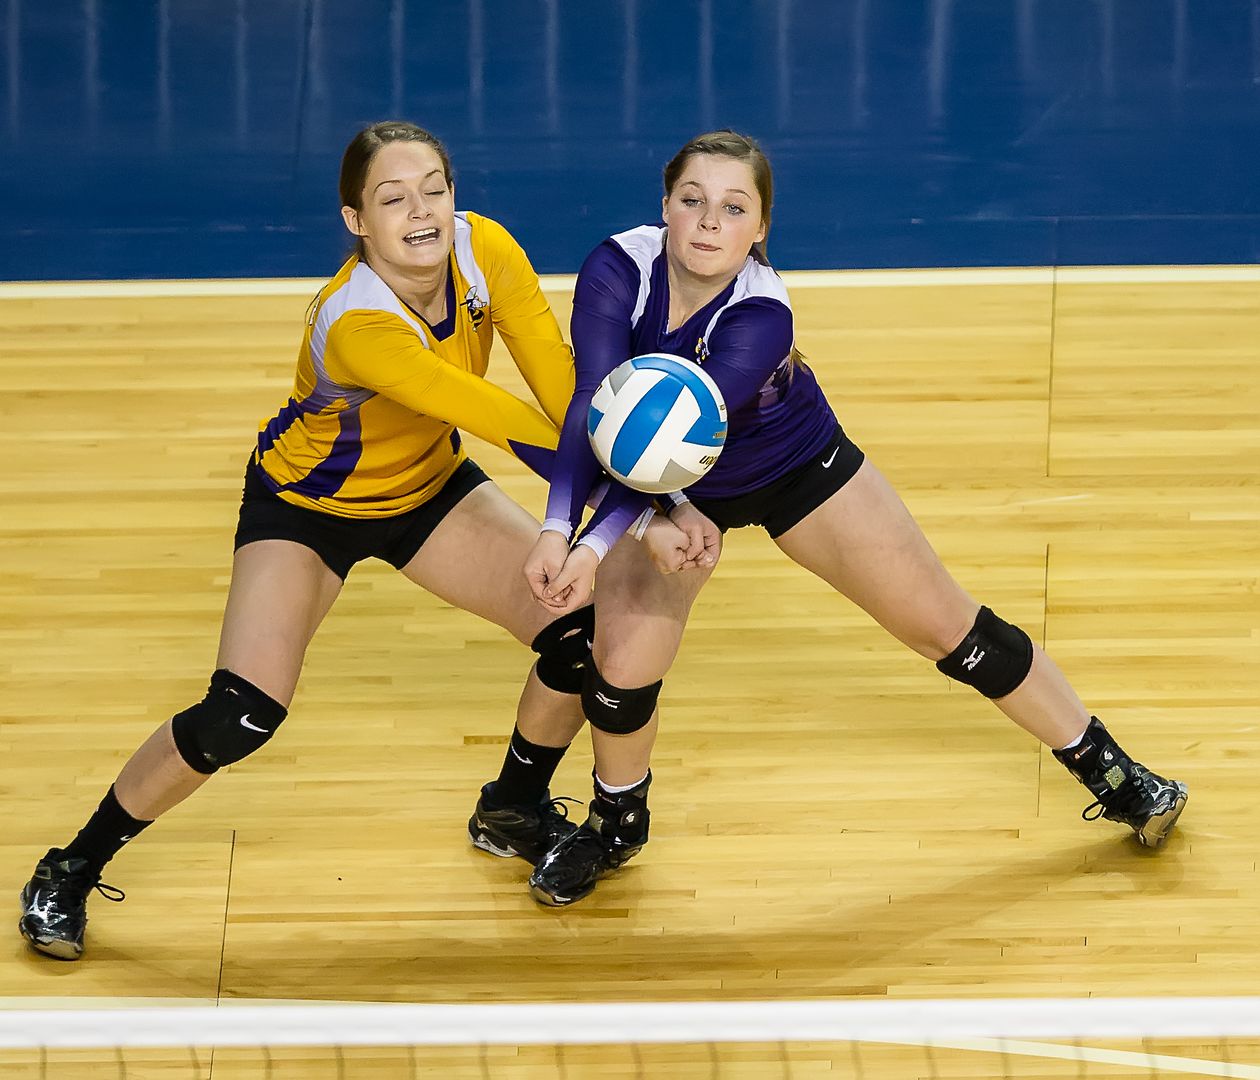
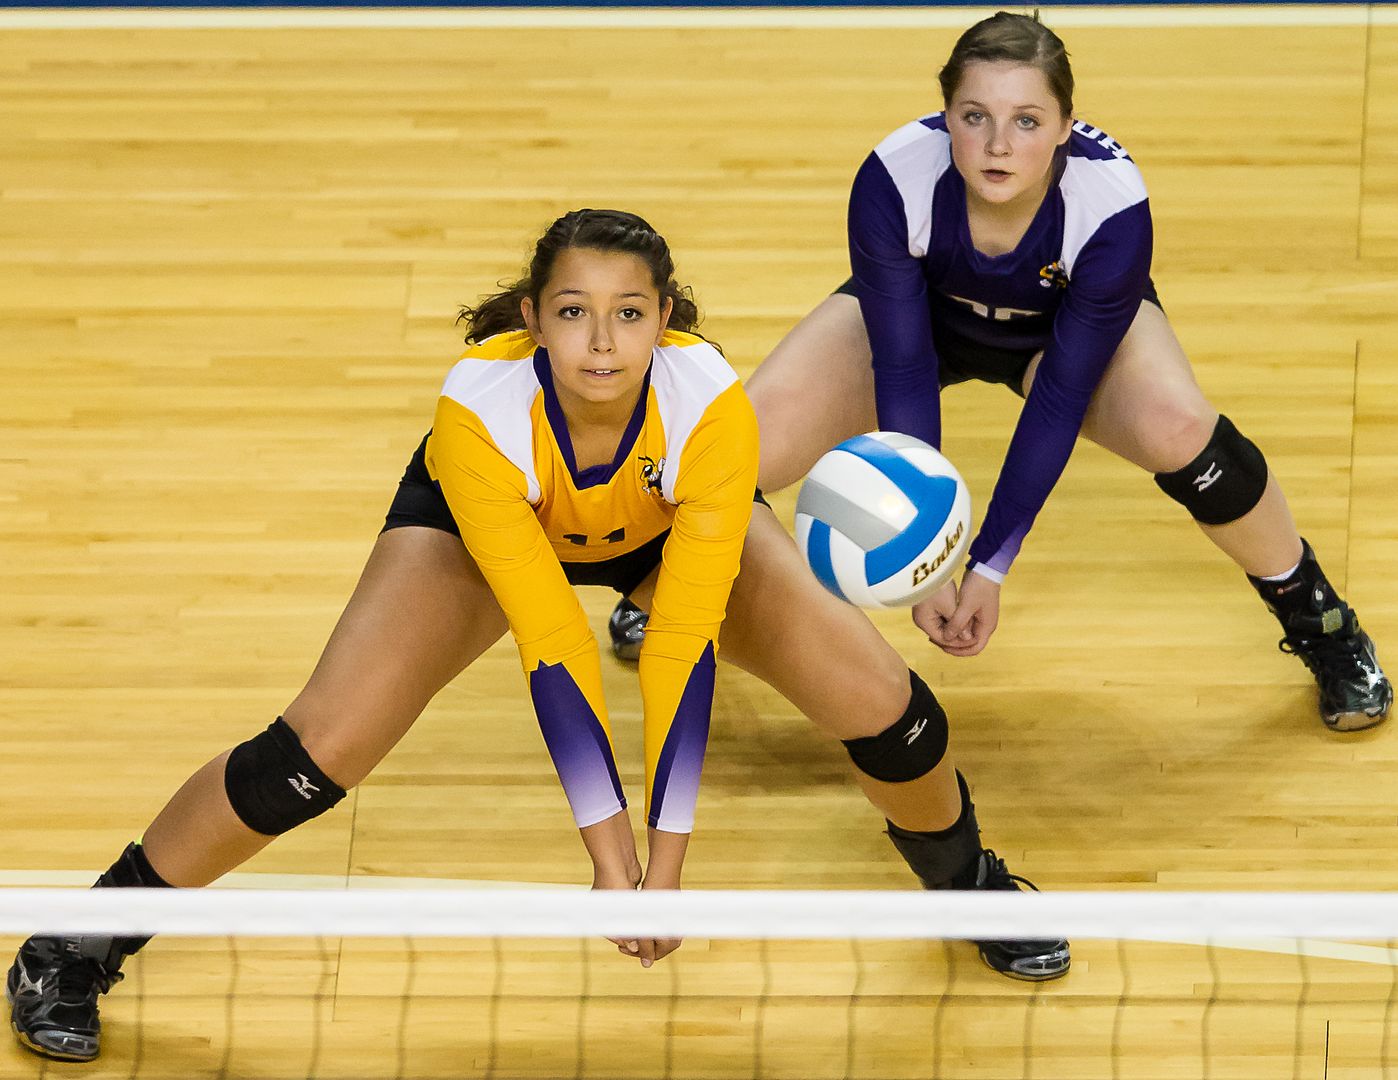
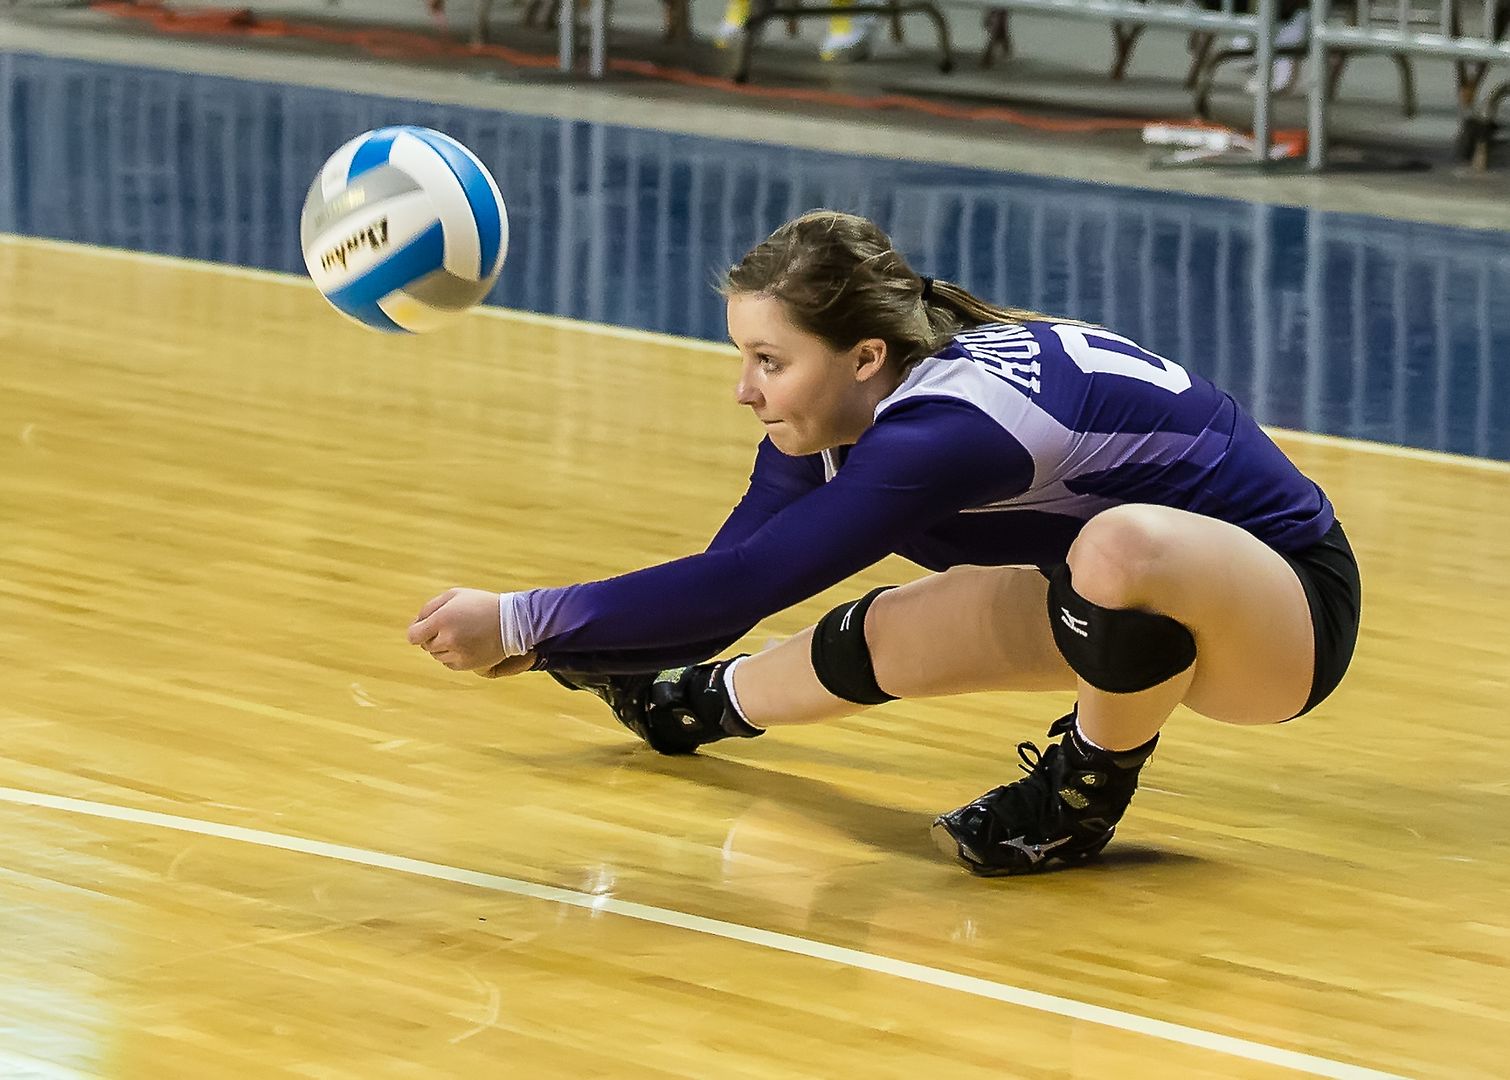
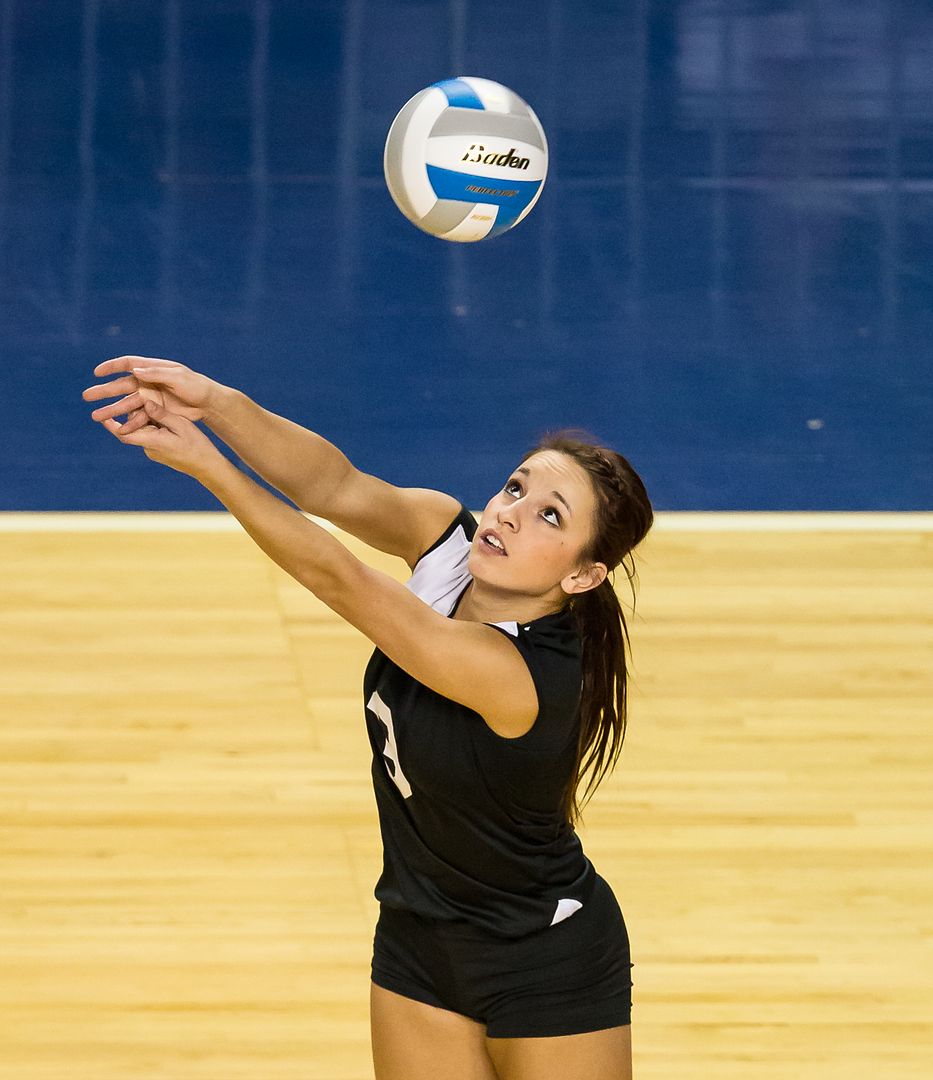
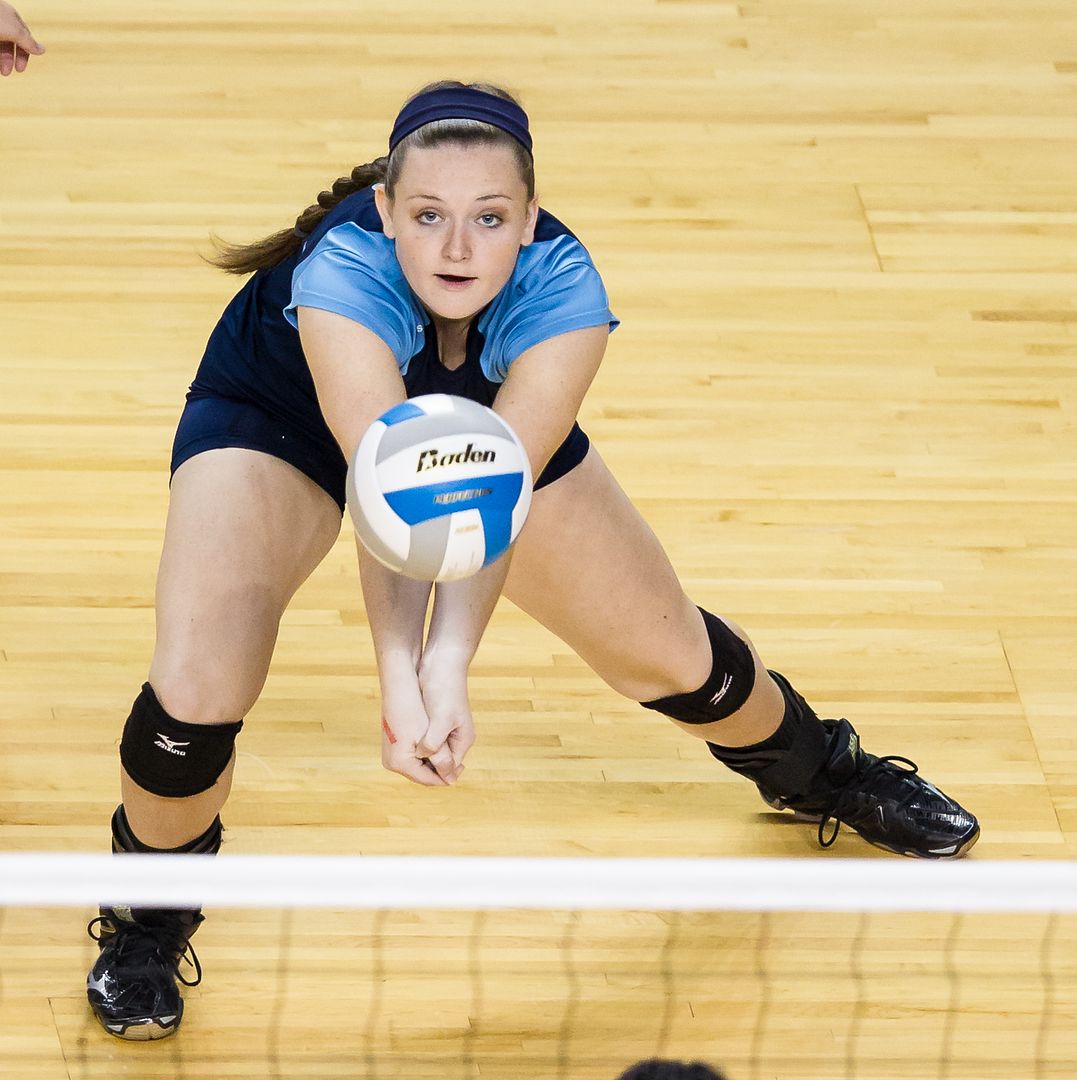
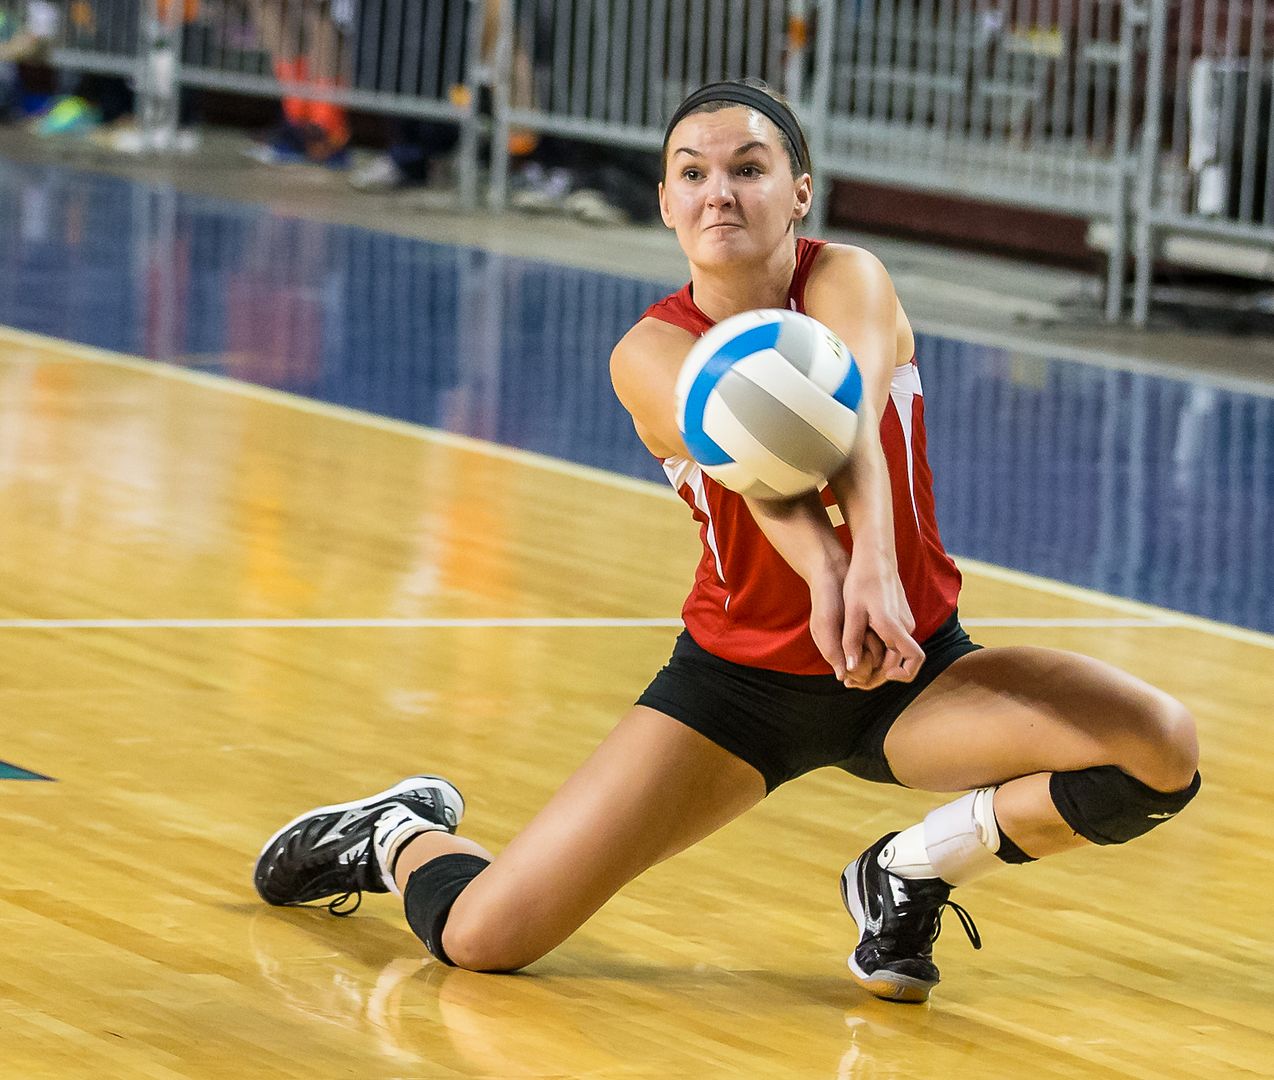
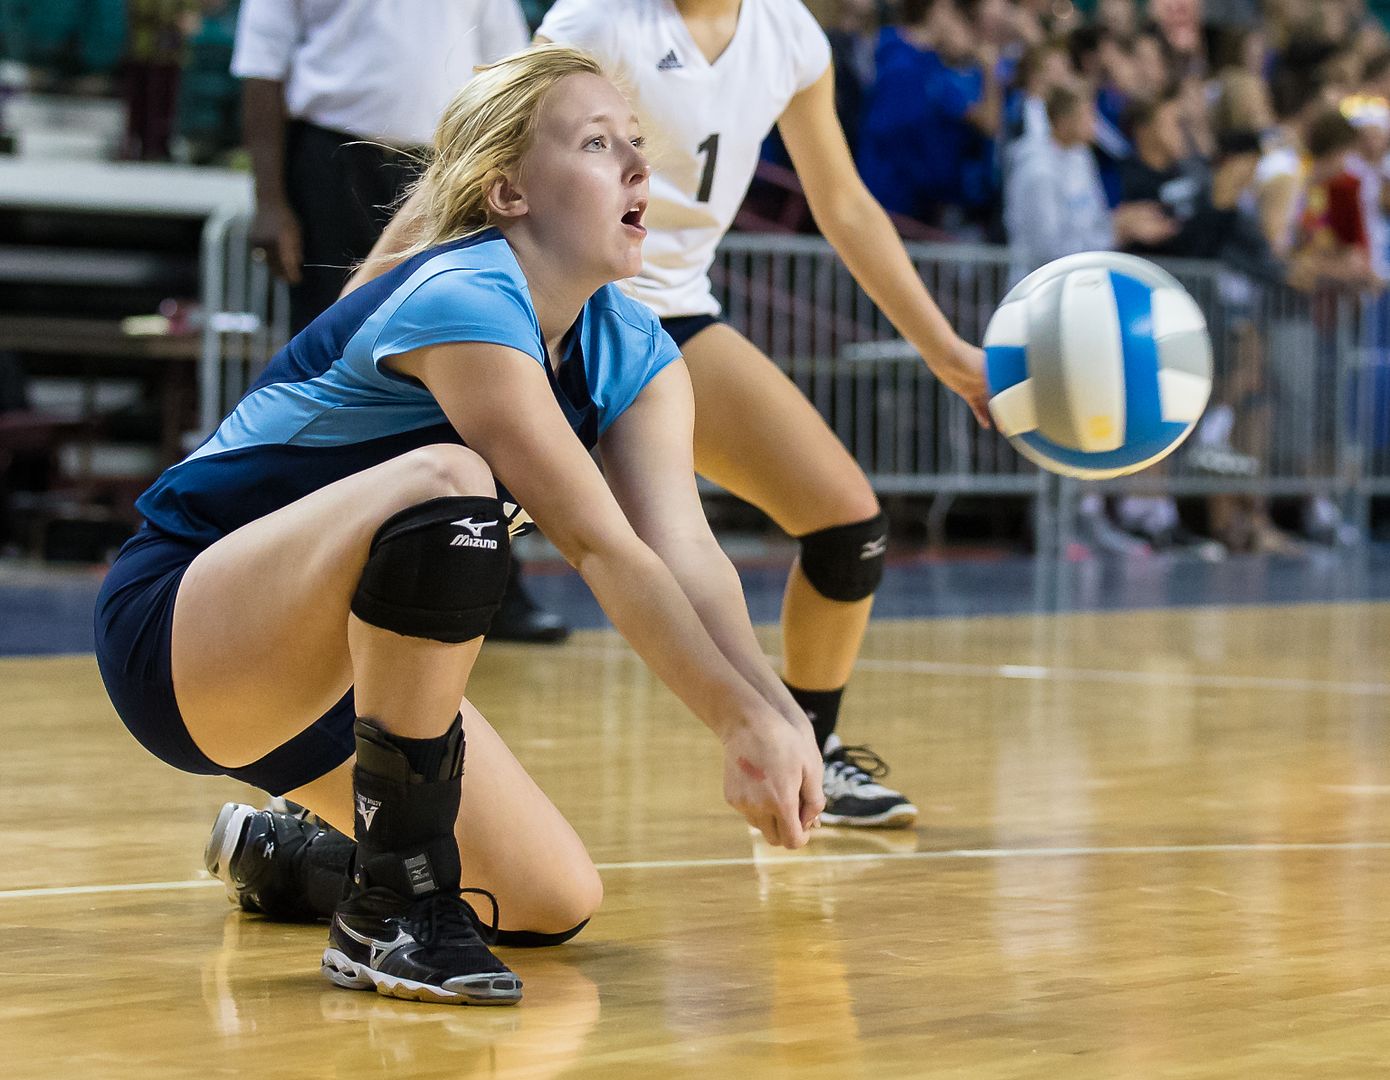
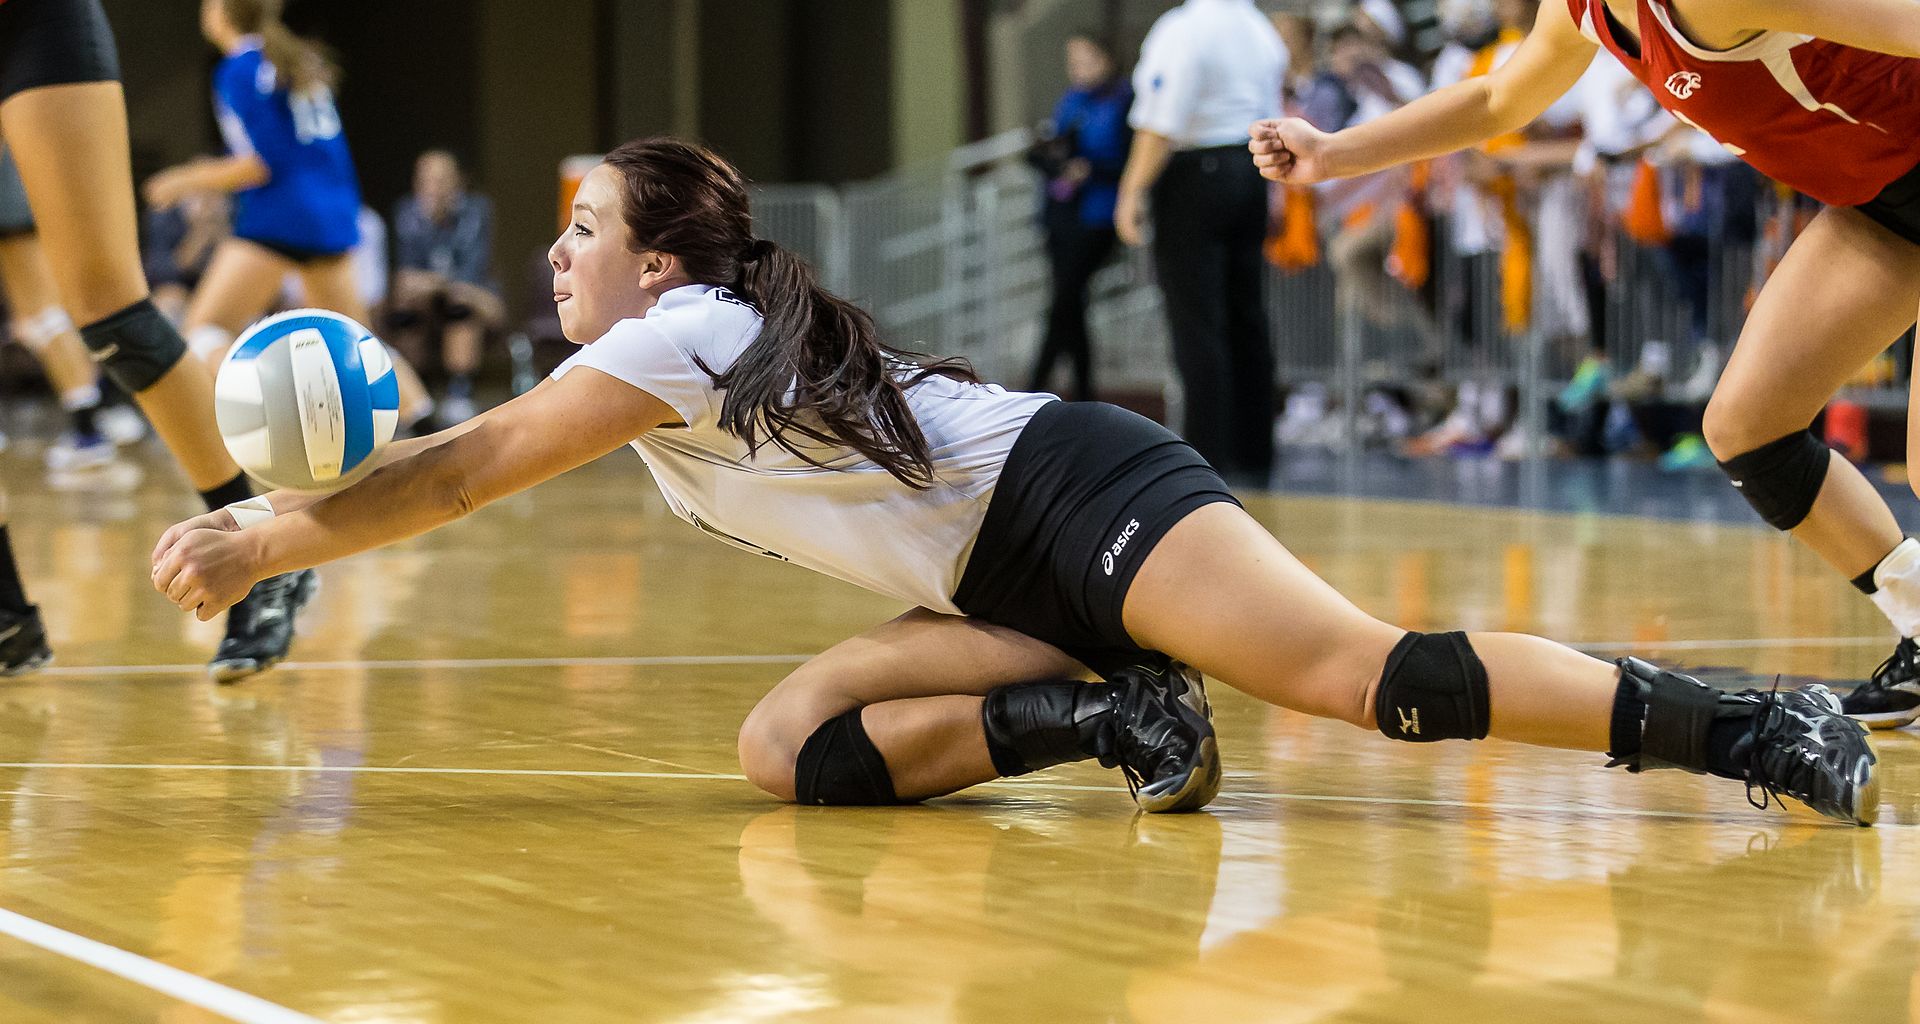
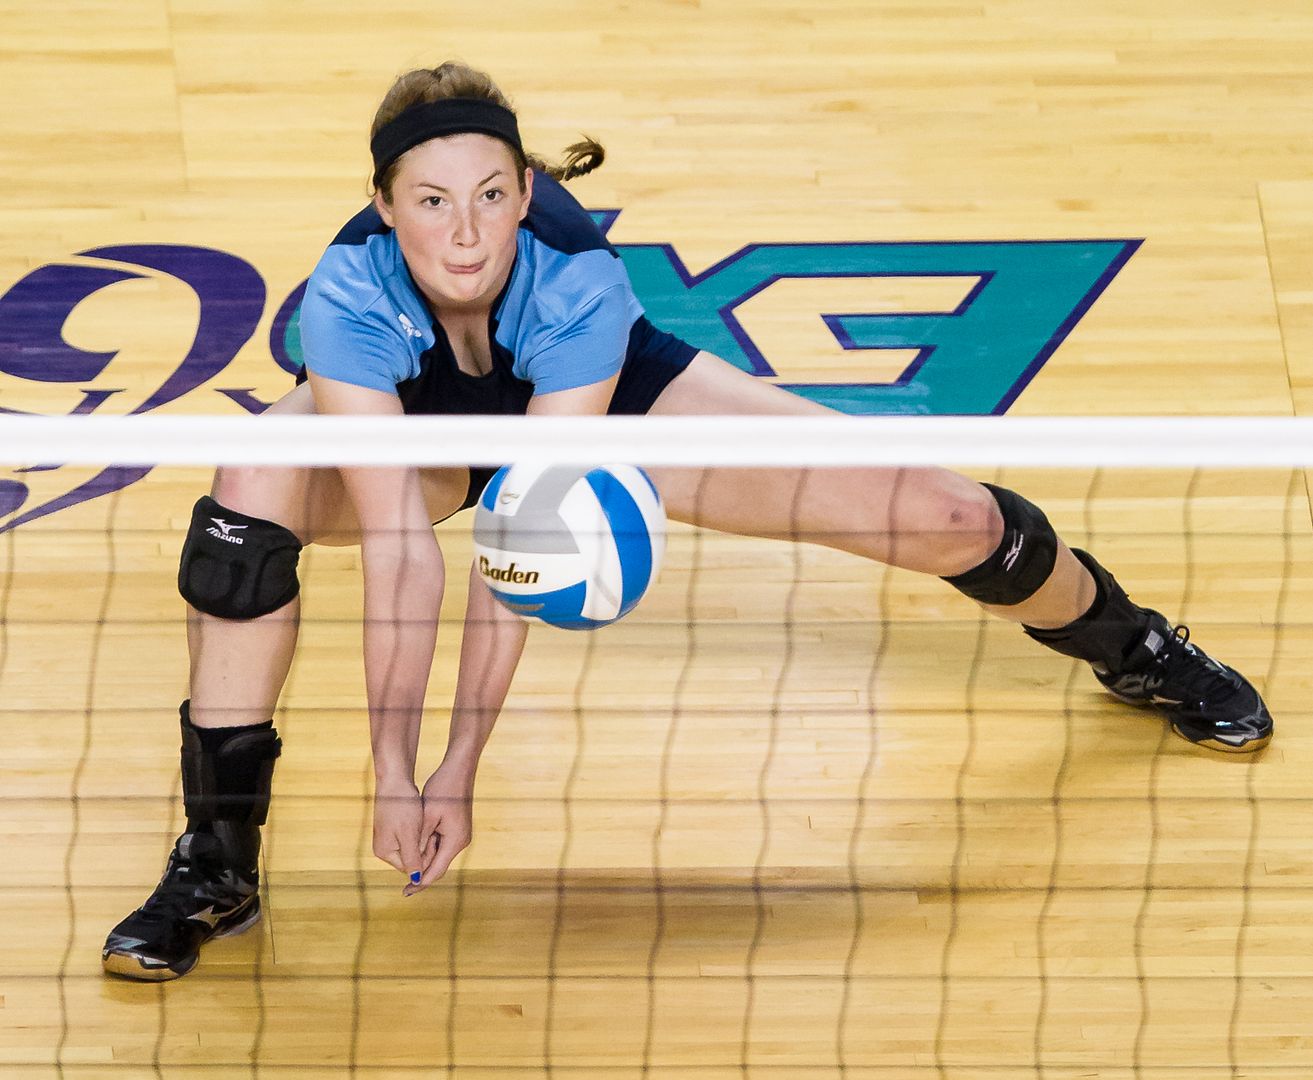
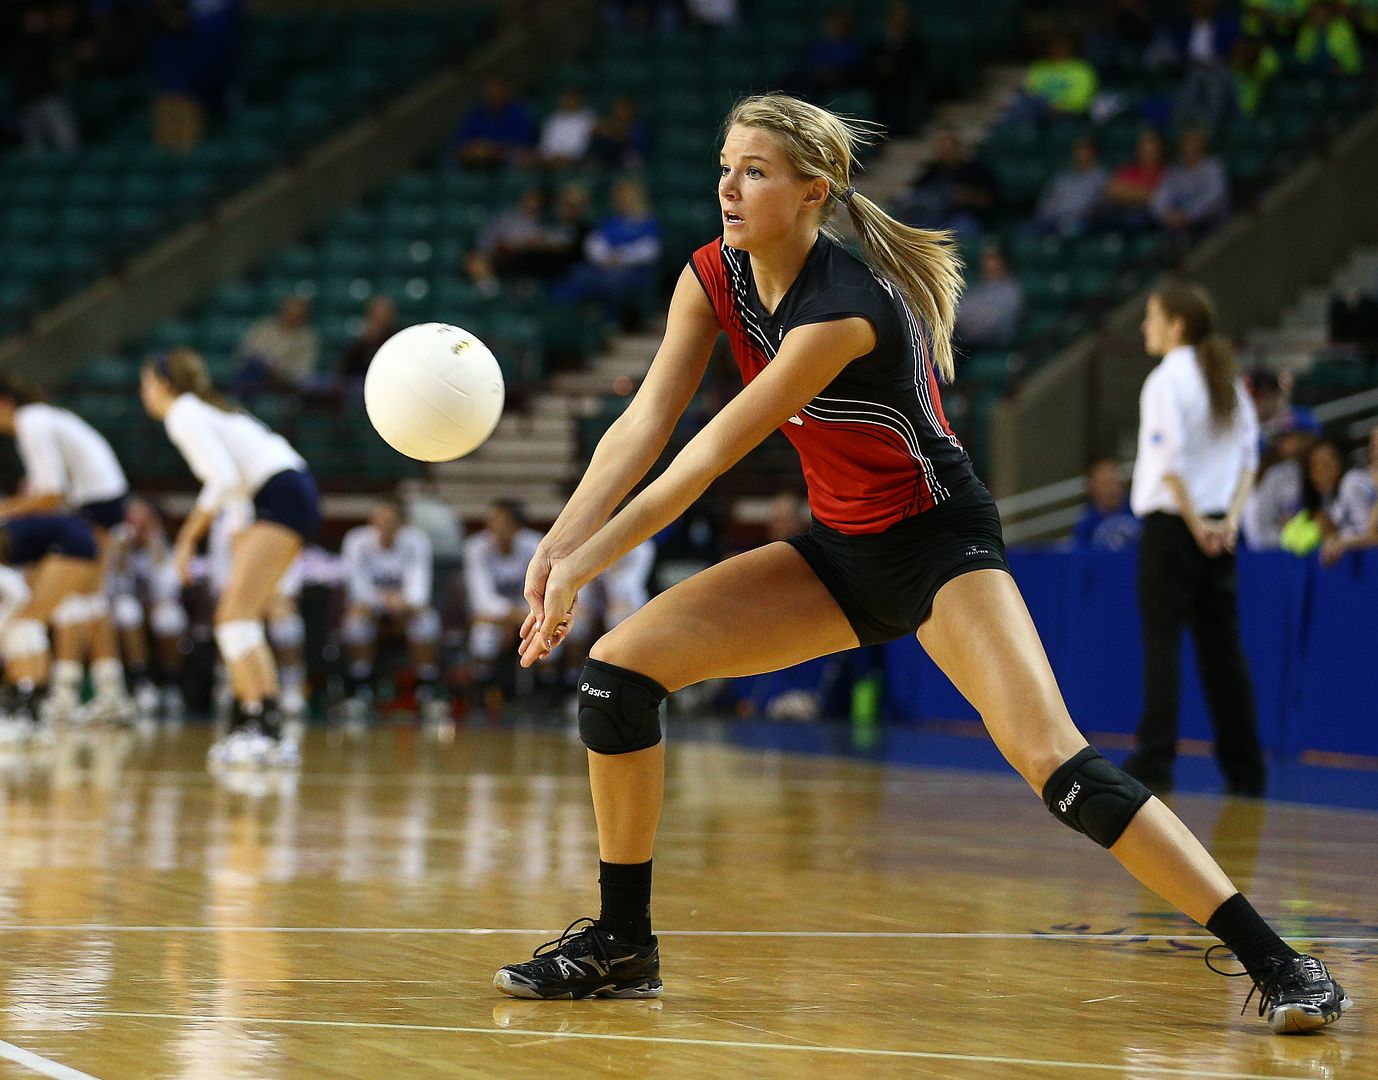
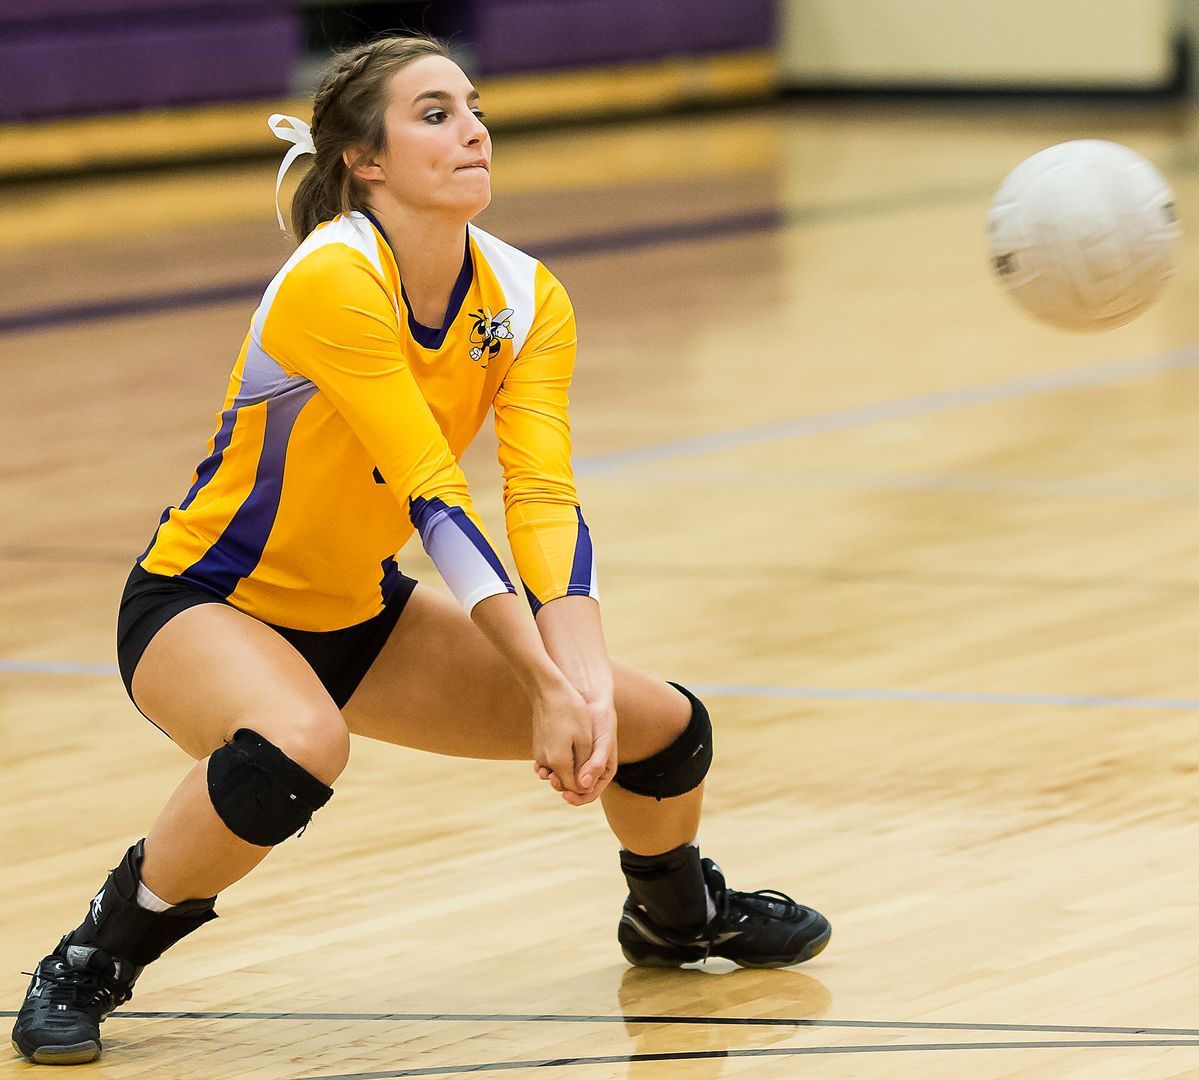
Consider the following images of players digging for the return:
Three of the shots were taken from a vantage point quite close to the floor and the fourth (upper right) was shot from a very high angle looking down on the athlete. The image gains drama if the camera is at or near the floor.
The image on the lower right was taken almost abeam the player and the result is a profile shot. Moving to a 45 degree angle (lower left) gives a improved view of the face and both eyes are visible. Shooting under the net from the opposite side of the court (upper left) gives the best view of the face and especially the eyes. This is a superior quality shot but the sight line will often be blocked by another player. If you are positioned at the end of the court and the serve is being made from near you toward the opposite side, see if you have a clear view to a possible returner, pre-focus on that player, and with a bit of luck, you will get a shot of that player similar to the photograph on the upper left. Try it. As you frame this shot, remember that the players will often move forward and down to the floor as they dig to get a short serve or spike. Get low. Anticipate. Change the focus point if it will help frame the shot and capture the ball in the image. You will often guess incorrectly and focus on the wrong player as you anticipate the return. That’s OK. It’s part of the challenge. Welcome to volleyball photography.
UL-- 1D X, f/3.5, 200mm, 1/1000, ISO 3200, 70-200mm f/2.8L IS II
LL-- 1D X, f/2.8, 182mm, 1/1000, ISO 3200, 70-200mm f/2.8L IS II
UR-- 1D Mark IV, f/2.8, 400mm, 1/1000, ISO 1600
LR-- 1D Mark III, f/4.5, 85mm, 1/250, ISO 400, Strobed with 4 Alien Bee B800s
The set
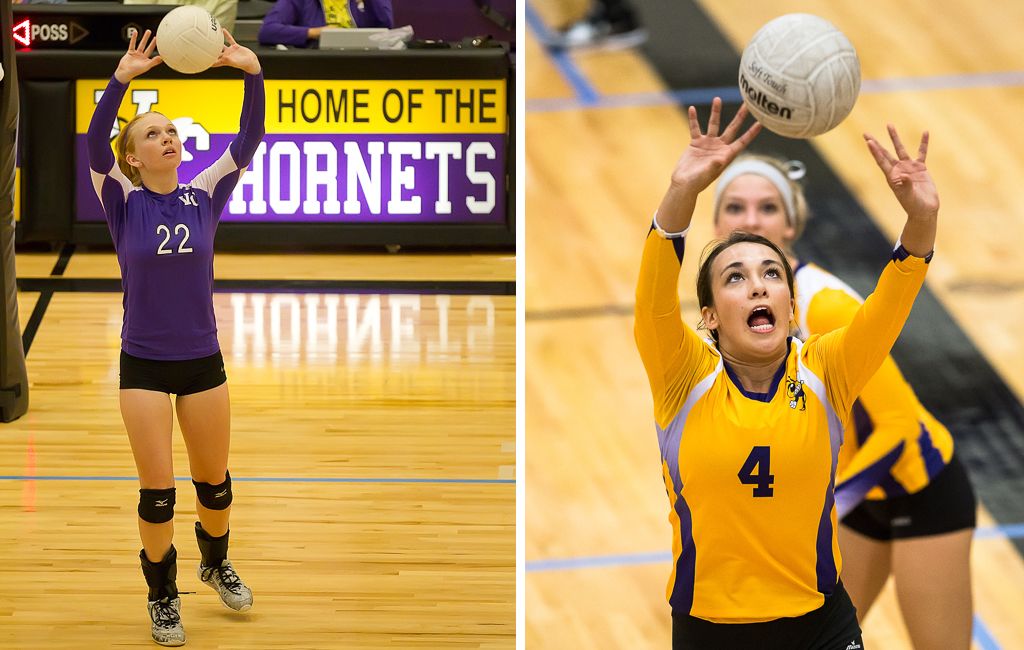
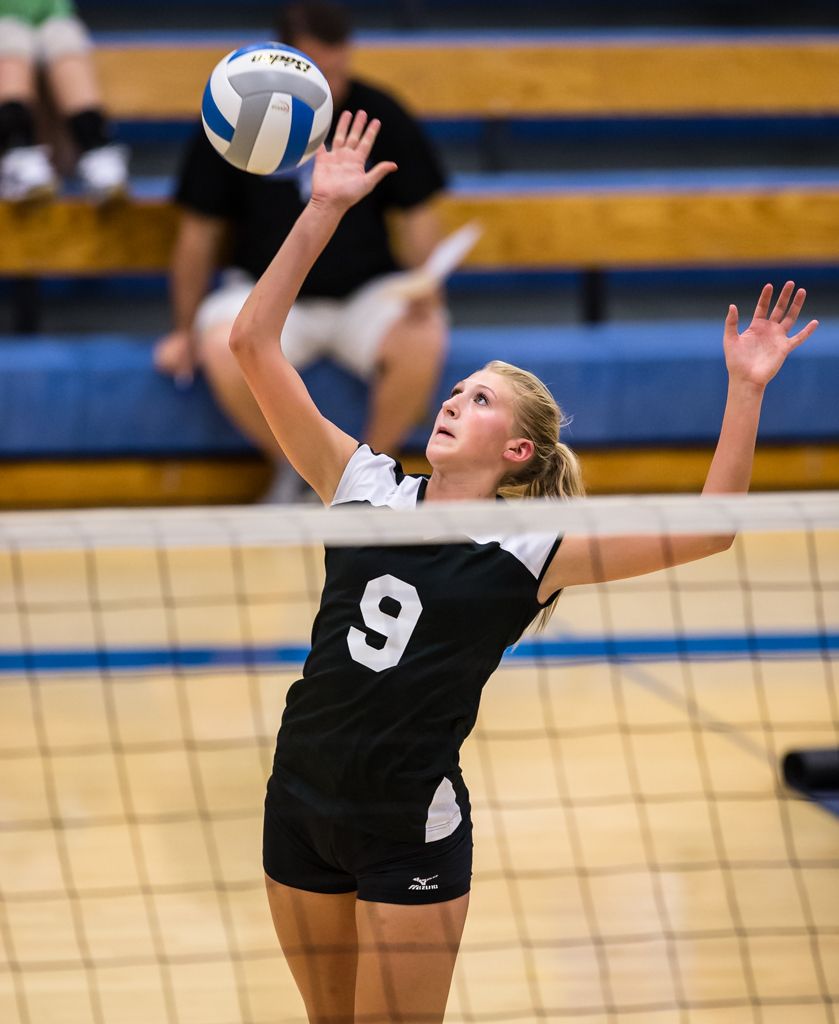
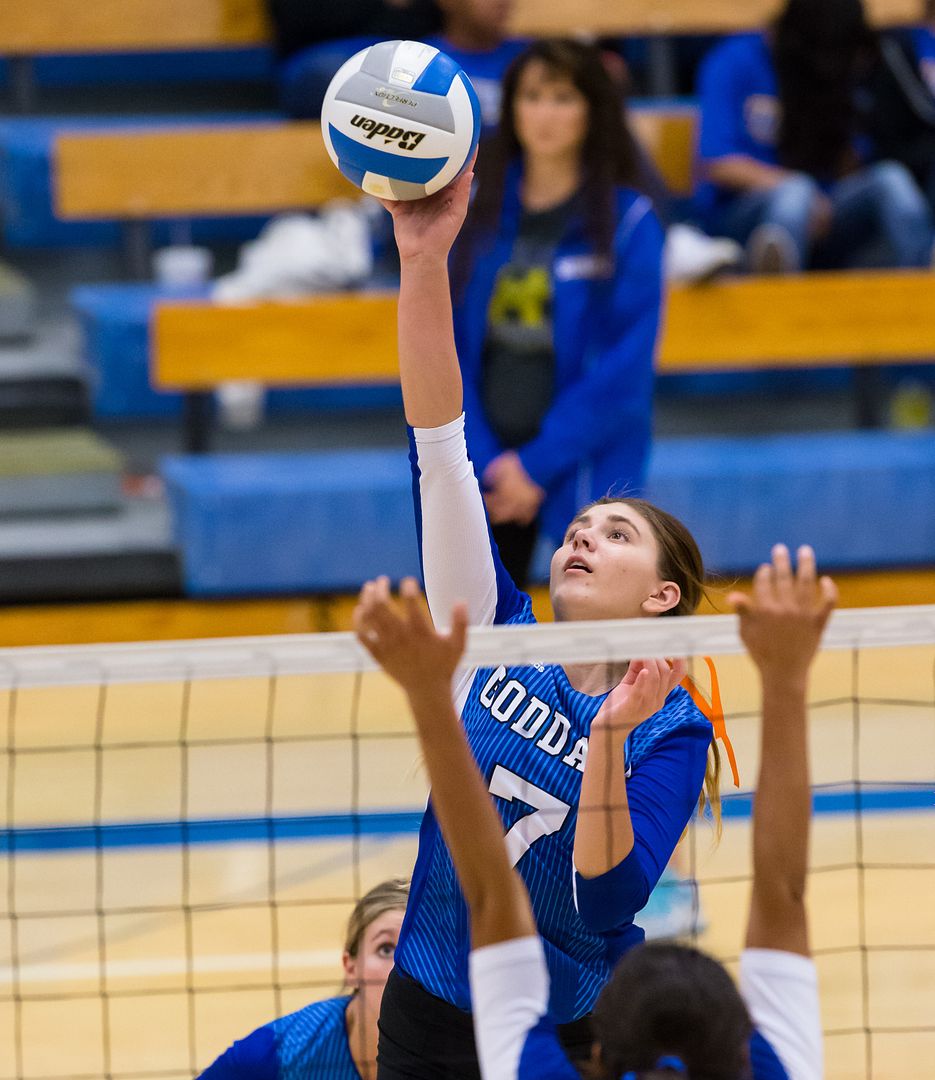
The setter typically faces the same side of the court every time which is toward the strong side outside hitter (left front for right handed outside hitters). She is most often looking up to see the ball (if it is to be an overhand pass). Position yourself to see her face. Since the setter is looking up, a high vantage point is preferred to capture the action and the eyes. I’ll usually use a center focus point, center it on the face, and try to shoot tight as in the image on the right. The full body shot on the left side was framed to capture the sign on the scorers table for context because this was the very first match held at a new high school.
A wider angle will often capture the spiker preparing her move to the net. Both types of images can work.
Left: looking down from the bleachers. Coach’s daughter, brand new “Home of the Hornets.” I knew the paper would love this shot and use it. [Wrong again!]
Right: looking down from a balcony. Note the eyes of the right outside hitter (weak side) locked on the ball to see if the set is coming to her.
L-- 1D Mark IV, f/2.8, 200mm, 1/1000, ISO 4000
R-- 1D X, f/3.2, 300mm, 1/1250, ISO 12,800
The Spike (Hit, Attack)
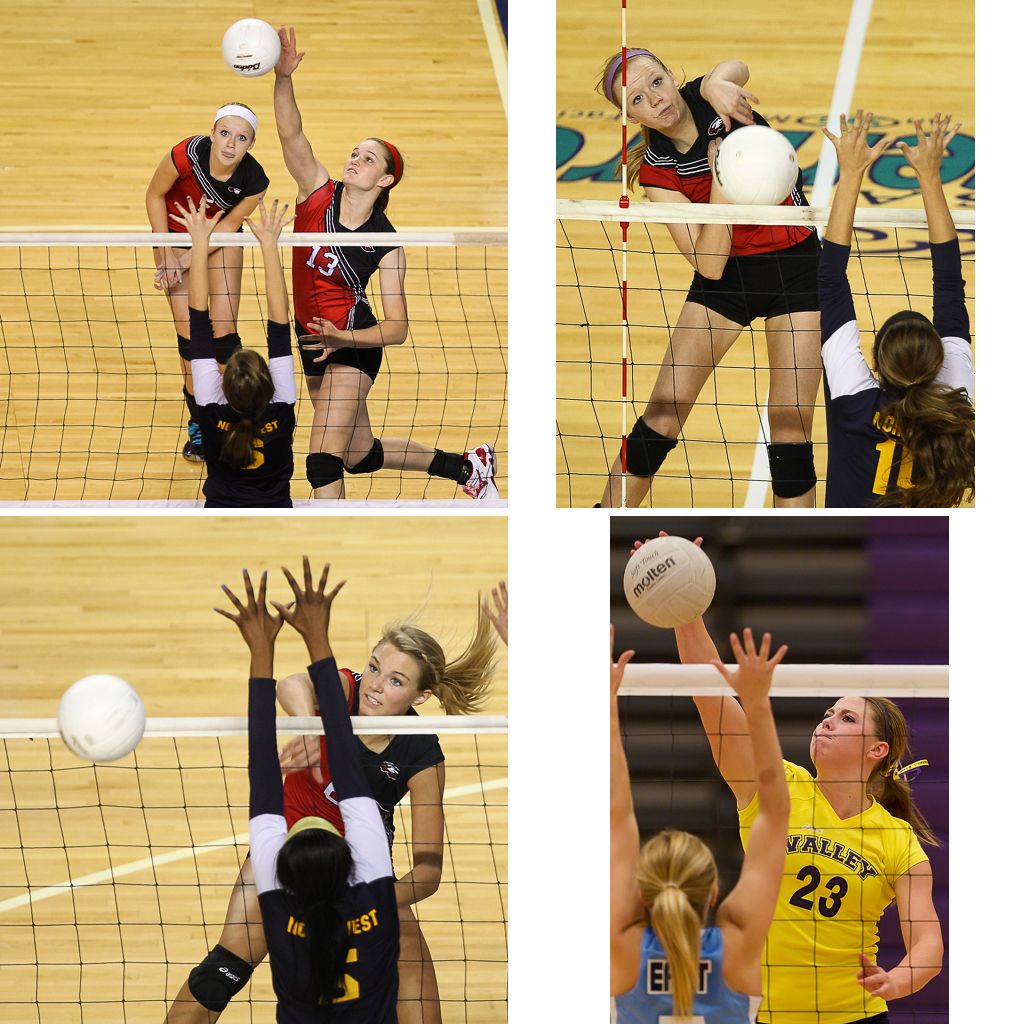
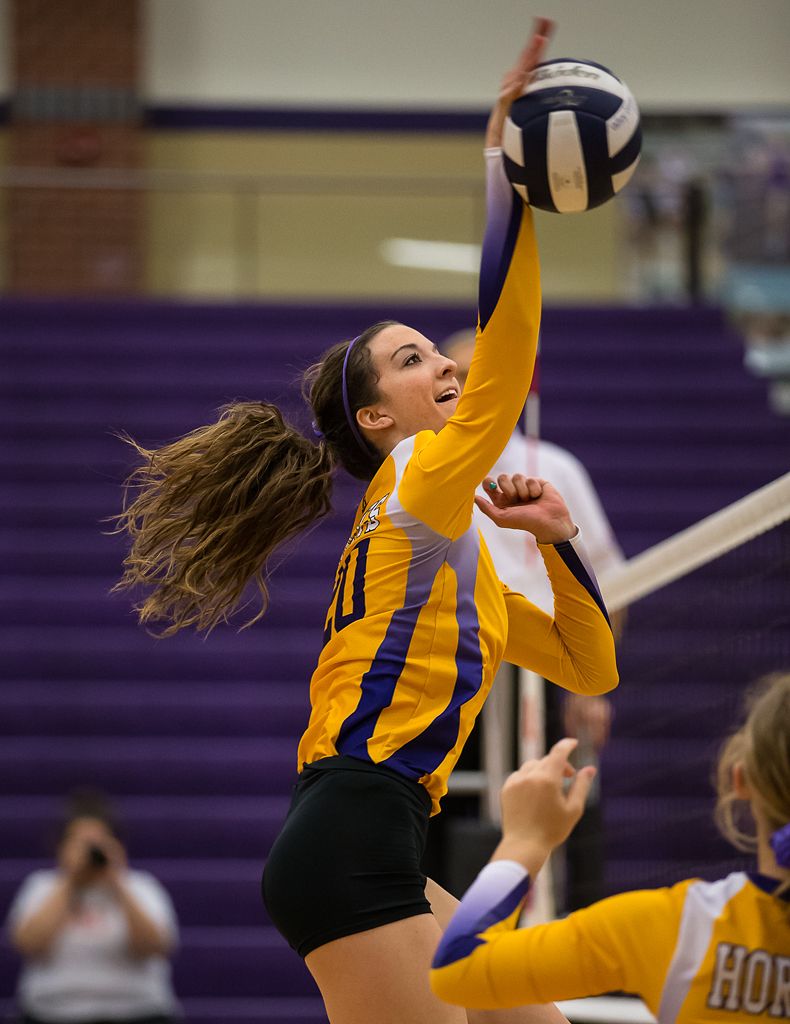
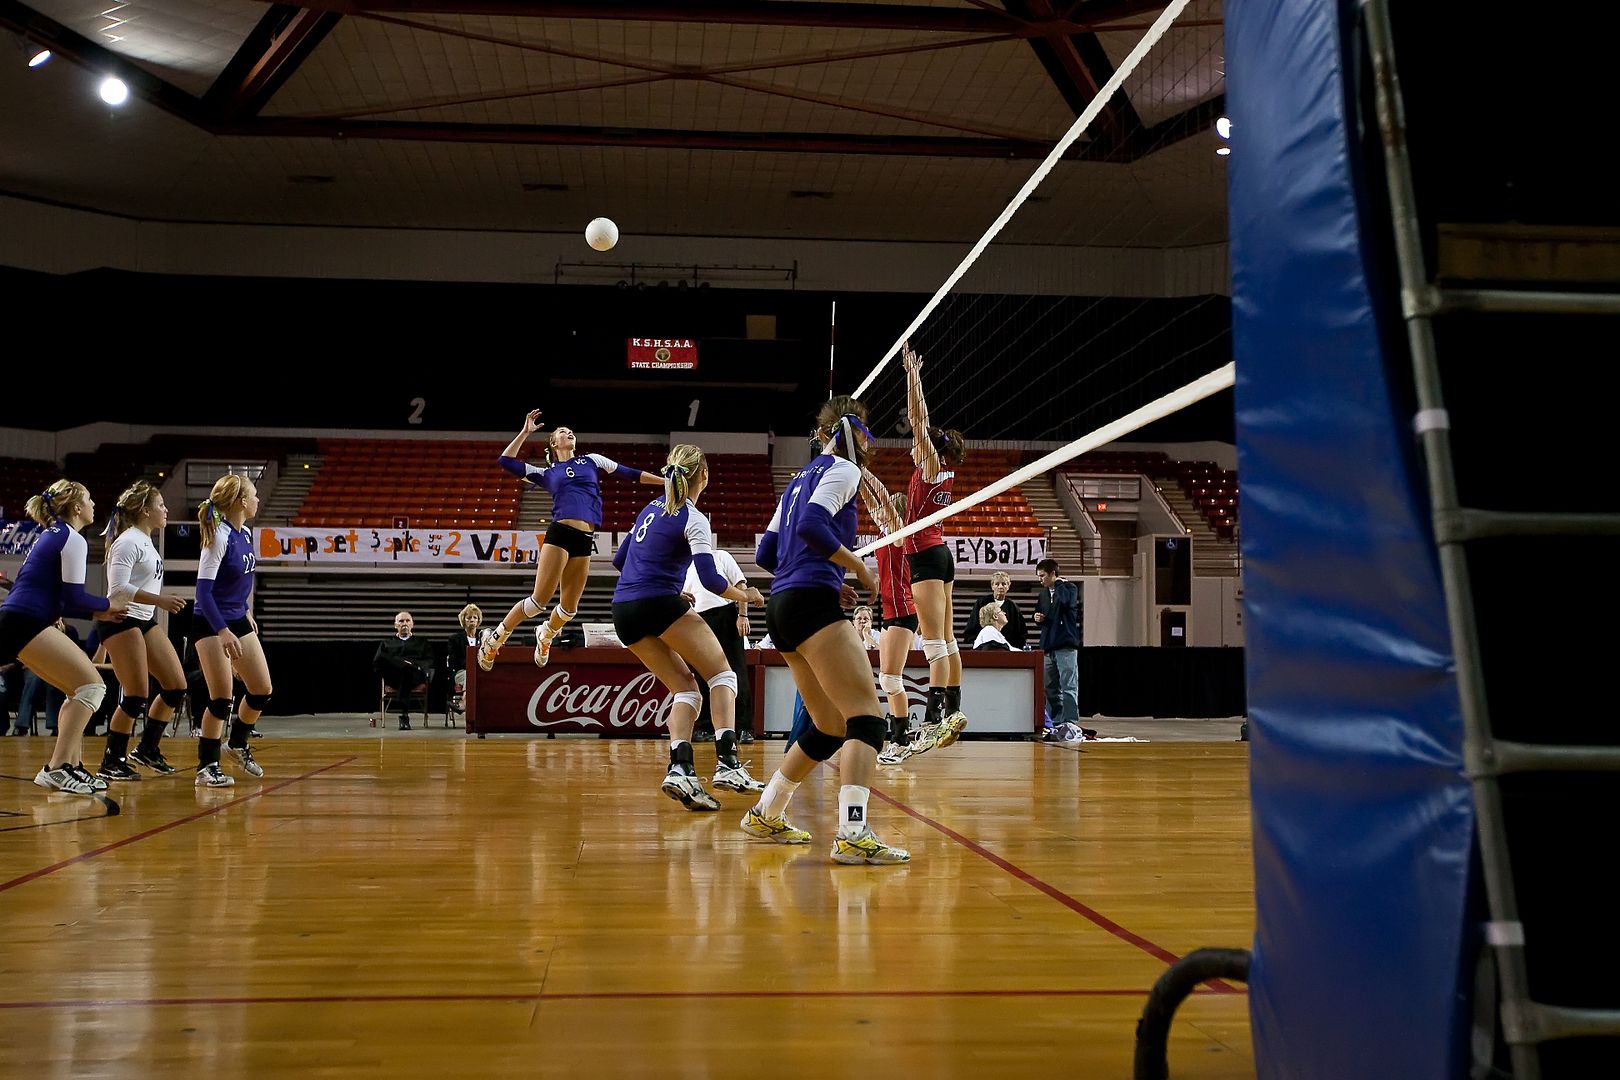
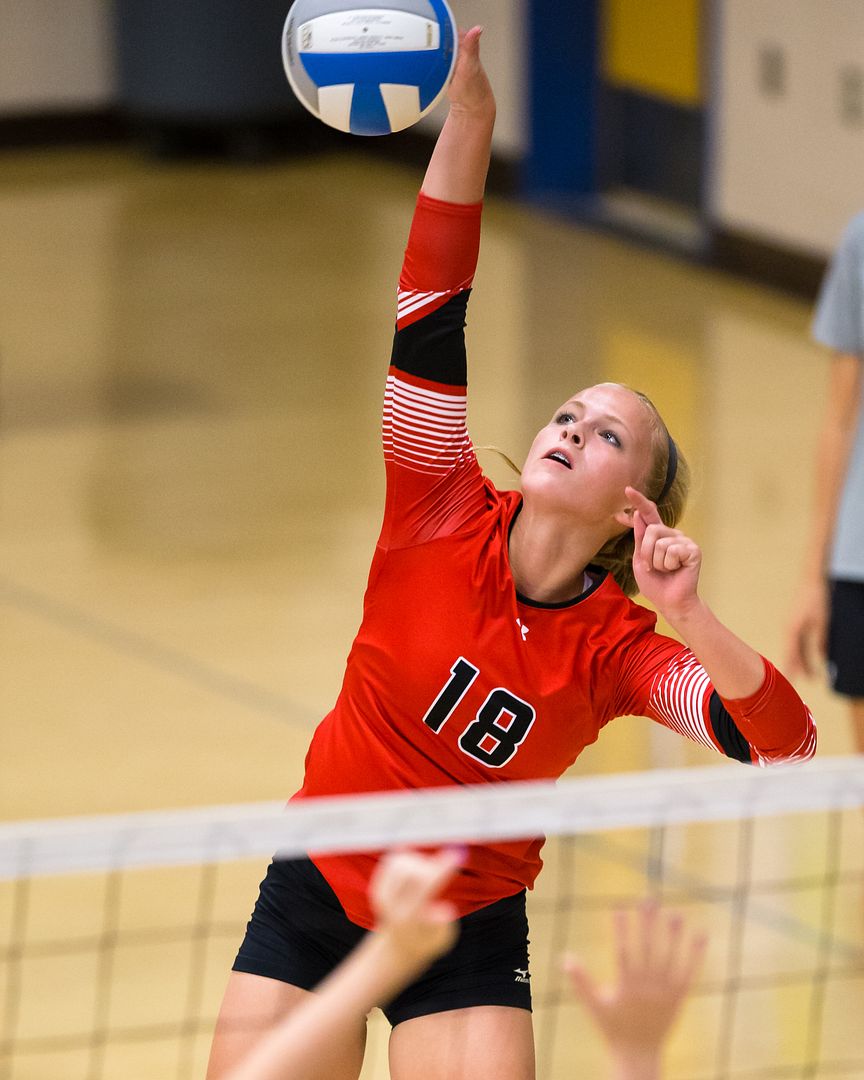
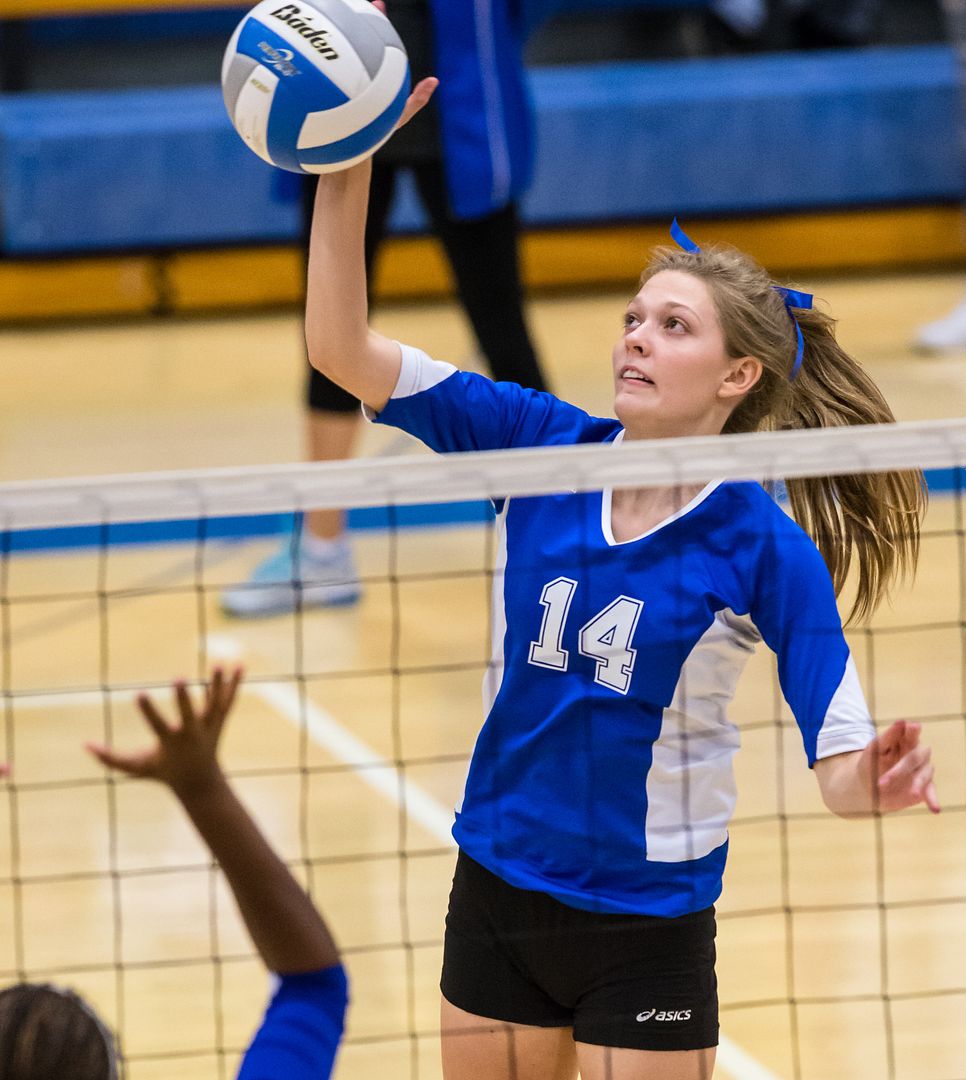
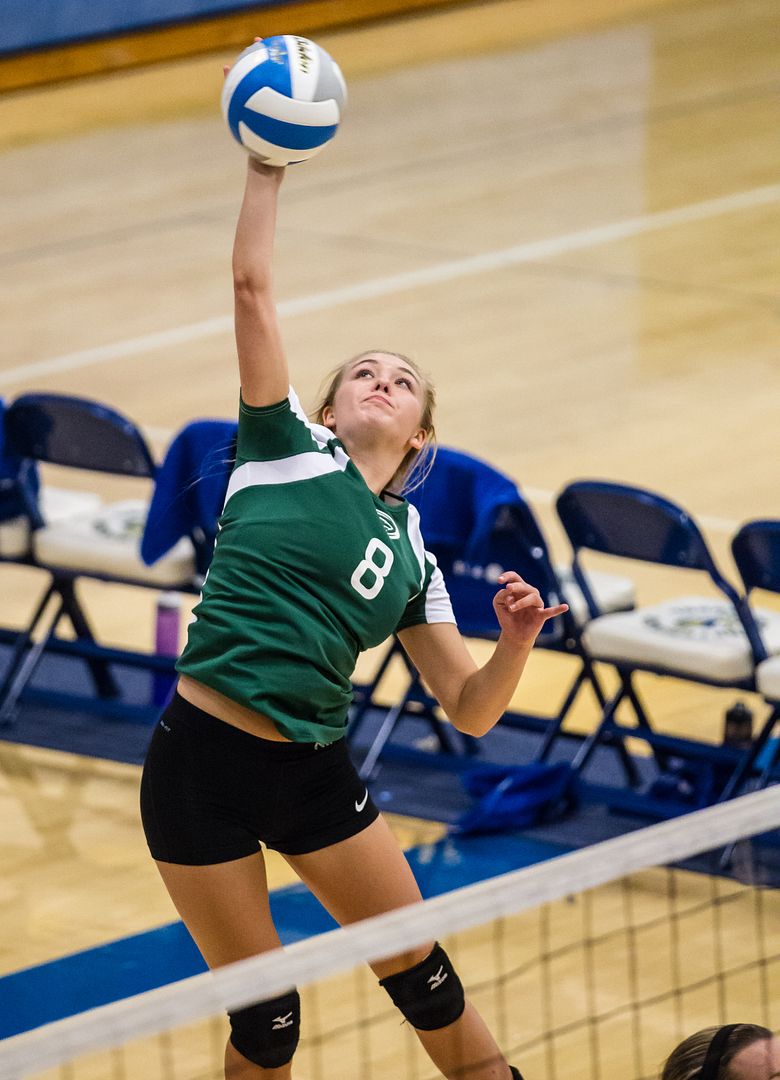
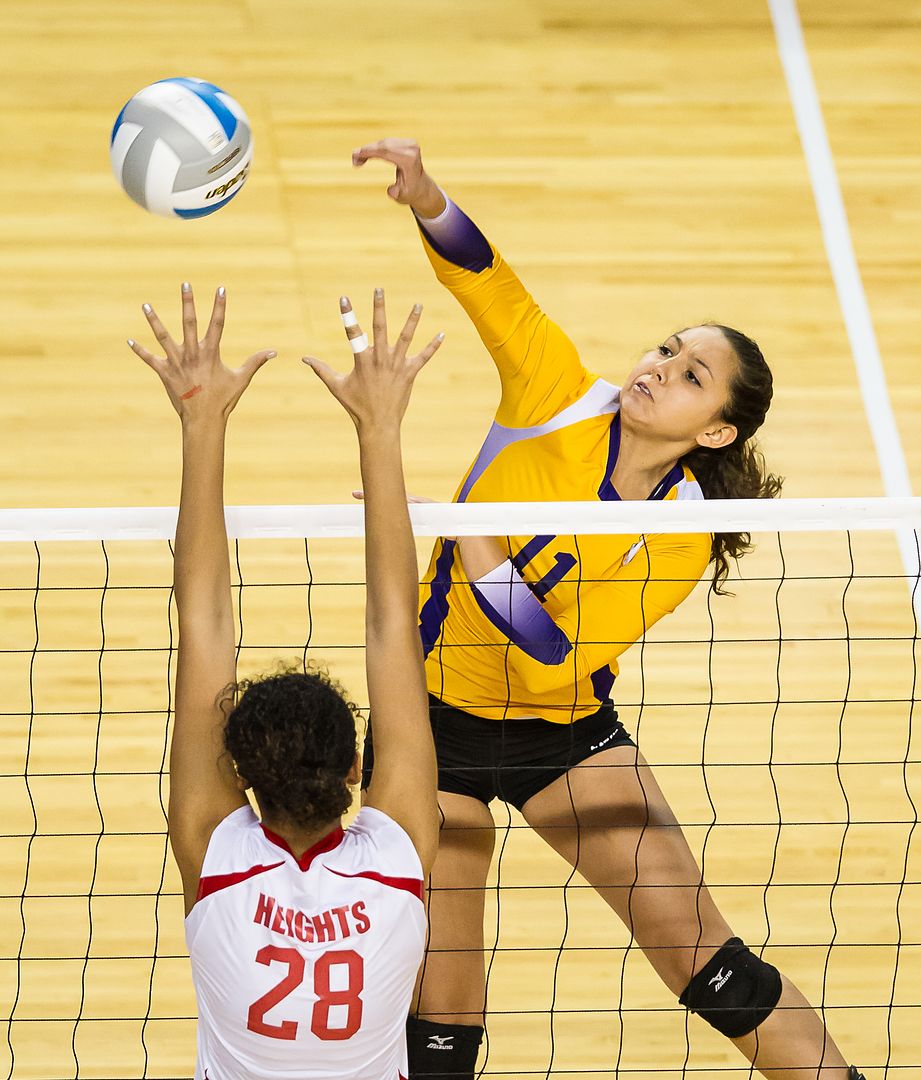
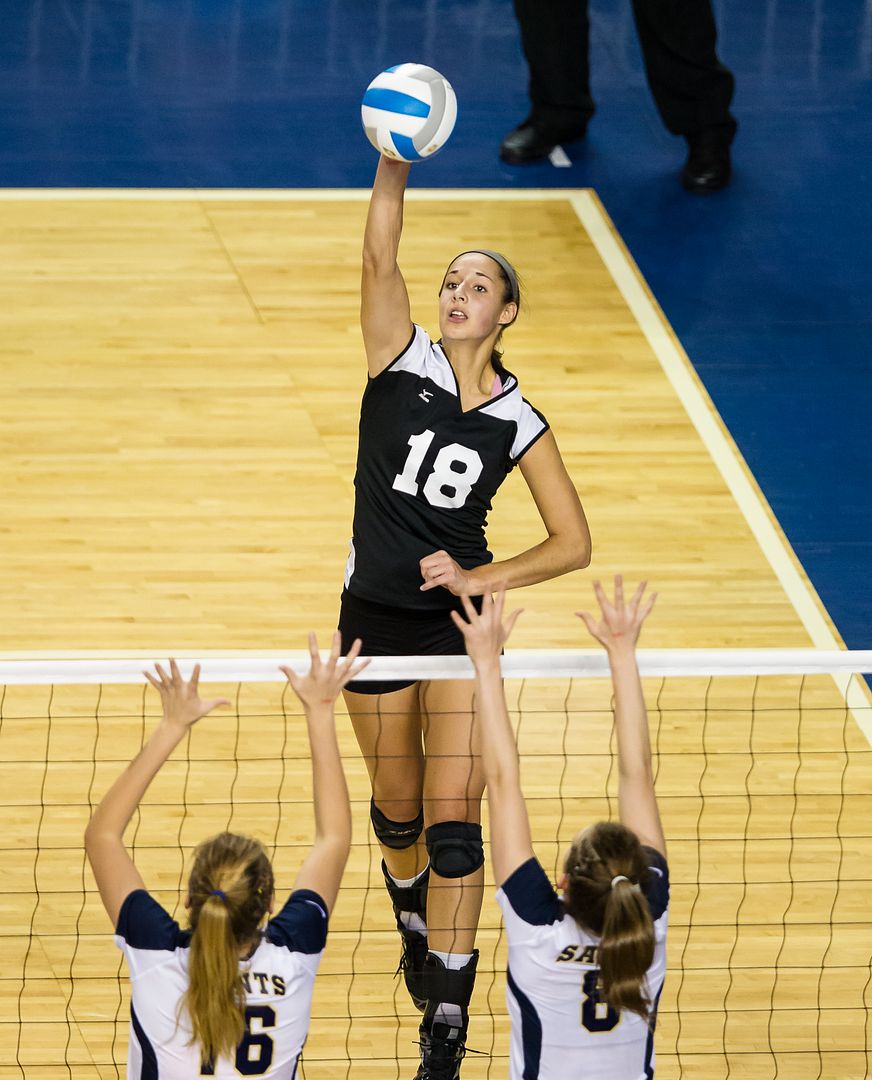
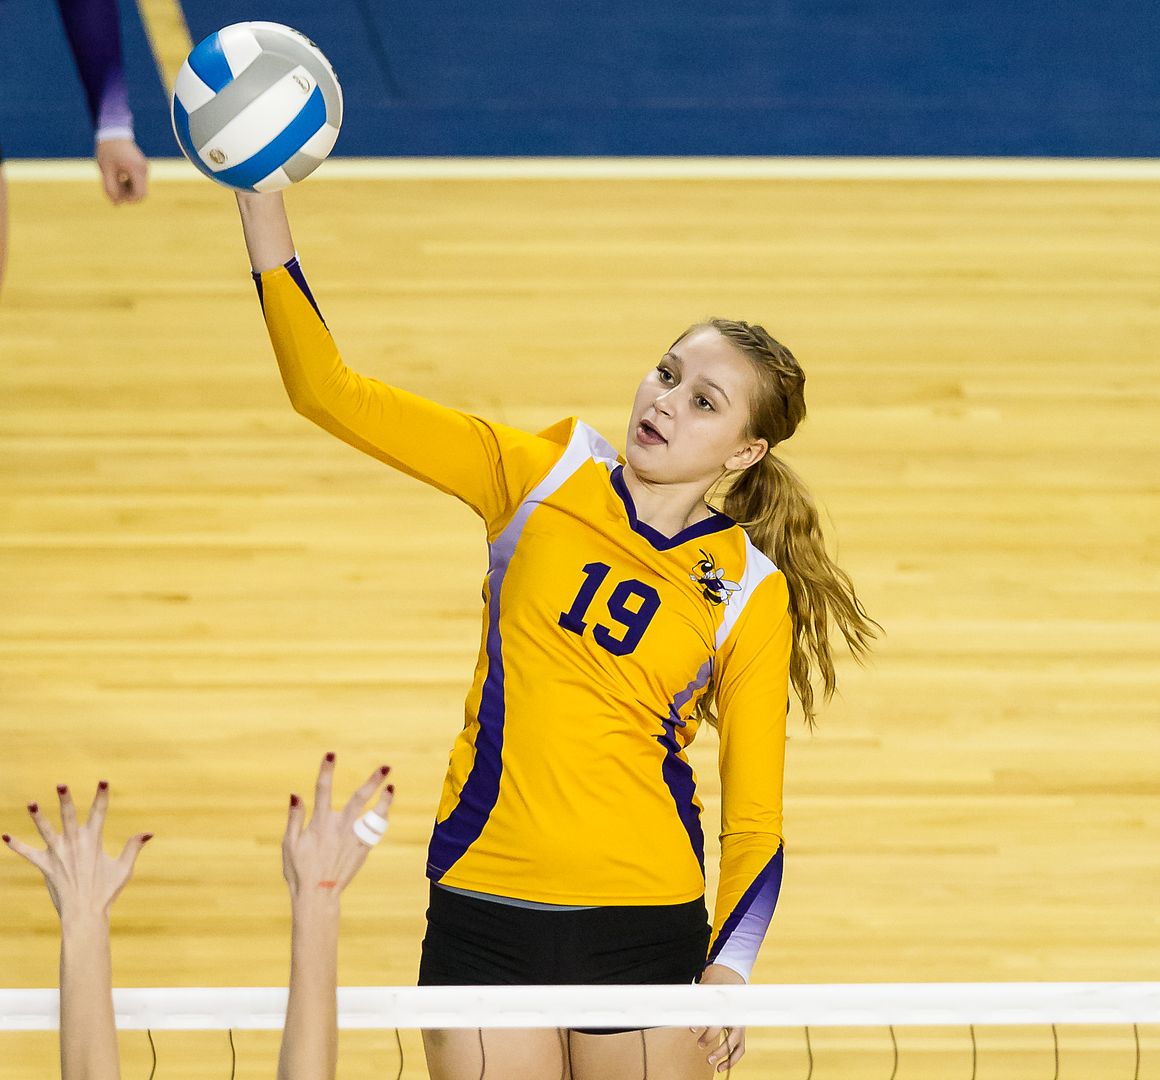
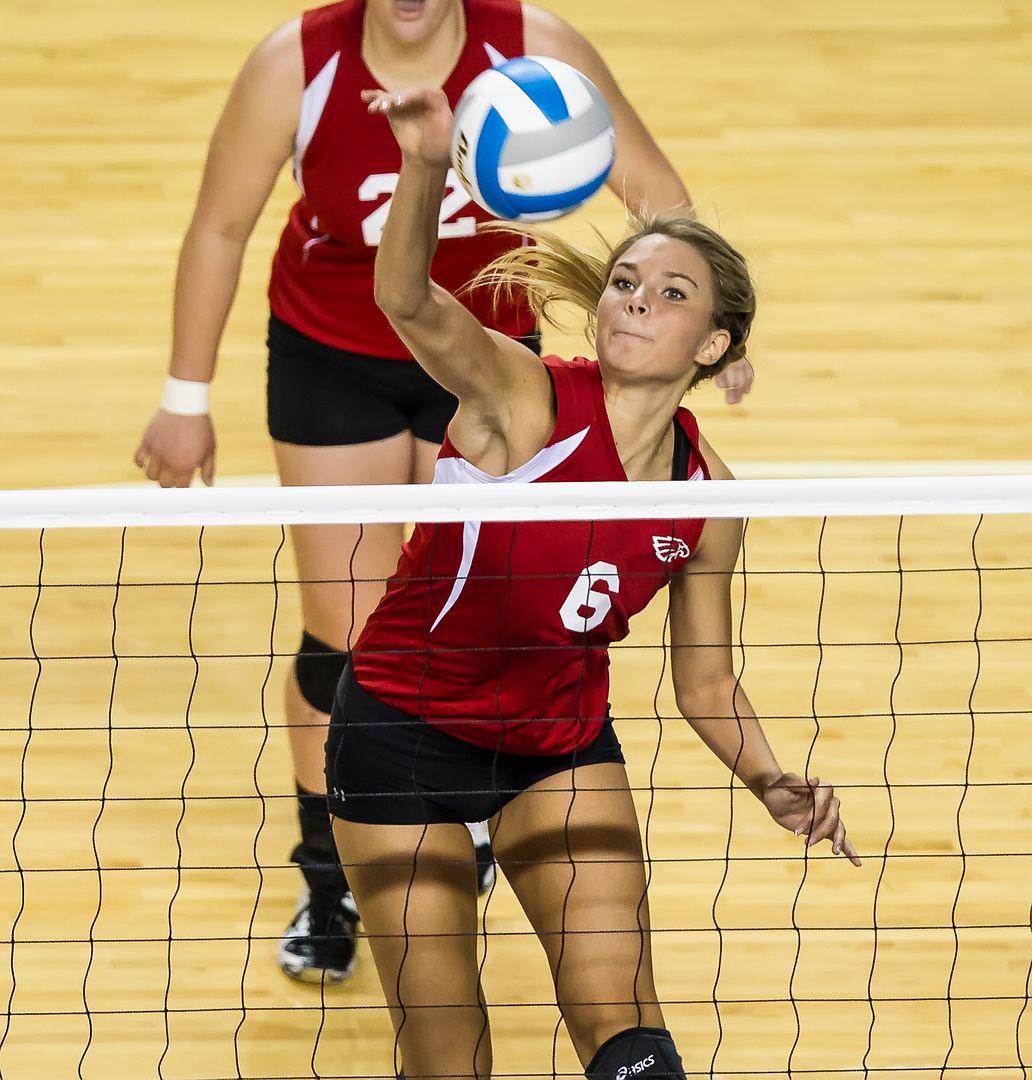
The spike is considered the pinnacle of action and no gallery is complete without some images of it. Gyms with a balcony and most arenas will offer the opportunity for the photographer to get high and shoot down on the play. This yields views of offensive players where the faces are not obstructed by the top tape of the net, hitters seem to be jumping higher, and focusing is far simpler. The three hitters pictured in the red/black uniforms below were all shot from the top of an arena (see LL event image below) with a 400mm lens on a 1.3 crop factor camera body .
The players on the offensive left and right front are the outside hitters. For right handed attackers (the majority), the left front is the key position and left side hitter is hitting from her strong side. She is often the best spiker and most athletic. The other front row players are the middle and the right. Shoot these three tight enough to see the intensity/emotion of the players. Full bodies are not required. Strong side (left side for right handers) outside hitters usually approach the net from about 3 steps back. Track them through their approach and hit. Middles and weak side rights will sometimes have set plays to get them in position to attack. Study your team’s front row strategies.
Spikers hitting on their strong side will start out looking toward the setter/ball and their faces will rotate with their bodies as they strike the ball (UL). Positioning yourself 30 to 80 degrees to the net is ideal. Any less and you risk having the hitting arm blocking the face. The face will follow the flight of the ball. Middles will often hit sets that are lower and have more tempo than the typical higher set to strong side outside. They may aim left or right with their spikes to avoid a blocker.
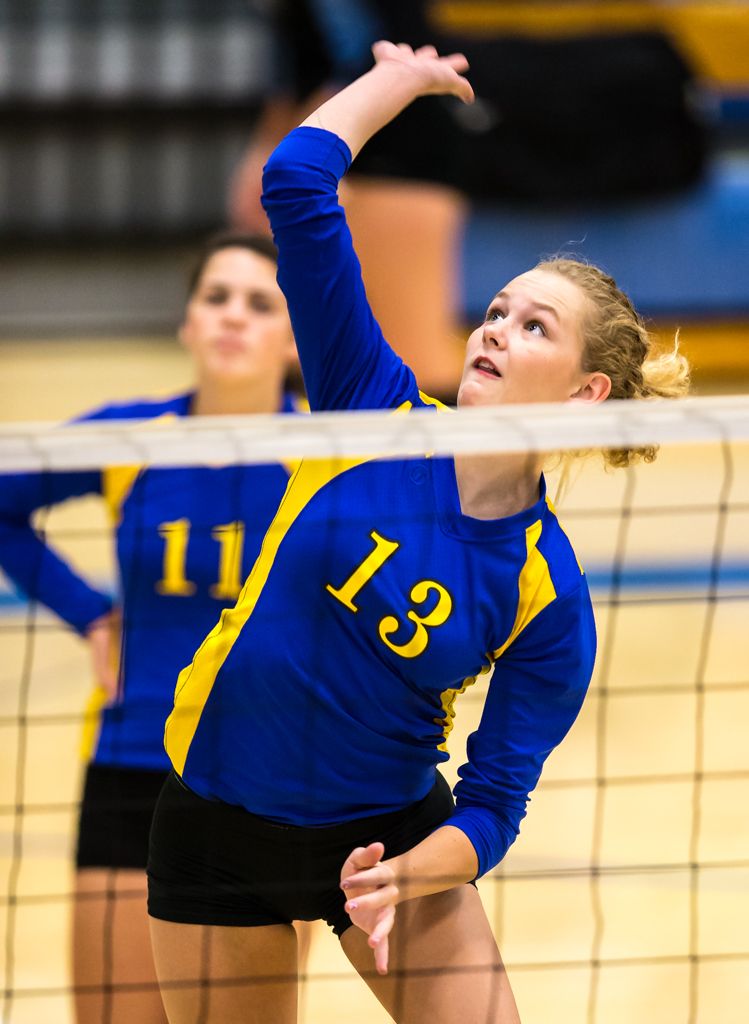
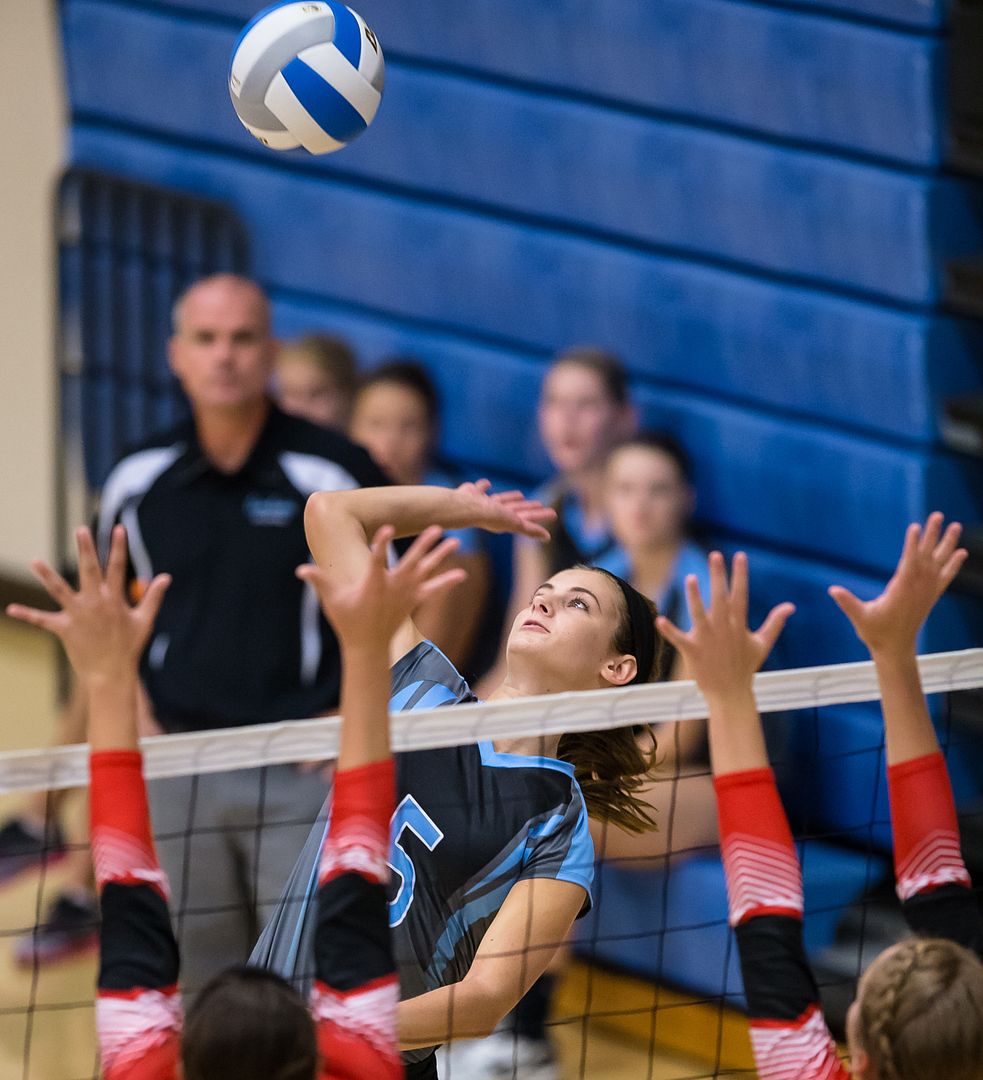
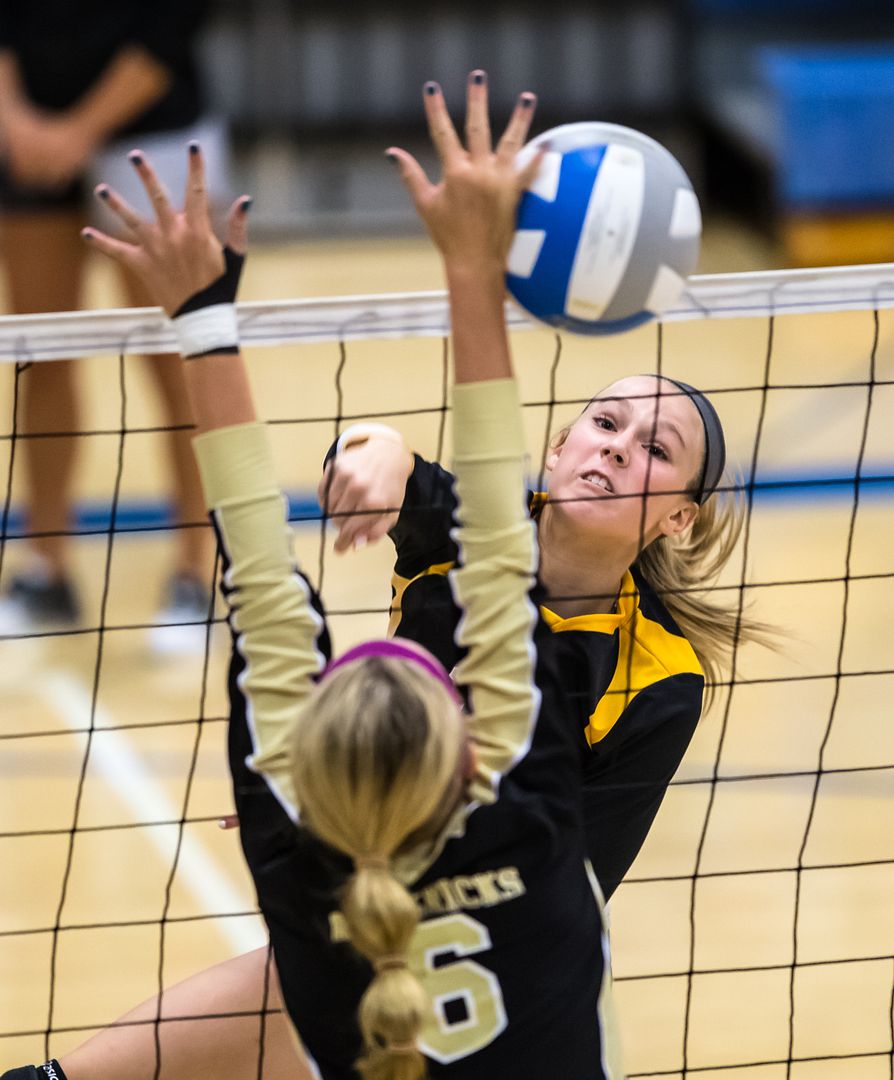
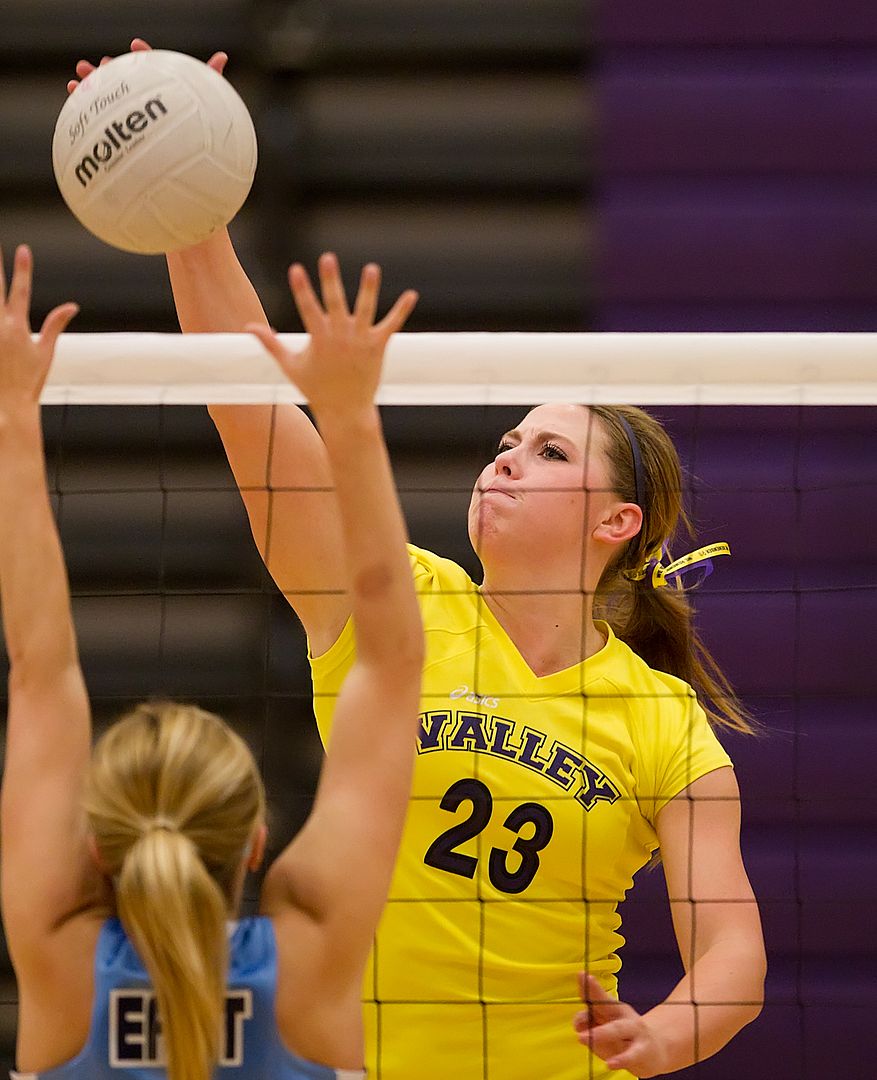
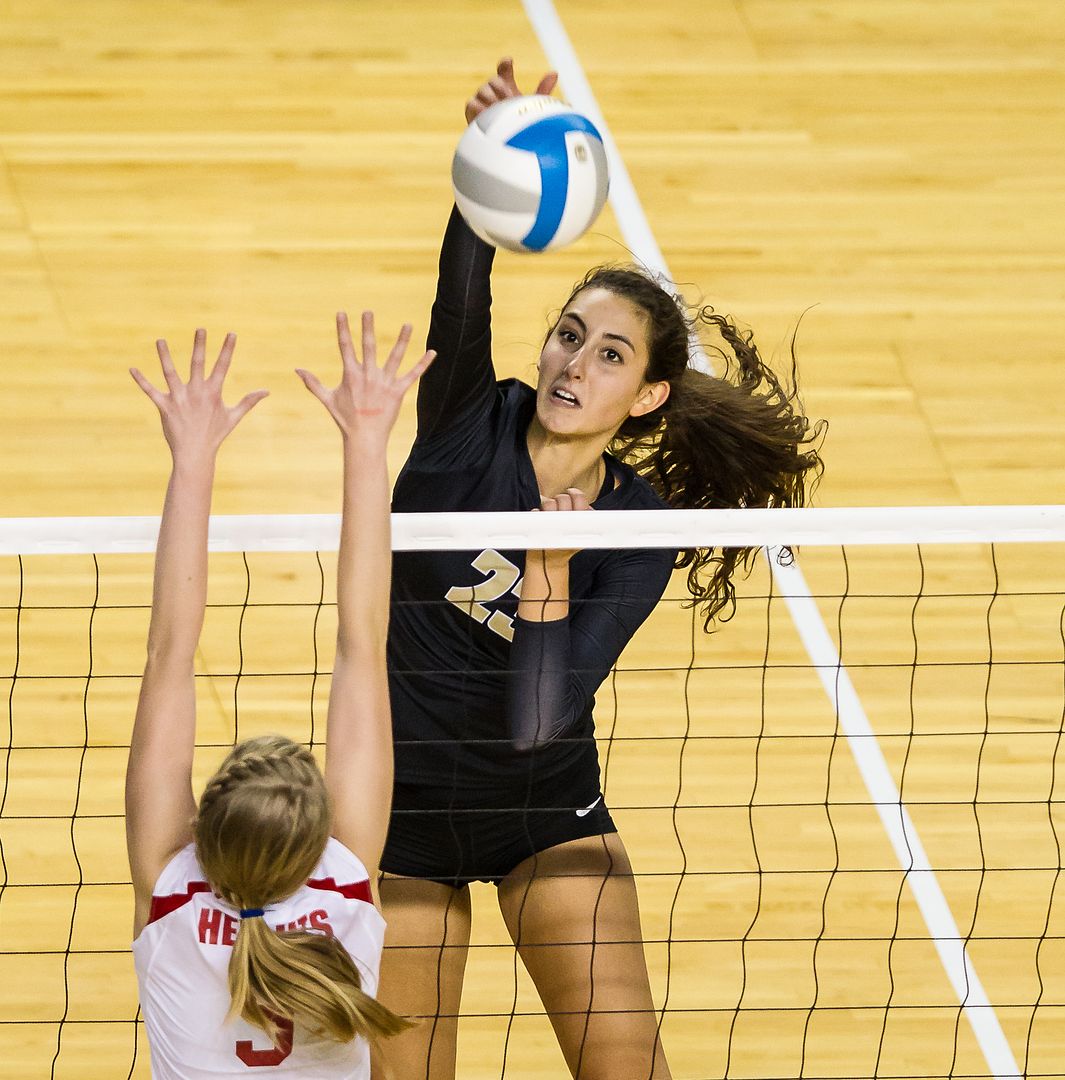
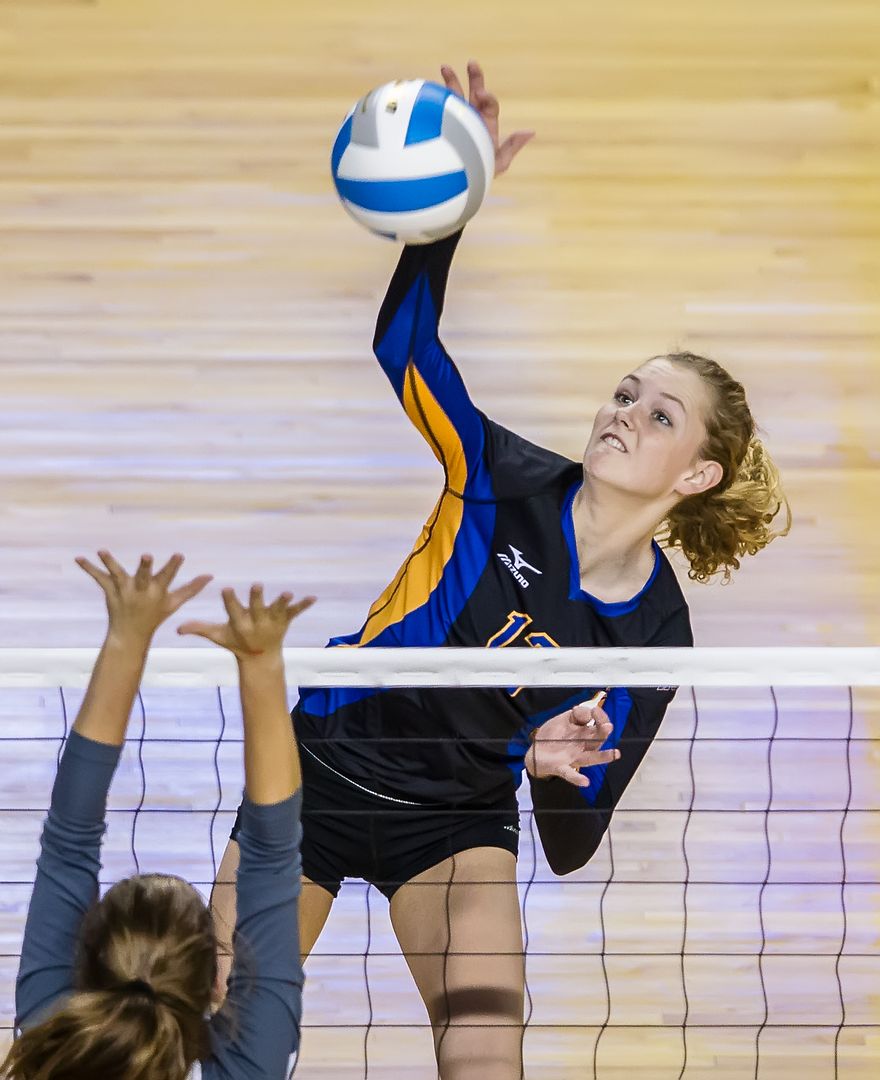
If you can’t get high, you’ll have to focus through the net. The white tape on top of the net is often problematic for obscuring the face. Get higher or lower if you need to. In the LR shot below, the background is dark and the black netting is almost invisible against it. This helped me be able to focus on yellow #23. If the netting is interfering with auto focus, first try adjusting the cameras focus settings (number of aux points, location of focus point, sensitivity etc). Sometimes you can use a low focus point aimed on the legs below the net to get a good result. Every camera model is different and you may need to experiment to see which settings track best. Remember in your framing that hitters will jump and reach up to hit the ball. Allow room at the top of the frame and choose your focus points accordingly. Tight, properly focused images of spikers are challenging to capture but worth the effort.
The dof at 300mm and 50 feet is 1 to 1 1/2 feet at f/2.8 depending on crop factor.
Tighter is better. Tighter is more challenging. Lots more.
LL, UL, UR-- 1D Mark IV, f/2.8, 400mm, 1/1000, ISO 1600 High vantage point looking down.
LR-- 1D Mark IV, f/2.8, 300mm, 1/1000, ISO 4000--Camera is net high so face is close to getting obscured by the tape.
UR, LL: eyes follow the ball on the spike follow through
http://photography-on-the.net/forum/showthread.php?t=1242386
Block
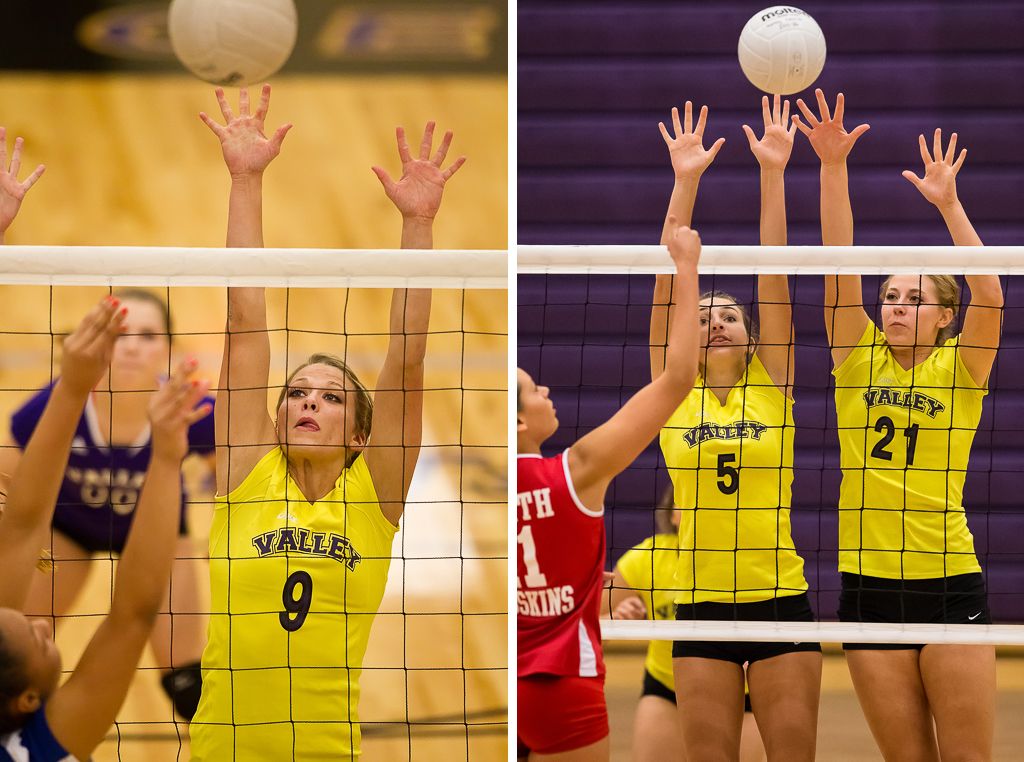
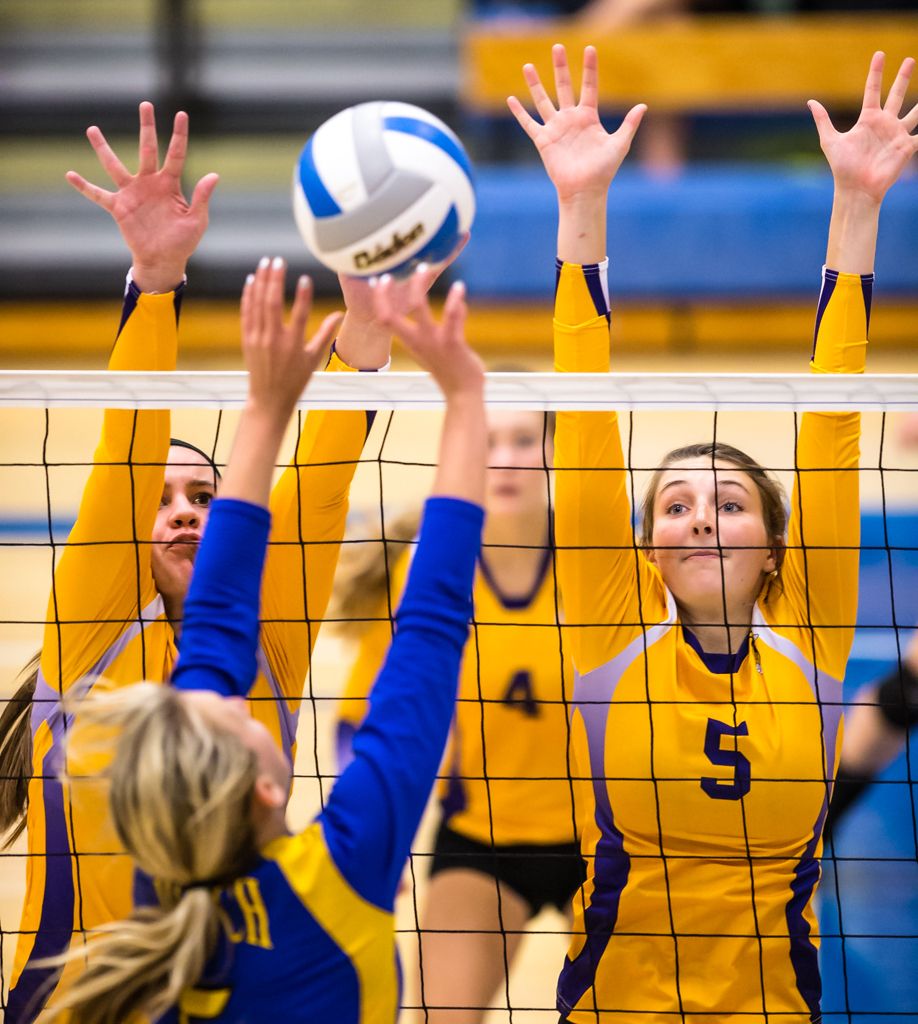
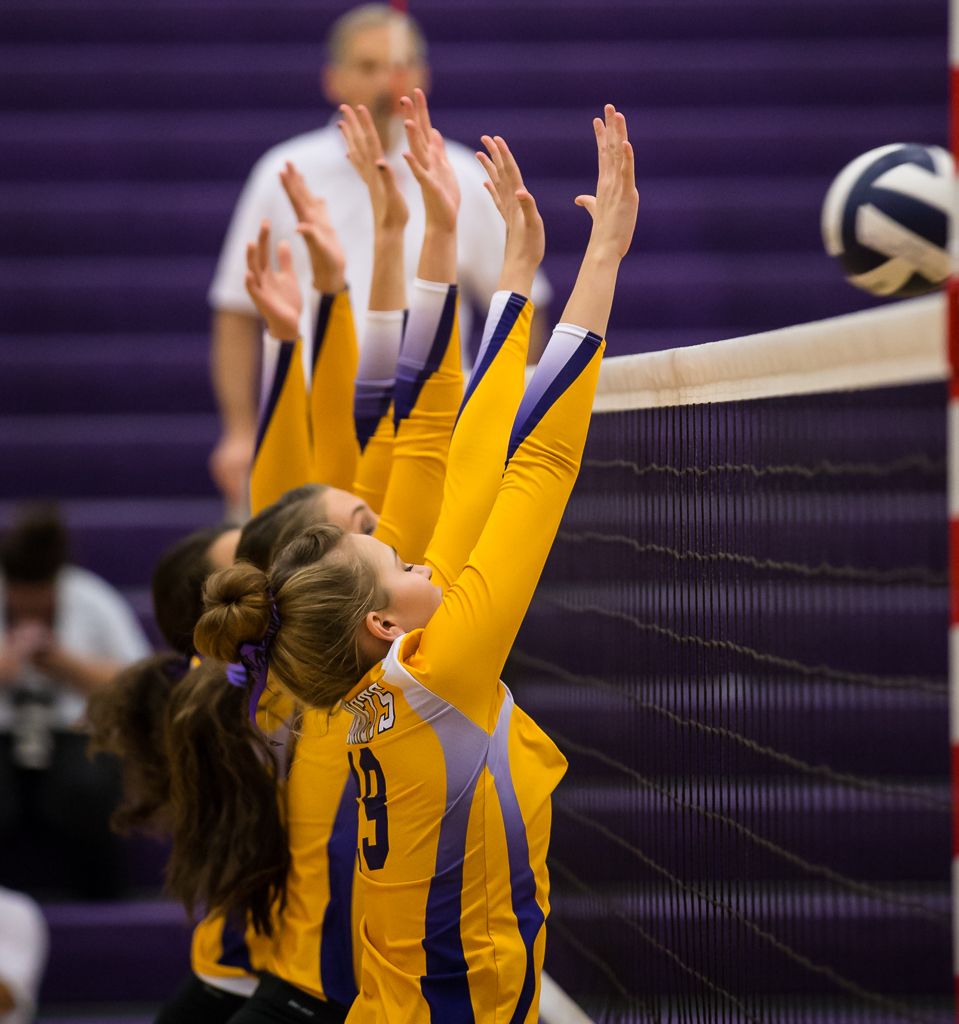
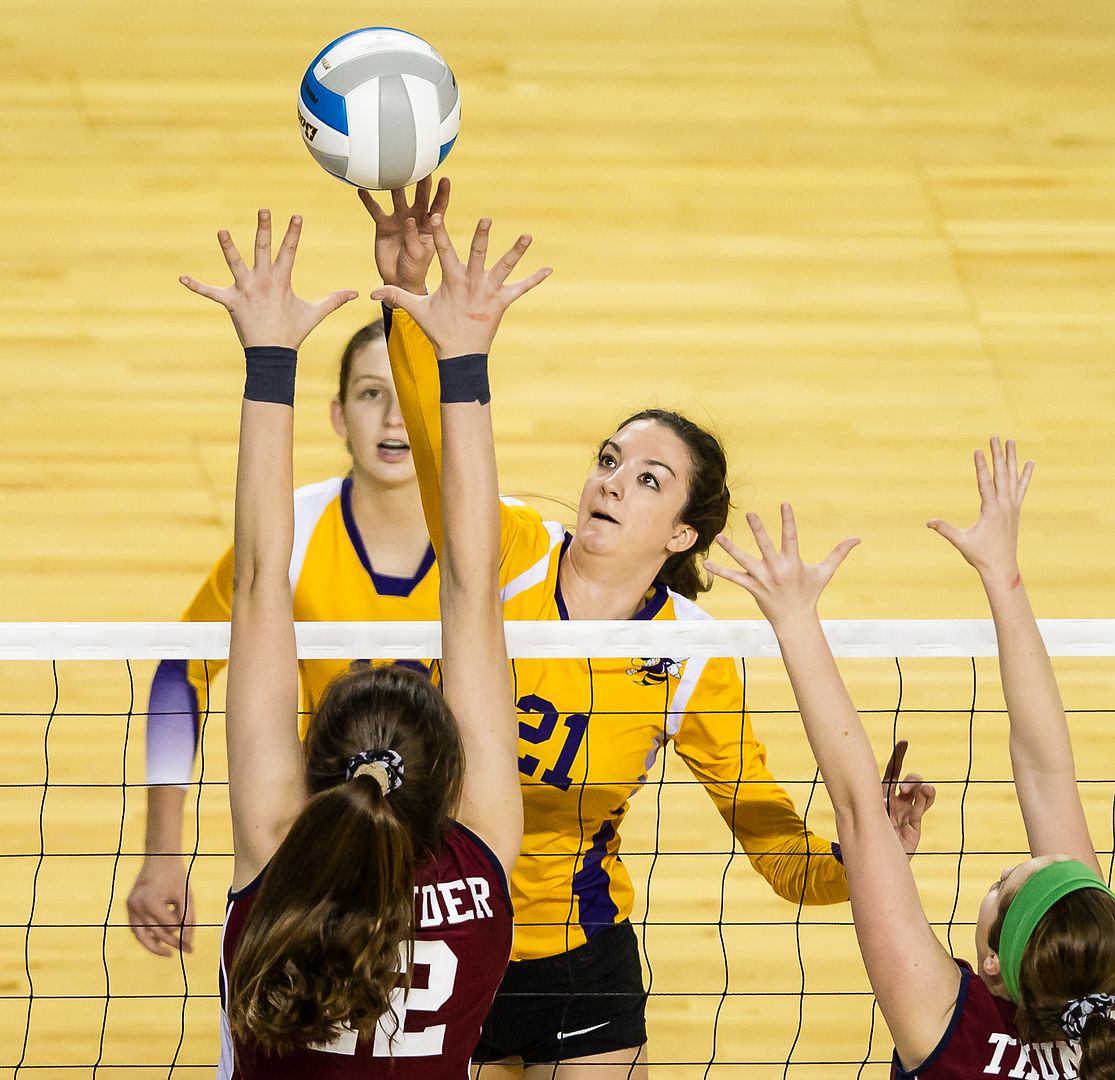
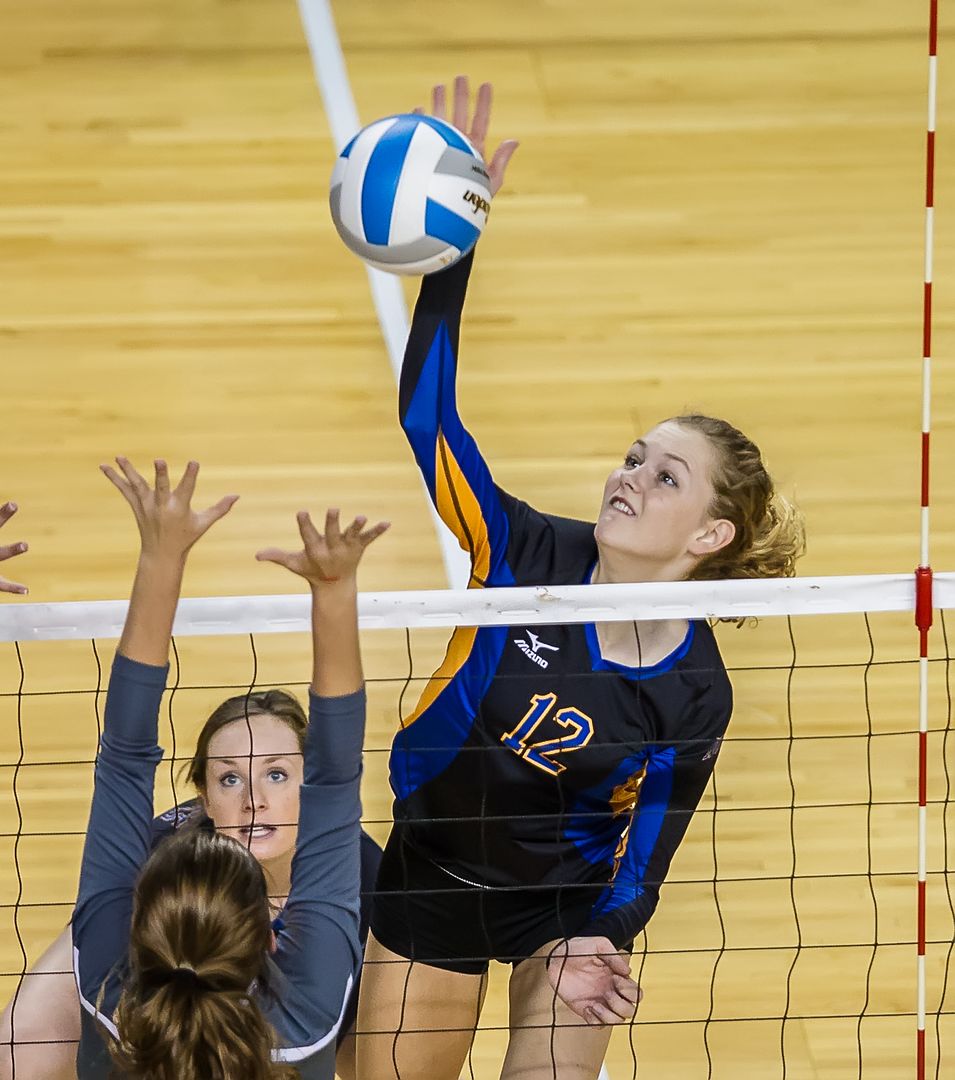
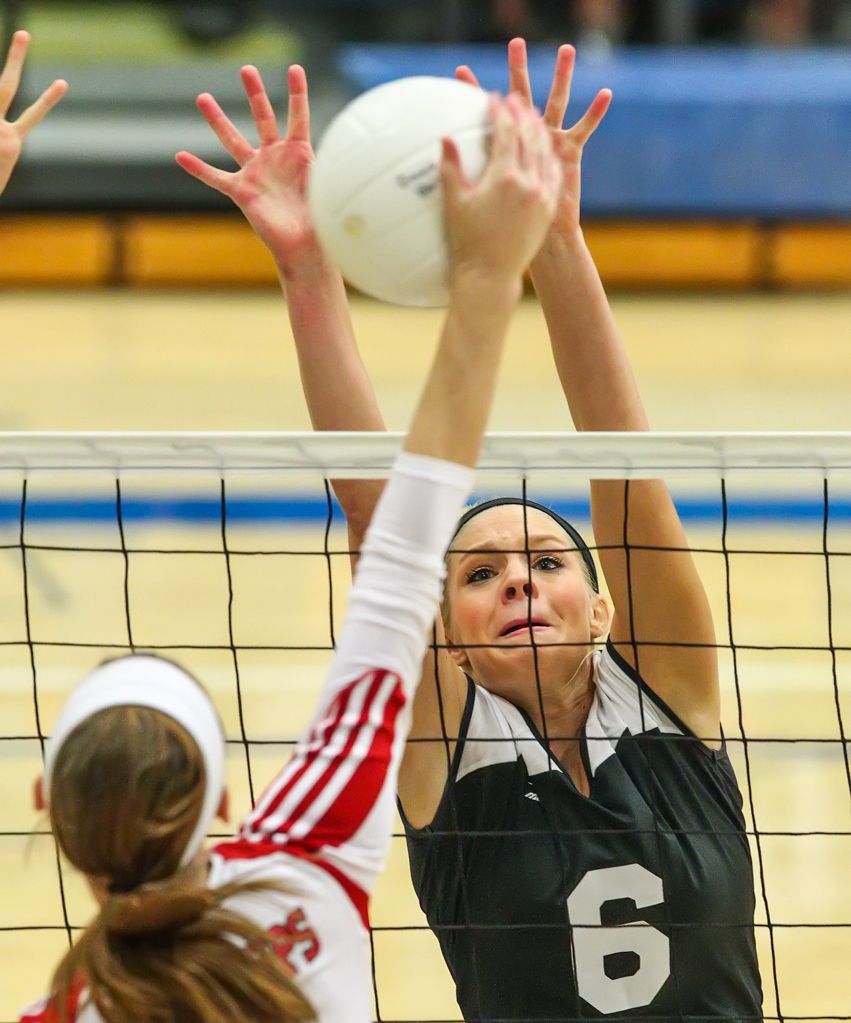
The block has challenges similar to the spike. Try focusing through the net. However, since the blockers are positioned at the net, using a low focal point to focus on the legs may work in a pinch if the auto focus locks on the netting. Use back button focus to pre-focus (use the leg trick only if necessary) and adjust as needed. Don’t forget to frame the shot with space at the top. Blockers often come in pairs and rarely, a trio. Middles are often key blockers. They are usually tall and part of the strategy is to have the middle join an outside to block a spike. A good offense will try to deceive the middle into being out of position. Their goal is to have the spiker hitting against a single blocker rather than a pair of defenders. The tempo and direction of the set is part of that deception.
L-- 1D Mark IV, f/2.8, 400mm, 1/1250, ISO 6400
R-- 1D X, f/3.5, 300mm, 1/1250, 12,800
Jube
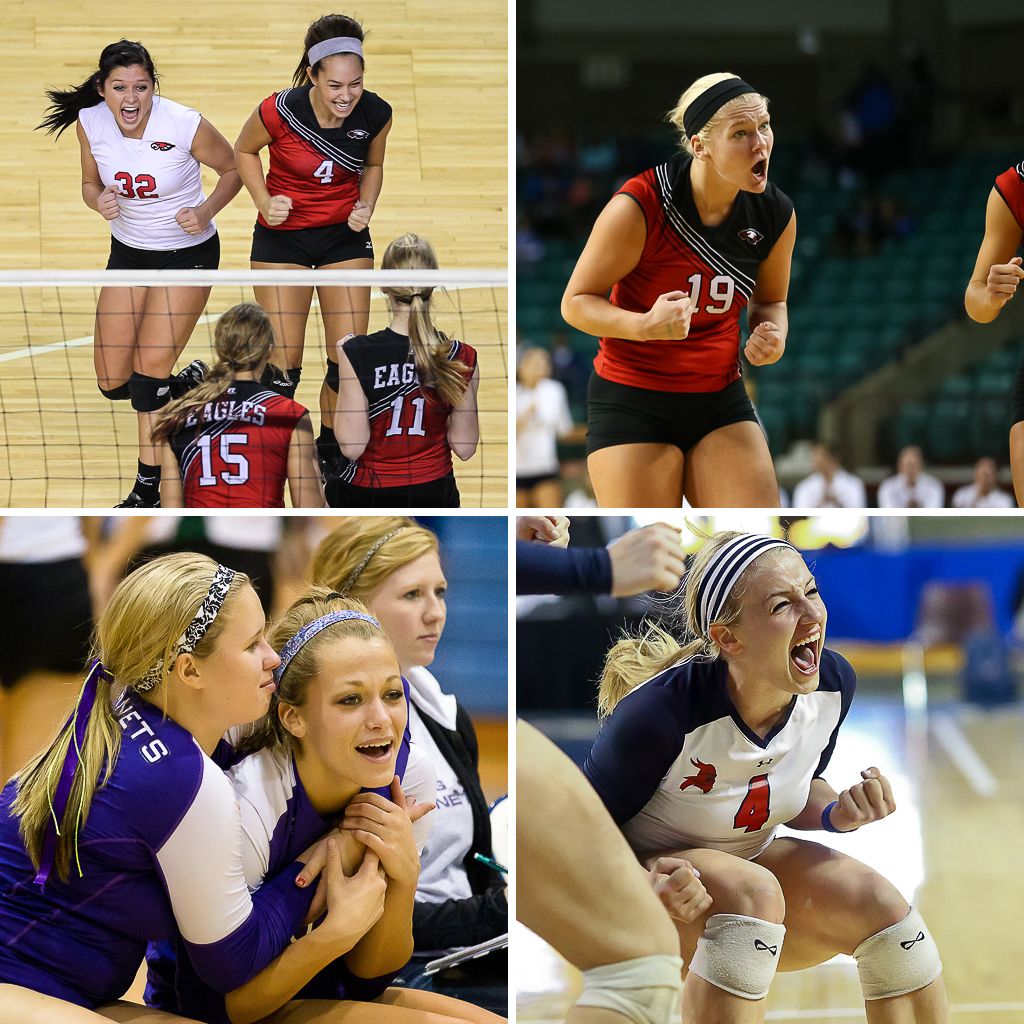
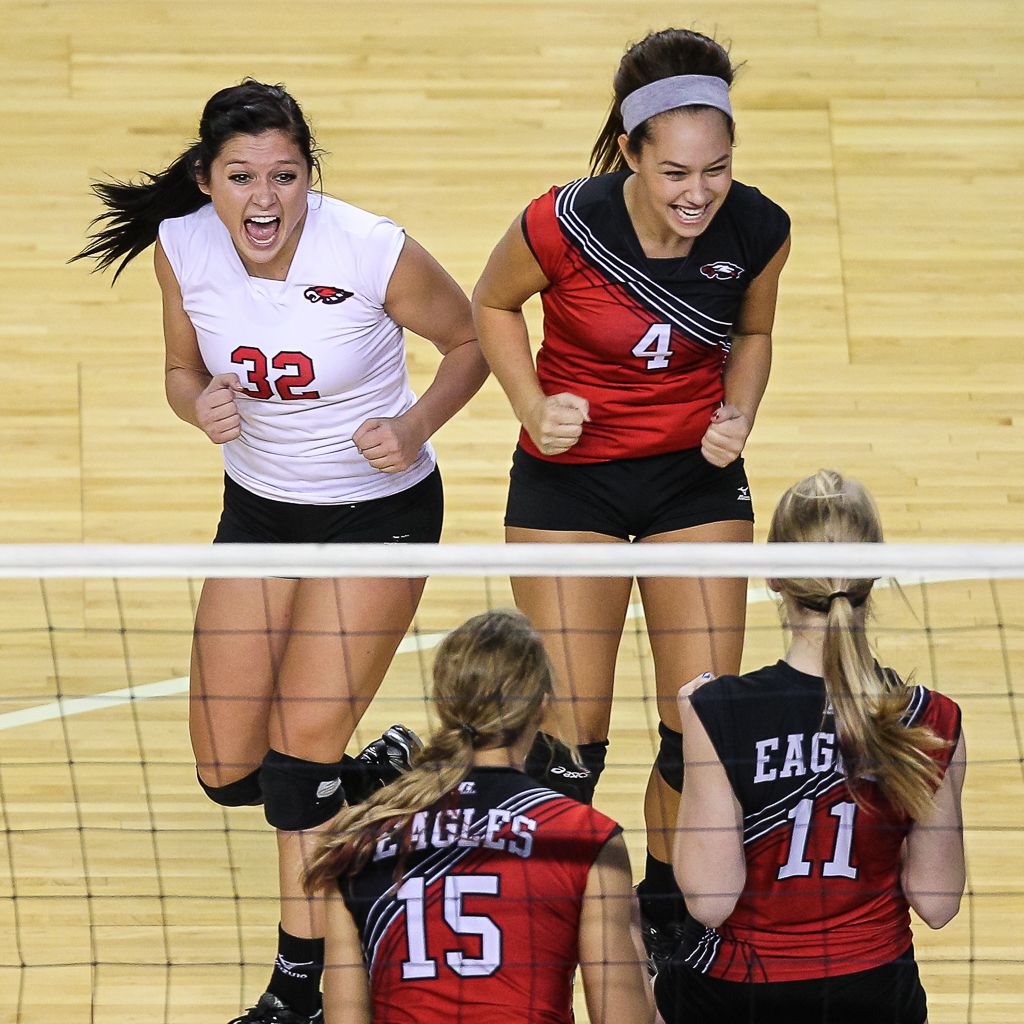
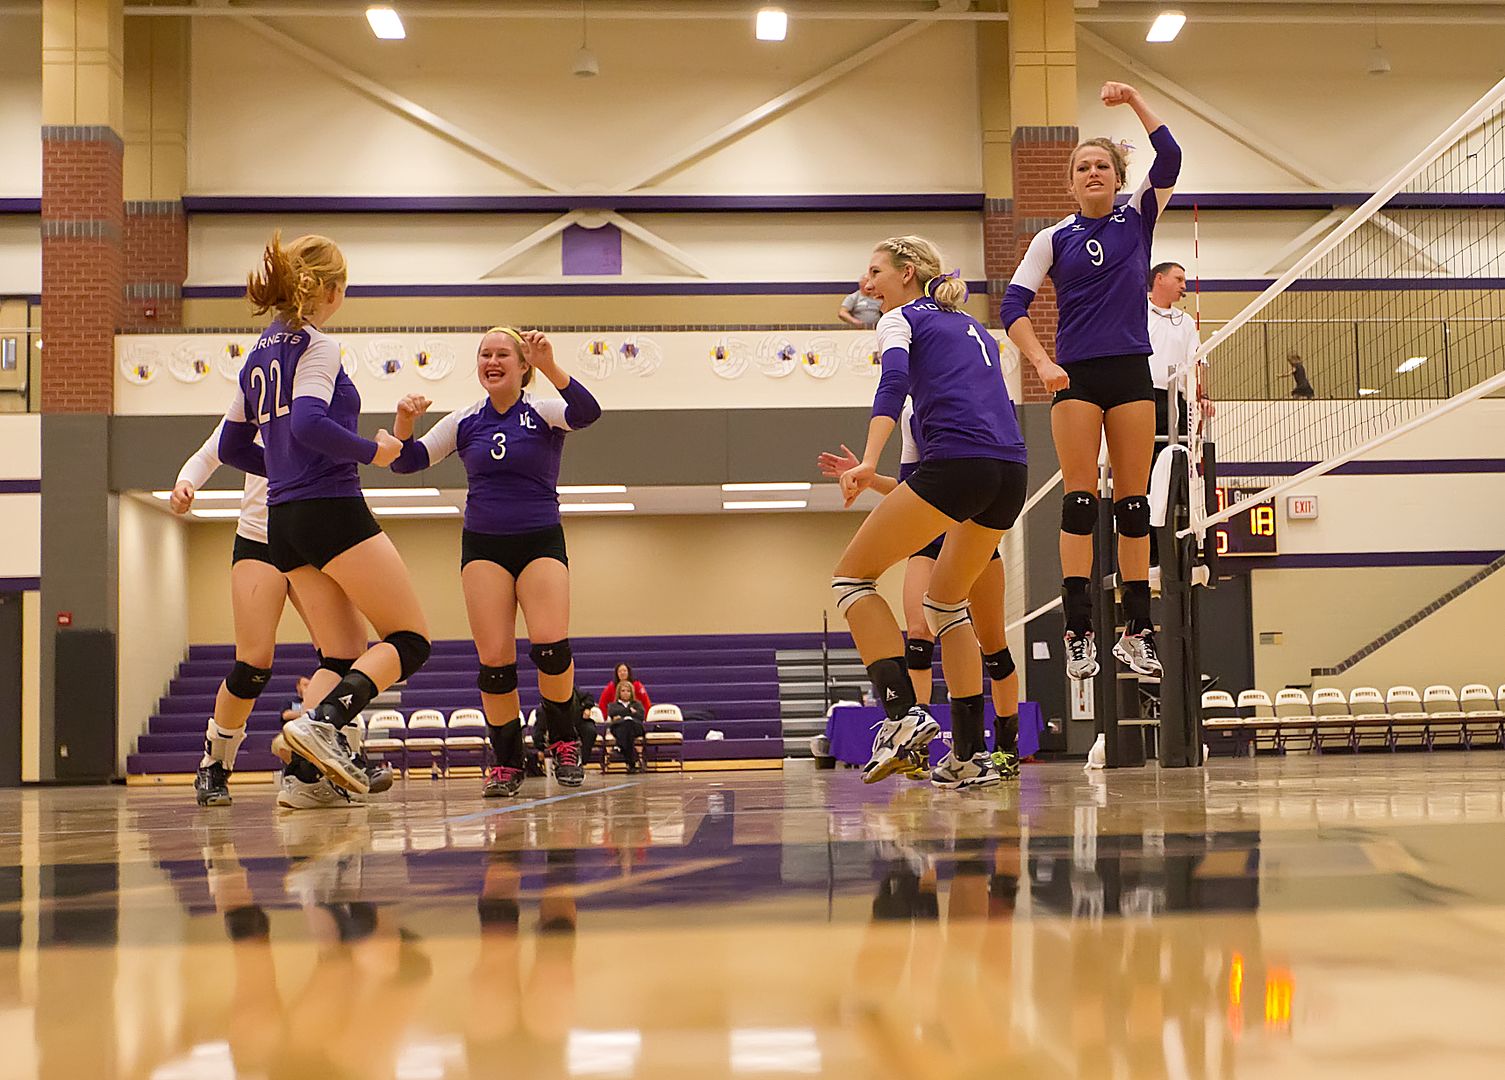
Volleyball has jube (jubilation or celebration) that is as good or better than any high school sport. Capturing that jube isn’t hard, it just requires the photographer seek it out. Every team will have one or more players who are exceptionally expressive. Take note of who they are during the games. When it gets to the final 2-4 points in a close game, I will stop shooting action and begin focusing almost exclusively on emotional jube shots. The proper time to switch will be marked by a soaring intensity that is unmistakable. Sometimes the celebrations will be directed at teammates and other times toward the coach/bench. Try positioning yourself behind the bench (emotion is often expressed in that direction), track the most animated player(s) and get those emotional peaks and valleys recorded. Get close and fire away in short bursts. After that last point, move around. Include the coaches if possible. Group and individual shots both work. Make the viewer of your images feel the joy and excitement. These shots are a must have.
UL-- 1D Mark IV, f/2.8, 400mm, 1/1000, ISO 1600
UR-- 1D X, f/2.8, 140mm, 1/1000, ISO 3200
LL-- 1D Mark IV, f/2.8, 200mm, 1/1000, ISO 6400
LR-- 1D Mark IV, f/2.8, 135mm, 1/1000, ISO 6400
The Event
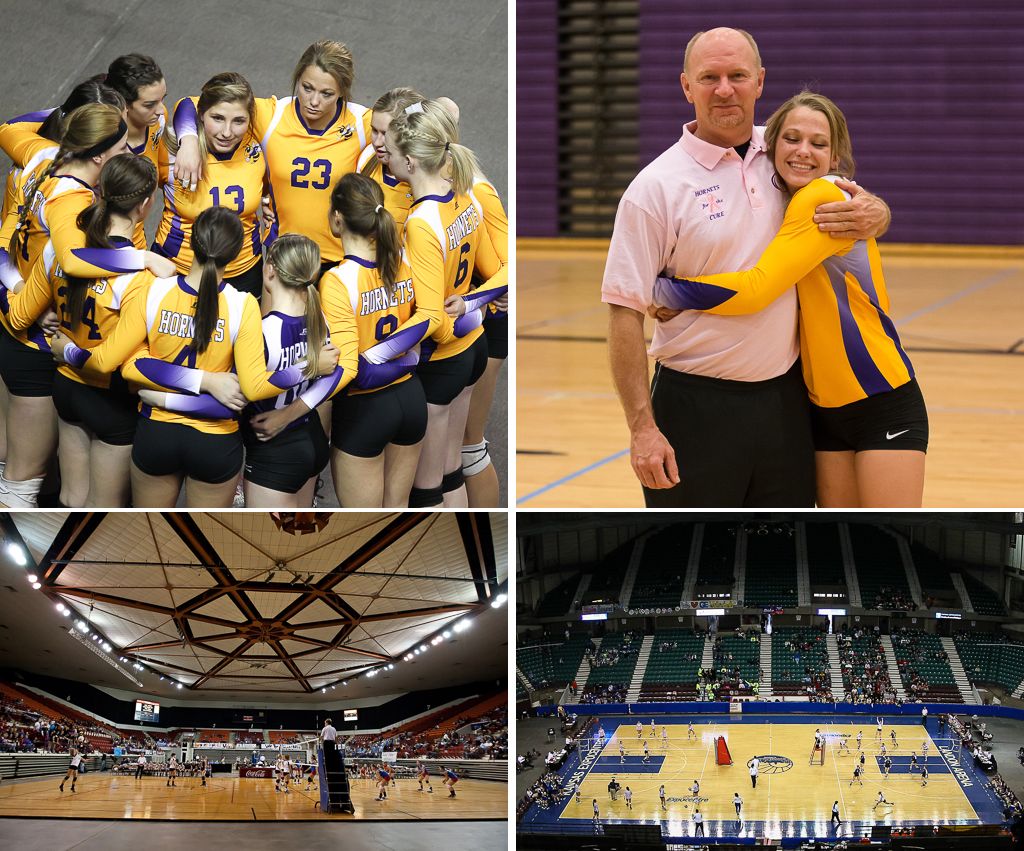
There is a photo story behind and around every match. The venue, cheerleaders, fans, timeouts, faces in the crowd, anything associated with the contest can be a source for an image. Supply the viewer with an experience of the event.
UL-- 1D Mark IV, f/2.8, 400mm, 1/640, ISO 2000
UR-- 1D X, f/2.8, 70mm, 1/1000, ISO 6400
LR-- 1D Mark IV, f/4.0, 15mm, 1/800, ISO 3200
LL-- 1D Mark III, f/2.8, 16mm, 1/800. ISO 3200
Nitty Gritty
The tutorial so far has covered great ways to get the typical shots in volleyball.
BUT... ... . Something’s missing.
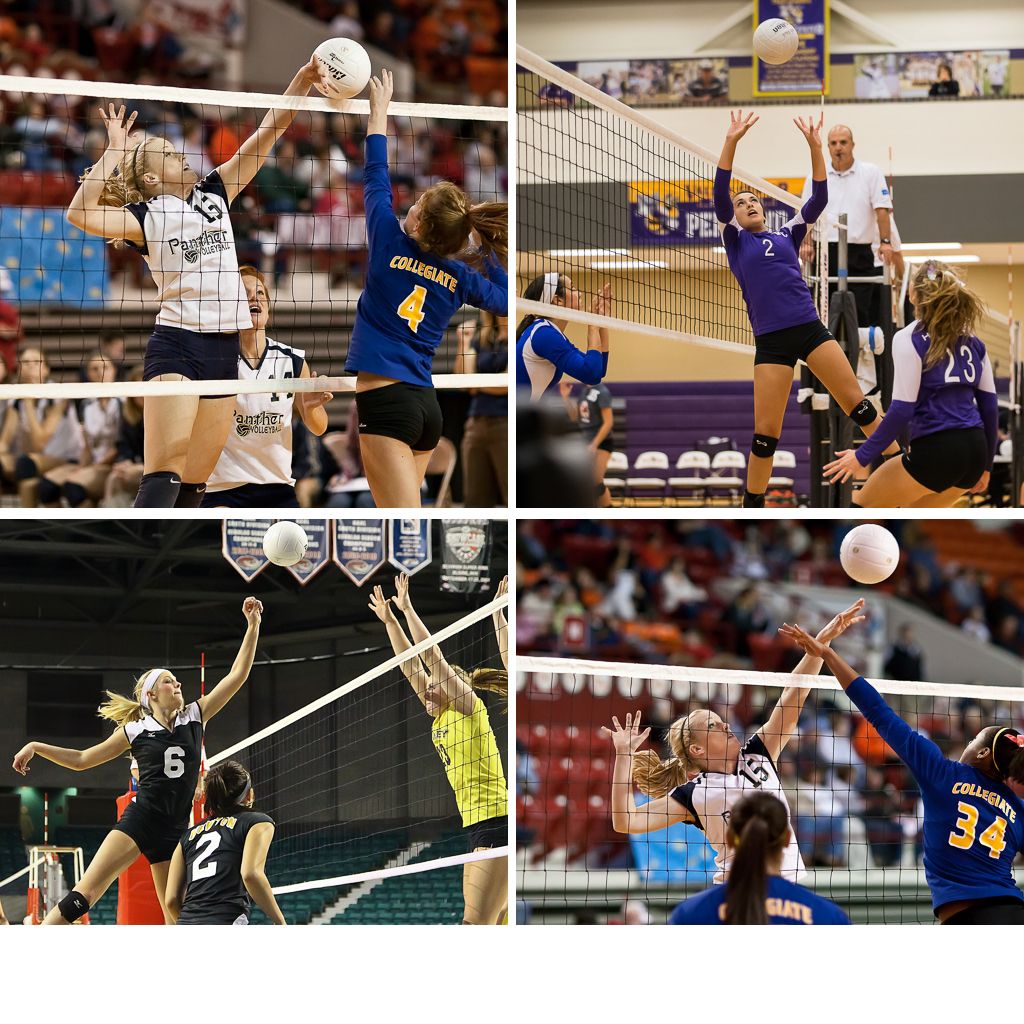
What’s missing is the heart, the soul, the hand to hand combat aspect of the game. There is something powerful, vibrant and dynamic about images where you get physically close to the action and capture net play when two or more players are battling at or above the net. Get low to the floor, be as close as permitted, use medium focal lengths and shoot when the peak action is in close quarters at the net. Focus can be tough, faces difficult to see, other players can block your view, access can be hard or impossible to get, plus there is no guarantee you’ll get a great shot anyway. Nonetheless, it is worth the try--especially on teams that have active, talented, middle hitters. The action will be fast and a responsive camera body and lens really help. Don’t try to shoot the outside hitter on the far side of the court. Too far away. Find closer action. If you are sitting on the side next to the strong side outside hitter, try a wide angle view of her spike when the opponents are doing a double block. You won’t see the face of the spiker but she will seem to be 10 feet in the air and the blockers will be prominent in the image. It’s fun to try this shot.
You can tell I love the nitty gritty part of the game. Just know that it can be frustrating to capture. Start with the conventional shots. Add these for spice.
UL, LR-- 1D Mark III, f/2.2, 135mm, 1/1000, ISO 3200
UR-- 1D X, f/2.8, 102mm, 1/800, iSO 6400
LL-- 1D Mark IV, f/4.5, 65mm, 1/1000, ISO 12,800
Lighting, Gear, Camera Settings, and Venues
Light has a huge role in determining which camera bodies and lenses can be used as well as affecting the final image quality. There is rarely any excess quantity of light and that drives the exposure settings. Use f/2.8 lenses (or faster) if at all possible. An f/4.0 lens will have half as much light to focus, require either a slower SS or higher ISO, and have a wider depth of field (dof). A 70-200mm f/2.8 lens is a great place to start for volleyball and much of sports photography in general. Since I use a variety of focal lengths, my lenses for volleyball are now all f/2.8. Shooters on a tight budget may want to try the 85mm f/1.8, the wonderful 135mm f/2.0 or other fast primes they already own. Ultra large apertures bring in more light but at the expense of a very shallow depth of field. My images are made exclusively with Canon gear but Nikon makes excellent products as well. Don’t change brands to chase the latest offering from a manufacturer. Trading lenses to match the body is far too large a hassle. I prefer a SS of 1/1000 and that speed will allow you to read the ball. Slightly slower is OK, especially for non-telephoto focal lengths. Use a SS of at least 1/640 unless you choose slower speeds for artistic reasons or because low light and high ISO noise force it. Camera bodies that have good image quality at ISO 6400 are wonderful and increasingly available for modest budgets. ISO 3200 at f/2.8 will work if the lighting is above average. Take a few test shots to determine your exposure settings and then enter those in Manual mode. I use the histogram and chimp on the lcd to evaluate the exposure. Expose to the right but don’t burn out the highlights. If you don’t use the histogram or don’t know how to use it, learn and use it now. That knowledge will help in all of your photography, not just volleyball, to properly expose and post process your images.
Mandates for energy efficiency have been a boon to lighting advances. Light is getting brighter with improved color rendering at many facilities in the US. Notice the photos on the right side of the jube shots above. They were shot at the same venue (a large arena), at almost exactly the same spot but a year apart. The LR image was taken in 2011 and the UR 2012. Improved lighting not only added a full stop of light but the improvement in skin tones (and other colors) is unmistakable. It was obvious to me just walking in the door that something had changed for the better. The skin tones in the earlier year appeared jaundiced even to the naked eye. The next year was great. Too many sports photographers consider only the quantity of light but not the quality of the light spectrum. We all know that golden hour light produces superior image quality when shooting outdoors but fail to consider that indoor light quality can vary as well.
These improvements are happening in high schools both old and new. Many of my older 1D Mark III images here were taken using 4 Alien Bee B800 strobes bounced off the ceiling. With the combination of improved lighting and camera sensor technology, I haven’t shot VB with strobes since 2010. Hurray! Some leagues never allowed flash anyway. That strobing experience has been helpful to me because timing the one exposure is crucial with strobes. Skillful timing helps even if you shoot in a 2 or 3 frame burst. Prior to the season, I’ll attend a practice or two and shoot single shots just to work on my timing. A Canon 70D will have a shutter lag of 65 milliseconds compared to a 1D X at only 36 milliseconds. That lag, along with your reaction time, must be accounted for in your technique. The adjustment will come quickly but if you don’t practice, you might find the exposures in your first match are just a tad too late.
All my shooting is done in RAW. I know some of you shoot for a newspaper on a deadline and need jpeg and if so, fine. If you have a choice, shoot RAW. Light cycling, noise, lighting spectra and changes in light because of brightly illuminated electronic billboards can all demand correction is post and RAW will do that best.
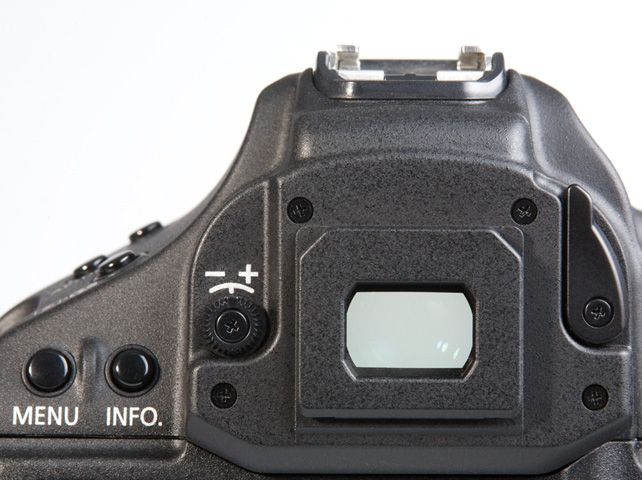
When you are focusing through the net, be sure to experiment with the number of auxiliary focus points, sensitivity, and switching speed for your auto focus. Since you are likely to be using large apertures, the shallow dof will reveal when the focus is on the net rather than the player. The brightness of the background and uniforms compared to the black netting can also affect which setting will track players best. Be sure the camera dioptric adjustment is set for your eyes so you can tell, in the viewfinder, when the focus strays. Being able to discern when focus leaves a player and locks on the net isn’t easy but it is hugely helpful in boosting your ‘keeper’ rate.
At a new venue, take a minute to assess where you can stand/sit/kneel, the backgrounds available, and what types of shots you can get. Most likely, you can’t get them all. Optimize the backgrounds for color, cleanliness, and setting. Nobody captures every type of shot at a single match. Capture what you can. Make a plan. Since it is unlikely that you will have access to both sides of the court, the setter will face your side for one game and have her back to you during the other game when the teams switch sides. The same issue (reversed) will apply to the serve shots. Decide when/how you want to capture those shots and front line action vs back row and remember to get some jube if the games are tight. Study your results, learn from them, modify your plan for next time, and keep shooting.
Don’t forget to have fun! You are there to capture young people totally alive and fully engaged during an event conducted for sport. Let their joy and enthusiasm infuse you and your images.
Phil Zivnuska
Samples: Find the types of images you like and replicate them in your gym with your team.
http://photography-on-the.net/forum/showthread.php?t=1224971
http://photography-on-the.net/forum/showthread.php?t=1232710
http://photography-on-the.net/forum/showthread.php?t=1226359
http://photography-on-the.net/forum/showthread.php?t=1221560
http://photography-on-the.net/forum/showthread.php?t=938979
http://photography-on-the.net/forum/showthread.php?t=775247
copyright 2013 Philip S. Zivnuska
zivnuska.zenfolio.com
Bonus Tip
Shooting through the net is always a challenge. Here's a tip to help. When you shoot through a net, the net is typically black. Camera focusing systems like to grab onto the contrast between the black net and a bright uniform and shift the focus to that net. Consider the following two photos:
1/1000 sec. f/2.8 400mm ISO 6400
1/1000 sec. f/2.8 300mm ISO 6400
Notice that the net is nearly invisible against the dark blue or the black uniform. At the same time, the netting is clearly visible against the light colored floor. Use that fact as part of your focusing strategy. When there are dark uniforms, place your focus point in the middle of the uniform where there is no contrast with the net and the net is essentially invisible for the camera. The only contrast available is from the bright number of the player and that's good.
Life gets more difficult with light uniforms.
1/1000 sec. f/2.8 300mm ISO 6400
In this case, I will focus on the black shorts, black knee pads or even black shoes just to avoid having the focus jump to the net. This won't work every time (At least not for me!) but it helps improve the odds when focusing is just plain tough.
A few more things. Try using few, if any, auxiliary focus points. I use four. The more aux focus points the more likely the camera will find something other than the player to focus upon. On a blocking shot, like the above, if the blockers are standing in position, I will try to get the focus on the player(s) (in this case I used the black shorts as my target) and then release the back button (thereby holding the focus) as I raise my framing to get the tops of the hands for the block and fire the shutter button.
Please don't think these ideas are fool proof. This photographer has plenty of out of focus shots to prove I've been fooled plenty of times! Volleyball photography is a challenge and it can get extremely challenging when long focal lengths and larger apertures combine to produce a tiny depth of field.
Phil Zivnuska
Once you master the rules, you are ready to break the rules.
]]>
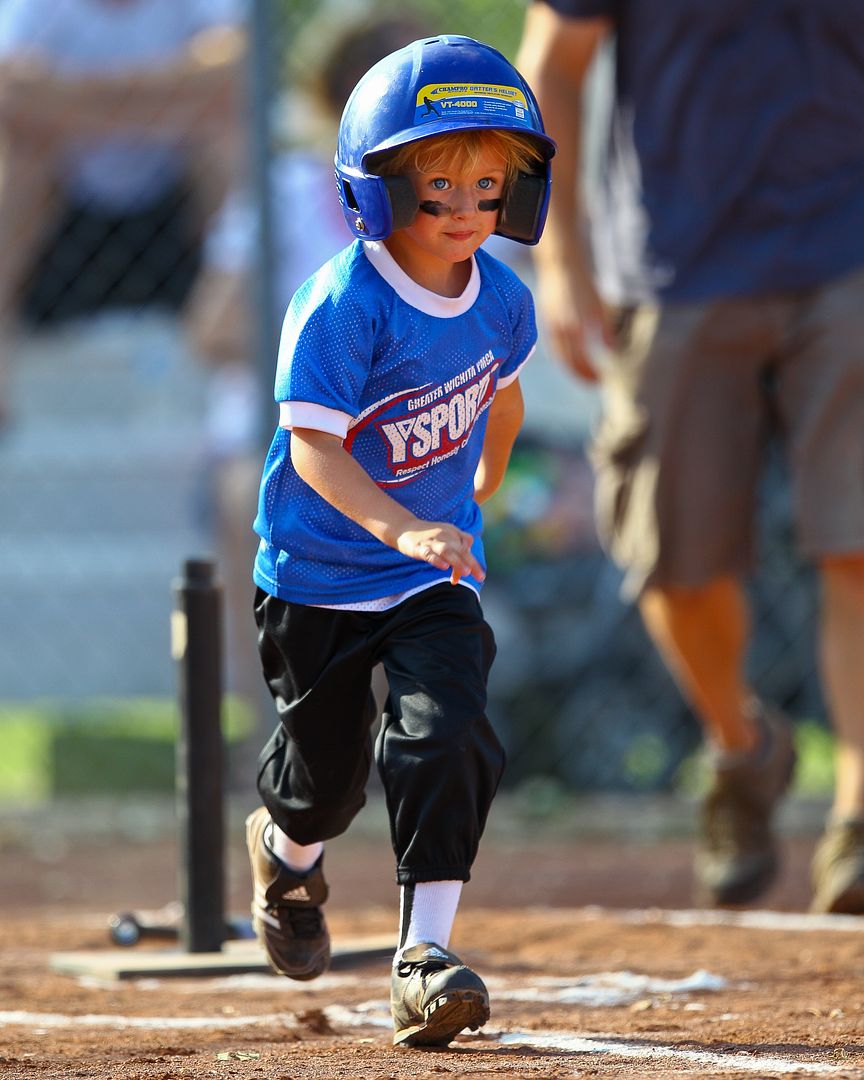
Getting low creates an upward angle for your shots and that makes the athletes seem larger and more impressive. The shorter the athlete, the more important it is to get low. Parents of little children, this means YOU! Sit down to shoot the little ones whether they are in an organized sport or just playing with the dog. BTW, there is nothing more fun than shooting the first t-ball game.
1/1250 sec, f/2.8, 400mm, ISO 200, Canon 1D Mark IV, Canon EF 400mm f/2.8L IS
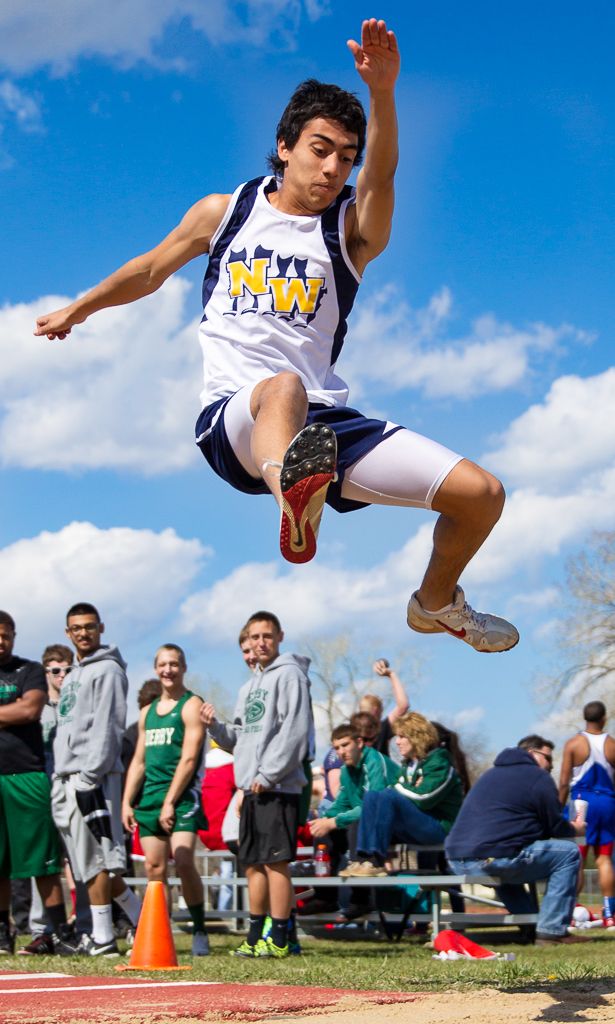
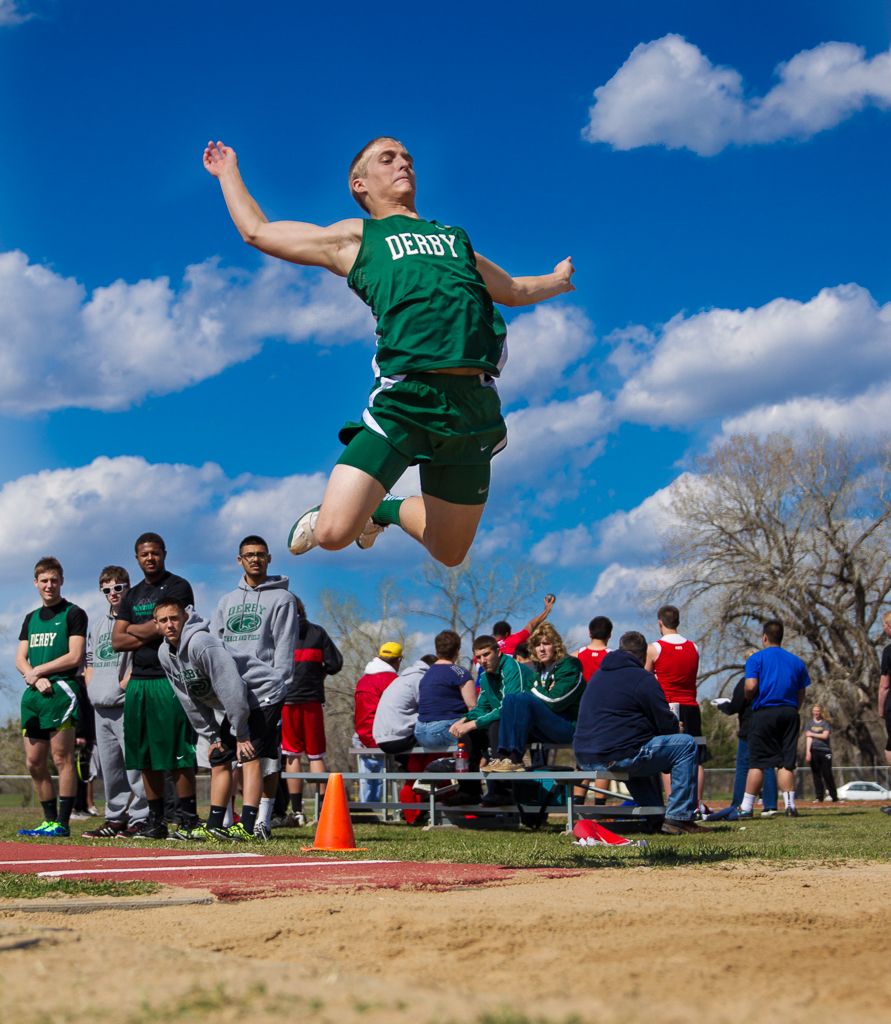
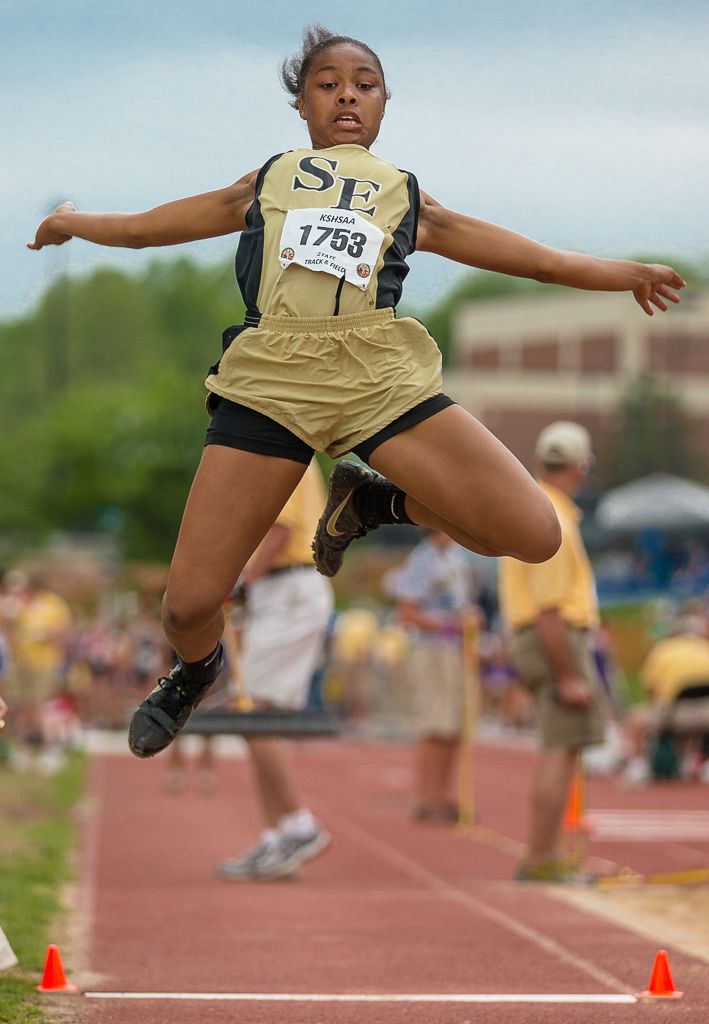
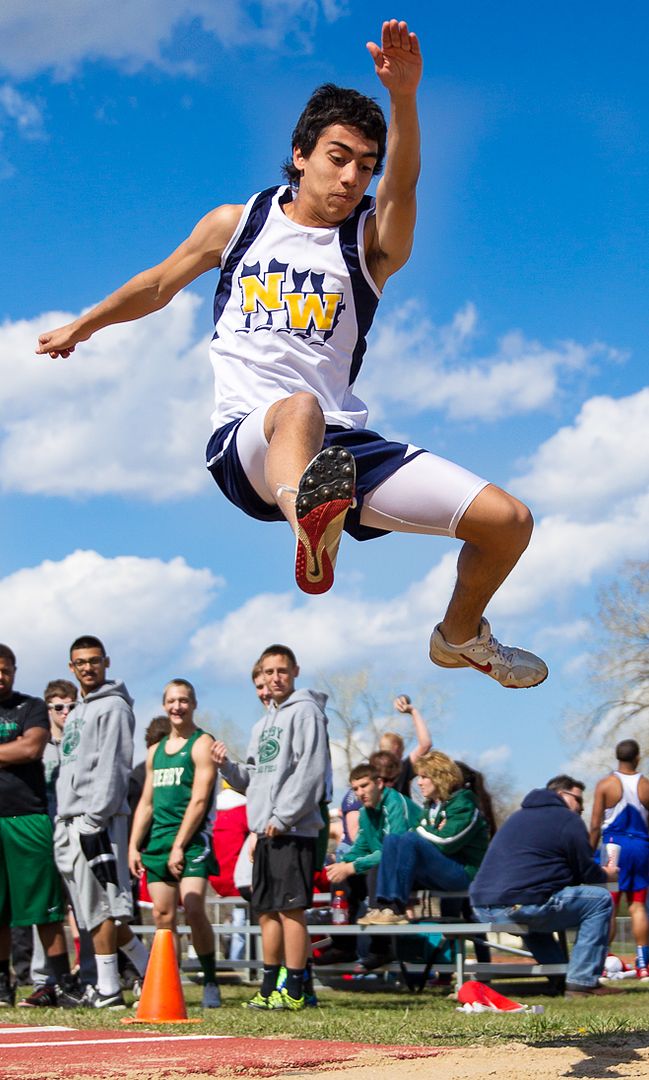
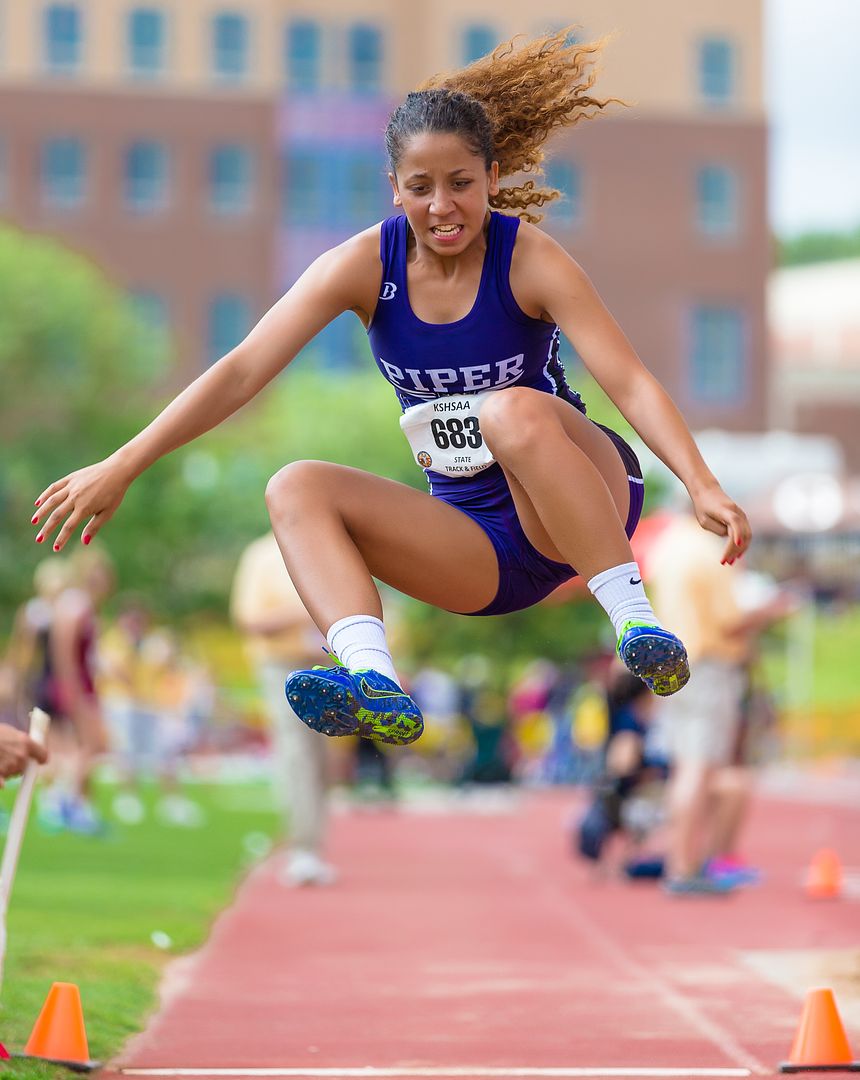
Sometimes, I'll even lay on the ground just to be able to shoot up at the athlete. Here I wanted to view the long jumper against a lovely sky instead of a cluttered background. My head is barely a foot to the side of the rake used to smooth the pit. That position to the side also enabled me to shoot with the sun at a better angle (at my back) compared to the shots I was able to get just sitting at the end of the pit looking up the runway. Those images had a much more pronounced sun/shadow line running through the middle of the face/body.
1/1250 sec, f/2.8, 35mm, ISO 100, Canon 1D Mark IV, Canon EF 24-70 f/2.8L II
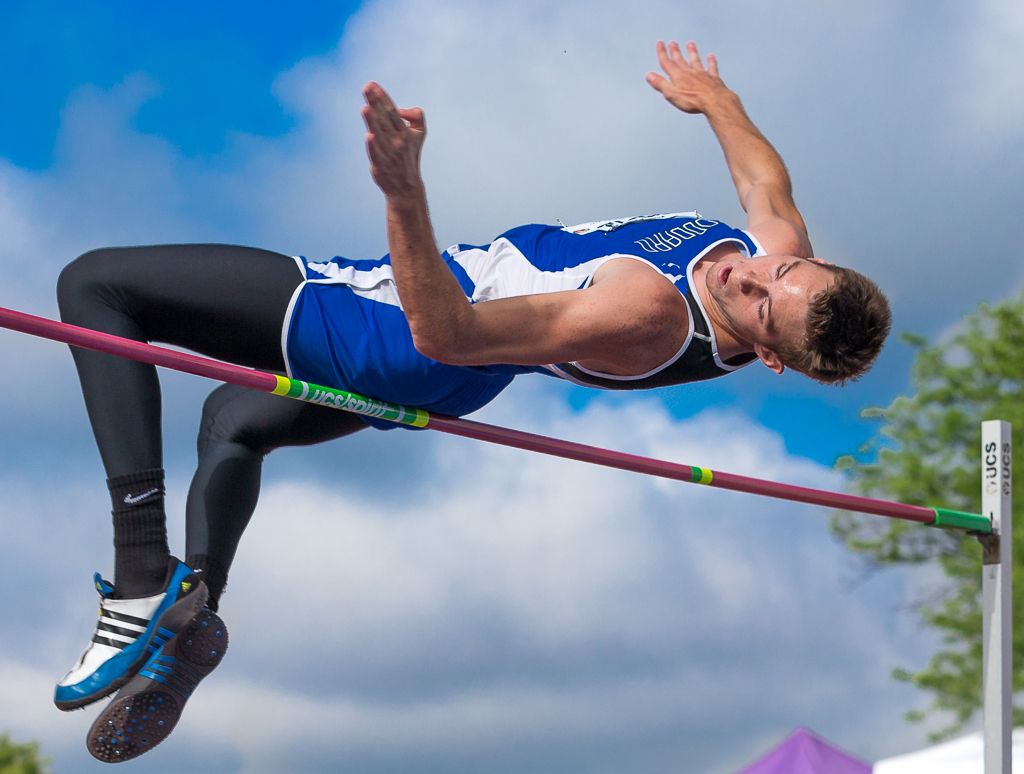
Additionally, having a unique angle to your images will make them more interesting to the viewer. Your pics should show them something they don't normally see. Sometimes that can be an overhead perspective but often a low angle will turn a good image into a "WOW" shot. Just be sure to avoid the cardinal sin of being boring.
1/1000 sec, f/2.8, 182mm, ISO 3200, Canon 1D X, Canon 70-200 f/2.8L IS II
Phil Zivnuska
www.zivnuska.zenfolio.com
]]>
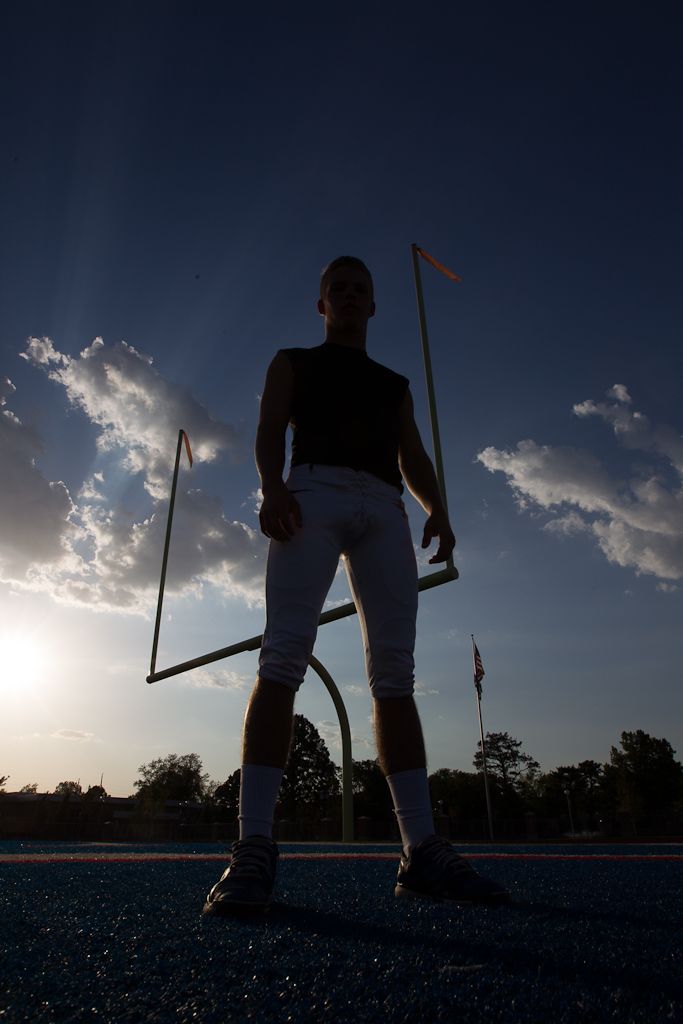
Consider the following image. My task was to take a photo of two football players who were small in stature but were large in importance to their team. In order to check exposure on the sky, I took a shot with one of the players. It is straight out of the camera after importing into Lightroom.
As you can see, the sky was darker than desired and the player was almost totally black. It was only a test image to meter the sky but since it was taken in RAW, it was an interesting challenge to see how much detail could be recovered. The answer was, quite a bit. Lots more than anyone would expect from a badly exposed photo.
Take a look at the skin tones and especially the shoes. Yes, it's the same image. The adjustments were done in Lightroom. Everything visible in #2 was present in the RAW file of #1. If that level of transformation is possible on a poor exposure, just think of what is possible for a properly exposed image. Some may claim that they always get the perfect image straight out of the camera and therefore don't need to process with RAW but I submit that in most situations, it is impossible to control all the factors that go into a good photograph. One other thing to consider is that even if you are happy with your image now and you currently don't have the post processing skills to improve your picture, non-destructive processing in Lightroom, Aperture, etc. will allow you to go back years from now and give new life and perhaps an alternative interpretation of an old image. There are other reasons for using RAW but those will have to wait for another blog post.
The final image used a gelled speedlight (580 EX II, 1/2 CTO gel) to obtain the following shot:
3.
1/300 sec, f/10, 16mm, ISO 100, Flash, Canon 1D Mark IV, Canon EF 16-35mm f/2.8 L II
Phil Zivnuska
]]>
BTW, that thing you always wanted to do? Get it done. Now.
Phil Zivnuska
]]>
Compared to an f/4.0 lens, the f/2.8 lens will let in twice as much light and that light can be used to increase shutter speed, lower ISO, or both. Indoor sports or outdoor events in low light can push the image quality capabilities of a camera body to the limits. Having the ability to get twice as much light is a good thing. BTW, compared to an f/5.6 lens, the 2.8 will garner four times as much light.
There are three other reasons that are important. First, the faster lens supplies more light for focusing. Even if the lens is shot at f/22, the lens supplies focusing light based upon its largest aperture i.e. f/2.8. That's extremely helpful in low light levels. The second reason is bokeh. The wider the aperture used, the smaller the depth of field (dof) and the better the bokeh compared to small apertures. That can be vital when the backgrounds are busy and distracting. To be a bit crude, a soft blue glow in the background is much better than a port-o-potty in sharp focus. Last, the fast super telephoto lens can be used with a 1.4 or 2.0 teleconverter and most camera bodies will still be able to focus.
Gathering more light means larger diameter lenses with more glass and that means heavier. Remember, you don't have to shoot at the maximum aperture to get the extra light for focusing. You the photographer are in control of your gear and hence, your image.
[I hope you won't mind looking at some young ladies in addition to traditional sports images]
1/1000 sec. f/2.8, 35mm, ISO 3200, Canon 1D Mark IV, Canon EF 16-35mm f/2.8L II
1/1250 sec. f/2.8, 38mm, ISO 100, Canon 1D Mark IV, Canon EF 24-70 f/2.8L II
1/2500 sec. f/2.8, 200mm, ISO 1600, Canon 1D Mark III, Canon EF 70-200mm f/2.8L IS
Fast lenses have uses beyond sports. These two high school ladies are playing the wicked step sisters of Cinderella in the school play.
1/500 sec. f/2.8, 300mm, ISO 3200, Canon 1D Mark III, Canon EF 300mm f/2.8L IS
1/1000 sec. f/2.8, 400mm, ISO 640, Canon 1D X, Canon EF 400mm f/2.8L IS
Don't forget, just because it is an f/2.8 lens, that doesn't mean you have to shoot at that aperture. Fast L lenses are high quality at any aperture.
1/250 sec. f/5.6, 35mm, ISO 100, Canon 1D Mark IV, Canon EF 16-35mm f/2.8L II, 580 EX II with hand-held Rogue Flashbender
One last thought. Used lenses can give great value. My first 400mm, an f/2.8L IS was purchased used. I had it for three years, used it heavily, and sold it for the same price I paid. I then purchased a flawless Canon 400mm f/2.8L IS II used and saved well over $1,000 compared to a new one. That's the lens I use today. Buying and later selling a used Canon EF 400mm f/2.8L IS can be justified if the net cost is below what an occasional rental would cost. The similar calculation can be made for any of the 'Big White' super telephotos. Consider that if your circumstances permit.
Phil Zivnuska
]]>
Burst shooting is a valid photographic technique. Which one of the following images would you have captured using a one shot technique?
]]>
Jubilation: noun A feeling of great happiness or triumph.
Jube
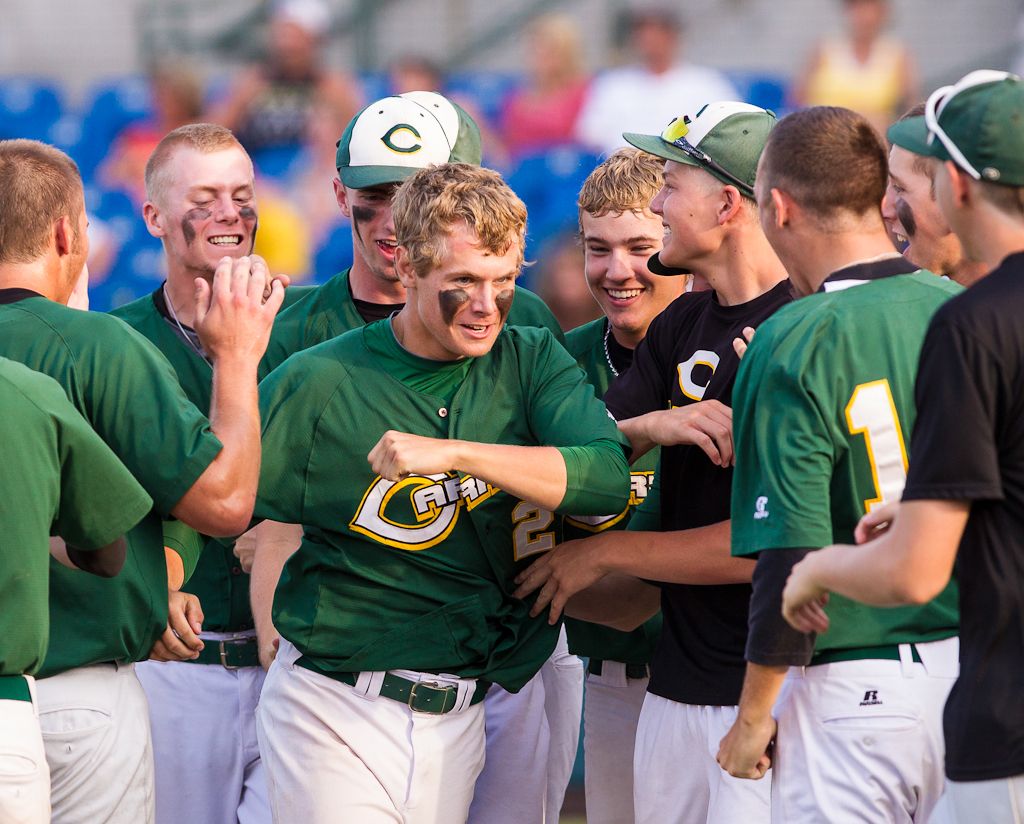
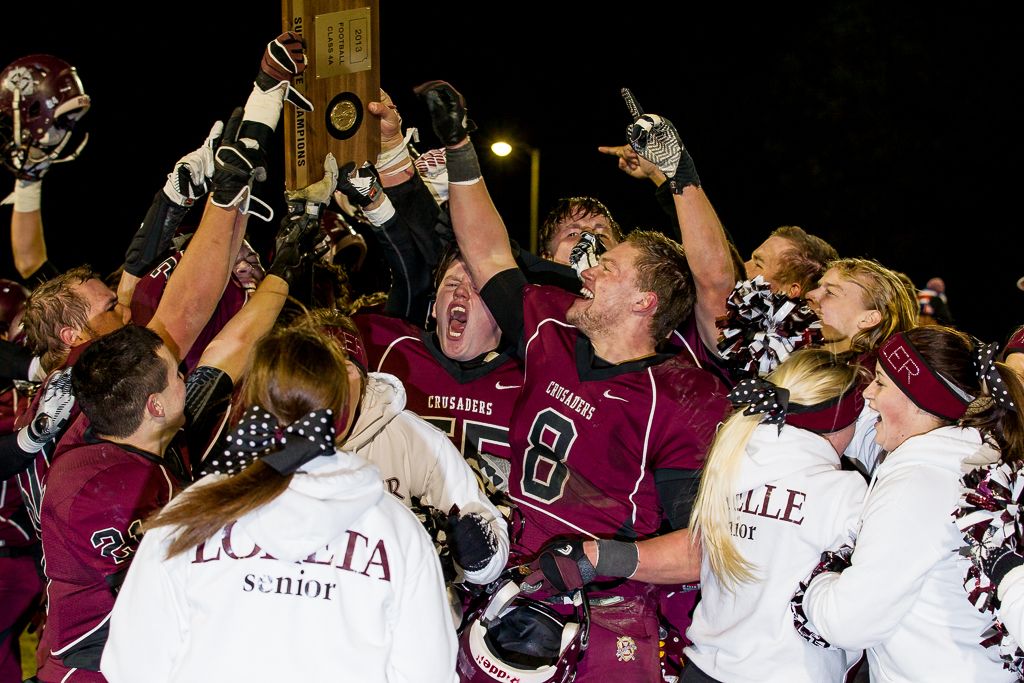
Shots of 'Jube' or jubilation are vastly underestimated in importance for many sports photographers. If you are submitting your photographs to a newspaper, magazine or even a high school yearbook, don't be surprised if an image of celebration gets top billing over your action shots. A good way to check and see what images are selling is to check the ESPN photo wire.
espn.go.com/espn/photos
You may be surprised to see how often it is the reaction rather than the action that is the image that gets chosen to tell the story.
If you are shooting a hard fought or important game, there is a good chance there will be good jube shots near the end of that game. It's often more important to position yourself to capture that than to shoot the last minute of the game. So, position yourself to capture jube. In some sports, that's relatively easy. In volleyball, there is usually one or two players who are especially expressive. When a close game gets near the end, stay focused on those players and be ready to react as they do. The players will often face the bench as they react in pure jubilation.
They will react individually:
Or in groups.
And it can be in any sport.
Jube photos tell the story of the game as well as action photos. Be sure to include them in your gallery of the game.
Phil Zivnuska
]]>
If your angle to the net is less than 30 degrees, you risk being blocked out by the spiking arm. Generally, the spiker's eyes will not go past 80 degrees on the follow through. Obviously, these rules must be adjusted for a left handed spiker. Since I typically won't move to shoot the spiker on the right side, I often shoot from about a 60 degree angle. Try different angles and see how your results work.
Phil Zivnuska
]]>Everyone needs someone to critically evaluate their work. In effect, everyone needs an editor or someone who can look at your images with fresh eyes. This is due to several reasons. We all tend to get in a rut where we make the same mistakes over and over. I see this from photographers who only shoot landscape or just portrait orientation. It can be something we do such as chronically making the white balance too warm or saturation too high on our galleries. On the other hand, it may be something we omit such as the failure to include jube shots or emotional shots of the coaches or fans. Your eyes may lock on the compelling action in an image and fail to notice that you are not paying enough attention to the cluttered backgrounds. Mentors can be hugely helpful in these cases.
The role of mentor is not to be taken lightly. To do this properly, time is required to really look at your photos in detail. Then the mentor must be willing to take the time and effort required to offer a detailed critique. When I say critique, understand that I'm not referring to criticism alone. A proper evaluation should include the positive aspects as well as the negative. We all have egos and an unrelenting barrage of complaints won't be helpful for long. This is something to remember when you are mentoring as well as being mentored. There is an old rule of thumb that says when critiquing, one should start with two things you like about the image(s) before starting in on the items to improve upon for the next shoot. Ideally, this should be someone with a breadth of experience.
Where can you get one of these people who will offer their time and expertise for no money? Surprisingly, there are lots of folks who will do this in the photography community but it may require the establishment of a relationship before you can expect significant help. There are likely many professional or skilled non-professional photographers in your community. Do you know any of them personally? If so, I'd start there. If not, do you know an experienced employee at a photography store? How about an editor at the local paper? Perhaps a person at the high school who edits the yearbook or paper? I've had the privilege of getting to know several highly skilled photographers just by taking the time to introduce myself at high school events where both of us are shooting. When you meet and greet a photog for the third or fourth time, it becomes much easier to engage in a conversation about the art and science of sports photography.
My mentor is Mike "Chico" LaBarbera. We became best friends in 9th grade (46 years ago) and he is the one who encouraged me to start sports photography. I cringe when I think of how terrible my early images actually were and how wonderful I thought they were! Fortunately, Mike was patient and he knew how to suggest just one or two improvements at a time and he was skilled in suggesting things that were appropriate to my skill level. We only see each other in person about once or twice per year. We talk photography once or twice per week and Mike evaluates my images on zenfolio several times per month. That is enormously useful.
The electronic age offers its own opportunities for growth. Photography forums are very helpful. Personally, my current favorite is
photography-on-the.net/forum/
also known as the Canon forum. There is a photo sharing forum for sports where you can post images and get feedback. The critiques can sometimes be harsh but the proper attitude to take is that even an unfairly negative evaluation can contain useful information for future events. It won't take long before you know who is talented and who is a poseur. There are incredibly talented folks who post there (and other forums too) and I'm always pleasantly surprised by how these gifted photographers are willing to share their insights.
This is the best time in the history of mankind to learn photography. Dive in. Join the party. The technology is incredible. Use it to realize your photographic vision. Have a mentor help guide your journey. Make it your task of tasks to do it now.
Phil Zivnuska
]]>
First of all, let me say that the vast majority of my images of this game were the typical 70-200mm shots.
The depth of field at 105mm and 17 feet distance is 1.33 ft.
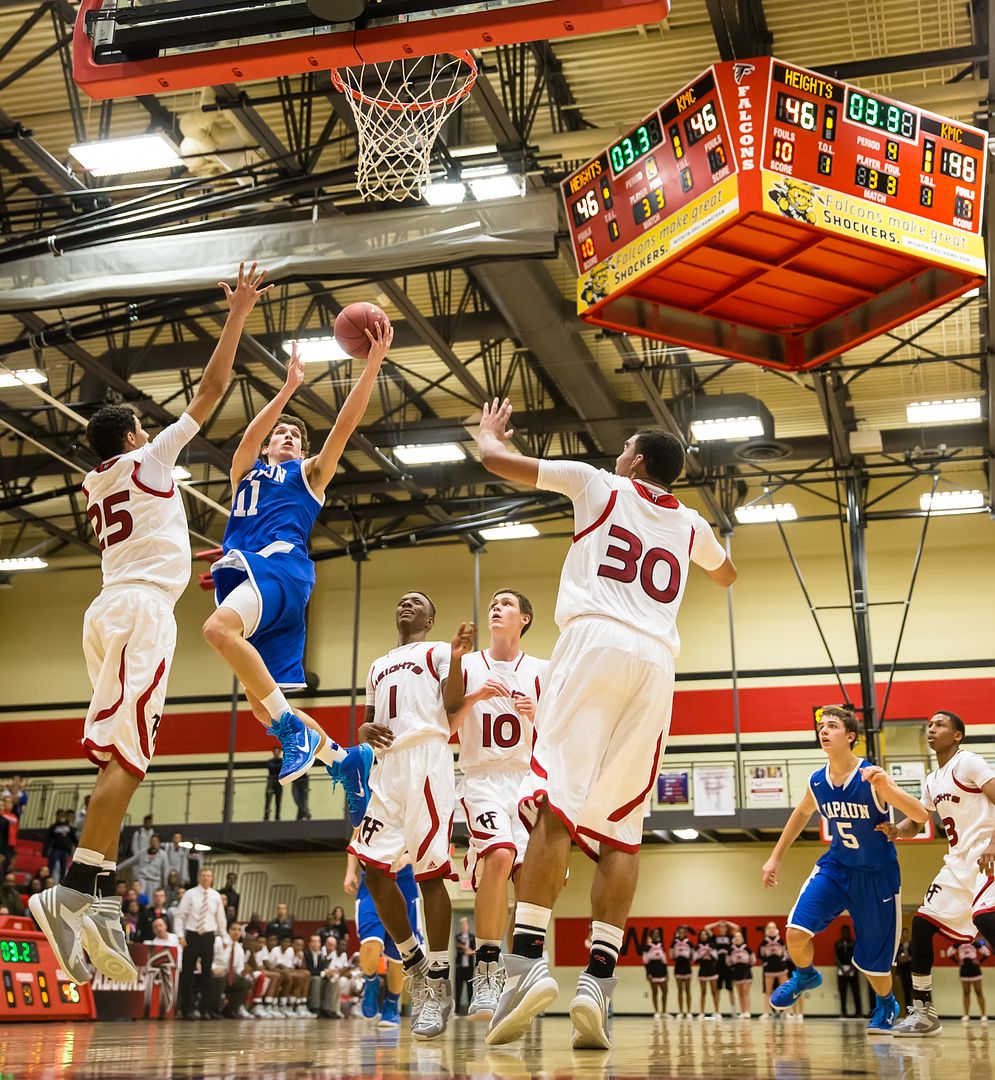
When the game got down to the end of the second half, the score was tied at 46, there were 9 seconds left to play, and the team in blue (Kapaun) had the ball. A time out was called and I moved to Kapaun's end of the floor to shoot the final seconds. I was shooting with a 1D X and the 24-70mm f/2.8L II lens.
Here is how I set up the shot of the player and scoreboard:
1. I sat under the basket to the edge of the lane. How far off the edge of the lane? I positioned my sight line so that the edge of the backboard matched up with the edge of the scoreboard. This sight line also helped determine how far away from the baseline my position would be. Here I was about 8 feet from the baseline.
2. The shot desired was going to be from the floor--literally. The camera was going to be placed on the floor and angled up slightly to include the scoreboard mounted on the roof. The focal length had to include the floor therefore my focal length had to be wide. My choice was 35mm.
3. Pre-focus, using back button focus, on the rim. Approx. 17 ft. Pre-focusing was required since the camera was going to be placed on the floor and there would be no way to aim my focus point on any given player. Using back button focus allowed me to aim the camera in hand, focus at the desired distance, and later push the shutter button without any refocusing.
4. Since my ISO was 6,400, it was necessary to shoot the shot at f/2.8. How was my depth of field going to work? This is where a familiarity with dof calculations helped immensely.
www.dofmaster.com/dofjs.html
At 35mm and pre-focused at 17 feet, my depth of field extended from 12.5 to 26.4 feet. The total dof is 13.9 feet. That would be plenty to have my subjects in focus.
5. Place the camera on the floor and aim it up a bit so as to include the floor and the scoreboard. How much is a 'bit'? Trial and error will give you a good idea. Since I'm shooting very wide, my aim need not be perfect, just in the ballpark.
6. Follow the action with the camera. I wasn't looking through the viewfinder, just aiming the camera as it sits on the floor. (Tilted up slightly)
7. Get Lucky! Yes there is a large element of luck. You will have to have action that is visible to you roughly in front of the basket. This capture had it all.
8. Fire away in a burst as the action comes into view. Don't forget to include the rebound.
Kapaun senior Atir Cherne drives the lane with 3.3 seconds left to play to break a 46-46 tie and defeat Wichita Heights 48-46.
In this particular case, I was able to capture key action in the final seconds. You need not have that be the case to use these same principals for very wide angle shooting. Pre-focus, get the camera on the floor, practice your aiming, and fire away. If you can shoot at f/4.0 that will give you even more focusing leeway. Remember that the primary insight that makes this work is that depth of field increases rapidly as the focal length decreases. Wide angle lenses have a large dof.
These shots won't be the majority of your images but can add variety and a bit of spice. Try it for rebounding action.
BTW, I'm off to Kauai for two weeks so the next blog issue will be in 2015. Cheers.
Phil Zivnuska
]]>Proper shutter speed (SS) is determined, in part, by the pace of the action. For grade school or middle school, 1/500 second (or faster) would be appropriate for shooting players. In high school, the athletes are moving faster, so 1/640 second is needed. Eliminating motion blur on the ball will require an even faster SS. Personally, I'm a sharpness freak so 1/1000 sec. is my minimum. That's because I want to be able to "Read the Ball" with sharp lettering. I'll go much faster to stop the ball in baseball or tennis.
When using a 400mm or longer lens, I'll sometimes adjust to 1/1250 sec. as a new minimum. Keep in mind that I shoot with top notch camera bodies (Canon 1D Mark IV and Canon 1D X) so I'm not afraid of using high ISOs to obtain a fast shutter. Once you master the rules, there will be times to break them. Panning and artistic interpretations are both valid reasons for a slower SS. You may want slight motion of the ball and still have the players sharp. This is a common way to convey the speed and motion in athletics.
Obtaining maximum performance from a digital slr requires that the photographer embrace the Manual, Aperture Priority, and Shutter Speed Priority modes available and move past the generic "running man" or other programmed modes.
1/1000 second, 300mm, f/2.8, ISO 4000, Canon 1D Mark IV, Canon EF 300mm f/2.8L IS
1/2000 sec, f/3.2, 300mm, ISO 250, Canon 1D Mark IV, Canon EF 300mm f/2.8L IS
3. 1/1000 sec, f/3.5, 400mm, ISO 1000, Canon 1D X, Canon EF 400mm f/2.8 IS
Next time: Get low for sports
Phil Zivnuska
www.zivnuska.zenfolio.com
]]>
Reproducing this tutorial in any form, in whole or in part, without written permission of Philip S. Zivnuska is prohibited.
How to Photograph Volleyball
By Phil Zivnuska
You might think it would be easy. After all, there are only 6 players on each team and the court is not all that big. Indoor volleyball, however, is one of the more challenging sports to photograph. The action is fast, the lighting marginal, players usually face the net and that net gets in the way of focusing. The key elements are the same as in most sports photographs; focus, face (especially the eyes), action, and the ball. “Shoot Tight and Crop Tighter” applies to volleyball too. This tutorial will discuss the elements needed to capture the 7 types of indoor volleyball photographs. A solid knowledge of dslr fundamentals is required. I write as tight as I shoot, so let’s start.
Your efforts will be far more successful if you learn the game, scout the teams, and study the players. Volleyball photography doesn’t follow the ball, it constantly anticipates where the ball is going to be and sets up for the shot ahead of time. Where will the serve be aimed? Why? Who will set the ball up for a spike? What direction will she (he) be facing? Which positions (players) will be doing the spiking and how do they approach the net from their respective positions? Don’t try to capture every hit of the ball. It can’t be done. Think one or two volleys ahead. Consider where you should be positioned to get the best capture of a particular position. Frame and focus on the player who will be hitting the ball before the ball gets there. The more you know about the game, the higher your capture rate will be. The examples here will be from ladies high school volleyball. If you shoot at this level, you will see that players who are novices will be unpredictable due to a lower skill level. Better teams will have a predictable strategy and the best teams will be sophisticated in strategy and disguise their intentions in order to fool the opposition and often you too!
The Prime Directive--Remember that the game is about the student athletes on the court, not about you, not about your pictures. The hierarchy of courtesy has the student athletes, AD, coaches, officials, parents, and fans all above the photographer. Stay out of harms way, blend into the background, be respectful, and if you are told to do something by an official or administrator, do it. If you disagree, comply now and discuss it at a later date. Build cooperative relationships with those who have authority/responsibility for conducting the game. Contact the AD ahead of time and learn the local rules for access. Get permission well in advance of the event. Talk to the refs before the contest to see where you may and may not go to photograph. Don’t push the limits. Did I mention building cooperative relationships with those who have authority/responsibility for conducting the game?
Philosophy--In my view, the best galleries are those which capture a variety of action from changing perspectives using different focal lengths. In order to accomplish that, I will go high, go low, go long (long focal length lenses), go wide (wider angle lenses), go to the side and go to the ends of the court. Here is a gallery of 8 shots using 8 different lenses at 8 different focal lengths from an assortment of elevations:
http://photography-on-the.net/forum/showthread.php?t=1091324
For the lowest perspective, the camera was resting on the floor. To gain a high perspective, I will haul a 400mm f/2.8L to the top of the rafters (as in the LR Event illustration) if it results in a better image. Obviously, the gear available, the venue, and the access permitted will affect what is possible. The complete photographer will be able to adjust to a variety of circumstances and still get the job done.
We will talk about the gear, the light, camera settings and the venue later. Let’s look at and analyze the 7 types of volleyball images now.
Serve, Pass, Set, Spike, Block, Jube, and Event Images
The Serve
The first image to consider is the serve. This shot is usually easy to focus, repeatable and readily available for capture. Sports photographers often attempt to photograph the moment of impact with the ball and they end up with a shot where the hitting arm blocks the view of the face. Consider the images on the left side of the illustration below. This moment is easy to capture and is often very flattering to the player as the arms provide a beautiful frame for the face. Shoot tight. Let the parents know about your photo. Sell them a print.
Since this position is predictable and repeated several times, it allows the photographer to vary his background. On the upper left, the fans and bleachers provide the setting. The lower left shot uses the scoreboard. Look for a pleasing backdrop and change your position to get a good view of the player and have the crowd, scoreboard or perhaps the flag complete the scene.
The movement is slower at this moment, so a one stop slower shutter speed and lower ISO can be used, if needed, to gain image quality. Taking a moment to think through the settings and background will help give you a winning image.
On a jump serve like on the right, getting low will emphasize the athleticism involved. Shooting from a balcony high on the opposite end of the court with a long telephoto will allow you to look straight at the player and give you a better chance to get a good view of the face. The venue, access and/or lenses available may determine which approach you choose to take.
UL-- 1D X, f/3.2, 300mm, 1/800 sec, ISO 6400
LL-- 1D Mark III, f/4.0, 135mm, 1/250 sec, ISO 400, Strobed with 4 Alien Bee B800s
R -- 1D Mark III, f/3.2, 70mm, 1/320 sec, ISO 400, Strobed with 4 Alien Bee B800s
The Pass (Bump, Bump Pass, Overhand pass)
These can be dramatic shots that are often easy to focus and capture. Choose a back row player whose face you can see clearly and who you determine is likely to return the serve (or spike). Good teams will pick an opposing player they want to force to return their serves and they will hit the ball to that person. Lesser teams are happy just to serve the ball inbounds. A weak player may be unable to make the return at all. Even if they can make a play on the ball, a poor pass may compromise the resulting set and therefore impair the opportunity for a successful attack. Here’s where knowledge of the teams can improve your chance of success as a photographer. A good coach will scout the opposition to gain an edge. So can you!
Note: a ‘Bump’ is an underhand pass.
Consider the following images of players digging for the return:
Three of the shots were taken from a vantage point quite close to the floor and the fourth (upper right) was shot from a very high angle looking down on the athlete. The image gains drama if the camera is at or near the floor.
The image on the lower right was taken almost abeam the player and the result is a profile shot. Moving to a 45 degree angle (lower left) gives a improved view of the face and both eyes are visible. Shooting under the net from the opposite side of the court (upper left) gives the best view of the face and especially the eyes. This is a superior quality shot but the sight line will often be blocked by another player. If you are positioned at the end of the court and the serve is being made from near you toward the opposite side, see if you have a clear view to a possible returner, pre-focus on that player, and with a bit of luck, you will get a shot of that player similar to the photograph on the upper left. Try it. As you frame this shot, remember that the players will often move forward and down to the floor as they dig to get a short serve or spike. Get low. Anticipate. Change the focus point if it will help frame the shot and capture the ball in the image. You will often guess incorrectly and focus on the wrong player as you anticipate the return. That’s OK. It’s part of the challenge. Welcome to volleyball photography.
UL-- 1D X, f/3.5, 200mm, 1/1000, ISO 3200, 70-200mm f/2.8L IS II
LL-- 1D X, f/2.8, 182mm, 1/1000, ISO 3200, 70-200mm f/2.8L IS II
UR-- 1D Mark IV, f/2.8, 400mm, 1/1000, ISO 1600
LR-- 1D Mark III, f/4.5, 85mm, 1/250, ISO 400, Strobed with 4 Alien Bee B800s
The set
The setter typically faces the same side of the court every time which is toward the strong side outside hitter (left front for right handed outside hitters). She is most often looking up to see the ball (if it is to be an overhand pass). Position yourself to see her face. Since the setter is looking up, a high vantage point is preferred to capture the action and the eyes. I’ll usually use a center focus point, center it on the face, and try to shoot tight as in the image on the right. The full body shot on the left side was framed to capture the sign on the scorers table for context because this was the very first match held at a new high school.
A wider angle will often capture the spiker preparing her move to the net. Both types of images can work.
Left: looking down from the bleachers. Coach’s daughter, brand new “Home of the Hornets.” I knew the paper would love this shot and use it. [Wrong again!]
Right: looking down from a balcony. Note the eyes of the right outside hitter (weak side) locked on the ball to see if the set is coming to her.
L-- 1D Mark IV, f/2.8, 200mm, 1/1000, ISO 4000
R-- 1D X, f/3.2, 300mm, 1/1250, ISO 12,800
The Spike (Hit, Attack)
The spike is considered the pinnacle of action and no gallery is complete without some images of it. Gyms with a balcony and most arenas will offer the opportunity for the photographer to get high and shoot down on the play. This yields views of offensive players where the faces are not obstructed by the top tape of the net, hitters seem to be jumping higher, and focusing is far simpler. The three hitters pictured in the red/black uniforms below were all shot from the top of an arena (see LL event image below) with a 400mm lens on a 1.3 crop factor camera body .
The players on the offensive left and right front are the outside hitters. For right handed attackers (the majority), the left front is the key position and left side hitter is hitting from her strong side. She is often the best spiker and most athletic. The other front row players are the middle and the right. Shoot these three tight enough to see the intensity/emotion of the players. Full bodies are not required. Strong side (left side for right handers) outside hitters usually approach the net from about 3 steps back. Track them through their approach and hit. Middles and weak side rights will sometimes have set plays to get them in position to attack. Study your team’s front row strategies.
Spikers hitting on their strong side will start out looking toward the setter/ball and their faces will rotate with their bodies as they strike the ball (UL). Positioning yourself 30 to 80 degrees to the net is ideal. Any less and you risk having the hitting arm blocking the face. The face will follow the flight of the ball. Middles will often hit sets that are lower and have more tempo than the typical higher set to strong side outside. They may aim left or right with their spikes to avoid a blocker.
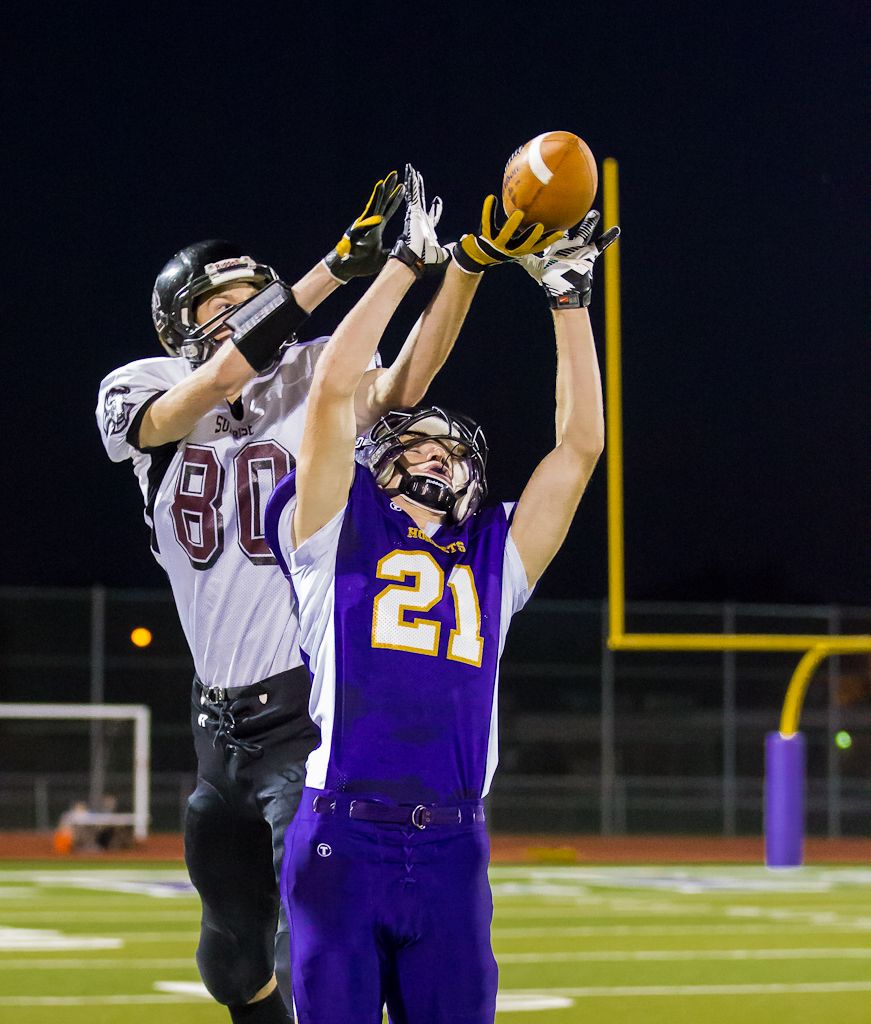
If you can’t get high, you’ll have to focus through the net. The white tape on top of the net is often problematic for obscuring the face. Get higher or lower if you need to. In the LR shot below, the background is dark and the black netting is almost invisible against it. This helped me be able to focus on yellow #23. If the netting is interfering with auto focus, first try adjusting the cameras focus settings (number of aux points, location of focus point, sensitivity etc). Sometimes you can use a low focus point aimed on the legs below the net to get a good result. Every camera model is different and you may need to experiment to see which settings track best. Remember in your framing that hitters will jump and reach up to hit the ball. Allow room at the top of the frame and choose your focus points accordingly. Tight, properly focused images of spikers are challenging to capture but worth the effort.
The dof at 300mm and 50 feet is 1 to 1 1/2 feet at f/2.8 depending on crop factor.
Tighter is better. Tighter is more challenging. Lots more.
LL, UL, UR-- 1D Mark IV, f/2.8, 400mm, 1/1000, ISO 1600 High vantage point looking down.
LR-- 1D Mark IV, f/2.8, 300mm, 1/1000, ISO 4000--Camera is net high so face is close to getting obscured by the tape.
UR, LL: eyes follow the ball on the spike follow through
http://photography-on-the.net/forum/showthread.php?t=1242386
Block
The block has challenges similar to the spike. Try focusing through the net. However, since the blockers are positioned at the net, using a low focal point to focus on the legs may work in a pinch if the auto focus locks on the netting. Use back button focus to pre-focus (use the leg trick only if necessary) and adjust as needed. Don’t forget to frame the shot with space at the top. Blockers often come in pairs and rarely, a trio. Middles are often key blockers. They are usually tall and part of the strategy is to have the middle join an outside to block a spike. A good offense will try to deceive the middle into being out of position. Their goal is to have the spiker hitting against a single blocker rather than a pair of defenders. The tempo and direction of the set is part of that deception.
L-- 1D Mark IV, f/2.8, 400mm, 1/1250, ISO 6400
R-- 1D X, f/3.5, 300mm, 1/1250, 12,800
Jube
Volleyball has jube (jubilation or celebration) that is as good or better than any high school sport. Capturing that jube isn’t hard, it just requires the photographer seek it out. Every team will have one or more players who are exceptionally expressive. Take note of who they are during the games. When it gets to the final 2-4 points in a close game, I will stop shooting action and begin focusing almost exclusively on emotional jube shots. The proper time to switch will be marked by a soaring intensity that is unmistakable. Sometimes the celebrations will be directed at teammates and other times toward the coach/bench. Try positioning yourself behind the bench (emotion is often expressed in that direction), track the most animated player(s) and get those emotional peaks and valleys recorded. Get close and fire away in short bursts. After that last point, move around. Include the coaches if possible. Group and individual shots both work. Make the viewer of your images feel the joy and excitement. These shots are a must have.
UL-- 1D Mark IV, f/2.8, 400mm, 1/1000, ISO 1600
UR-- 1D X, f/2.8, 140mm, 1/1000, ISO 3200
LL-- 1D Mark IV, f/2.8, 200mm, 1/1000, ISO 6400
LR-- 1D Mark IV, f/2.8, 135mm, 1/1000, ISO 6400
The Event
There is a photo story behind and around every match. The venue, cheerleaders, fans, timeouts, faces in the crowd, anything associated with the contest can be a source for an image. Supply the viewer with an experience of the event.
UL-- 1D Mark IV, f/2.8, 400mm, 1/640, ISO 2000
UR-- 1D X, f/2.8, 70mm, 1/1000, ISO 6400
LR-- 1D Mark IV, f/4.0, 15mm, 1/800, ISO 3200
LL-- 1D Mark III, f/2.8, 16mm, 1/800. ISO 3200
Nitty Gritty
The tutorial so far has covered great ways to get the typical shots in volleyball.
BUT... ... . Something’s missing.
What’s missing is the heart, the soul, the hand to hand combat aspect of the game. There is something powerful, vibrant and dynamic about images where you get physically close to the action and capture net play when two or more players are battling at or above the net. Get low to the floor, be as close as permitted, use medium focal lengths and shoot when the peak action is in close quarters at the net. Focus can be tough, faces difficult to see, other players can block your view, access can be hard or impossible to get, plus there is no guarantee you’ll get a great shot anyway. Nonetheless, it is worth the try--especially on teams that have active, talented, middle hitters. The action will be fast and a responsive camera body and lens really help. Don’t try to shoot the outside hitter on the far side of the court. Too far away. Find closer action. If you are sitting on the side next to the strong side outside hitter, try a wide angle view of her spike when the opponents are doing a double block. You won’t see the face of the spiker but she will seem to be 10 feet in the air and the blockers will be prominent in the image. It’s fun to try this shot.
You can tell I love the nitty gritty part of the game. Just know that it can be frustrating to capture. Start with the conventional shots. Add these for spice.
UL, LR-- 1D Mark III, f/2.2, 135mm, 1/1000, ISO 3200
UR-- 1D X, f/2.8, 102mm, 1/800, iSO 6400
LL-- 1D Mark IV, f/4.5, 65mm, 1/1000, ISO 12,800
Lighting, Gear, Camera Settings, and Venues
Light has a huge role in determining which camera bodies and lenses can be used as well as affecting the final image quality. There is rarely any excess quantity of light and that drives the exposure settings. Use f/2.8 lenses (or faster) if at all possible. An f/4.0 lens will have half as much light to focus, require either a slower SS or higher ISO, and have a wider depth of field (dof). A 70-200mm f/2.8 lens is a great place to start for volleyball and much of sports photography in general. Since I use a variety of focal lengths, my lenses for volleyball are now all f/2.8. Shooters on a tight budget may want to try the 85mm f/1.8, the wonderful 135mm f/2.0 or other fast primes they already own. Ultra large apertures bring in more light but at the expense of a very shallow depth of field. My images are made exclusively with Canon gear but Nikon makes excellent products as well. Don’t change brands to chase the latest offering from a manufacturer. Trading lenses to match the body is far too large a hassle. I prefer a SS of 1/1000 and that speed will allow you to read the ball. Slightly slower is OK, especially for non-telephoto focal lengths. Use a SS of at least 1/640 unless you choose slower speeds for artistic reasons or because low light and high ISO noise force it. Camera bodies that have good image quality at ISO 6400 are wonderful and increasingly available for modest budgets. ISO 3200 at f/2.8 will work if the lighting is above average. Take a few test shots to determine your exposure settings and then enter those in Manual mode. I use the histogram and chimp on the lcd to evaluate the exposure. Expose to the right but don’t burn out the highlights. If you don’t use the histogram or don’t know how to use it, learn and use it now. That knowledge will help in all of your photography, not just volleyball, to properly expose and post process your images.
Mandates for energy efficiency have been a boon to lighting advances. Light is getting brighter with improved color rendering at many facilities in the US. Notice the photos on the right side of the jube shots above. They were shot at the same venue (a large arena), at almost exactly the same spot but a year apart. The LR image was taken in 2011 and the UR 2012. Improved lighting not only added a full stop of light but the improvement in skin tones (and other colors) is unmistakable. It was obvious to me just walking in the door that something had changed for the better. The skin tones in the earlier year appeared jaundiced even to the naked eye. The next year was great. Too many sports photographers consider only the quantity of light but not the quality of the light spectrum. We all know that golden hour light produces superior image quality when shooting outdoors but fail to consider that indoor light quality can vary as well.
These improvements are happening in high schools both old and new. Many of my older 1D Mark III images here were taken using 4 Alien Bee B800 strobes bounced off the ceiling. With the combination of improved lighting and camera sensor technology, I haven’t shot VB with strobes since 2010. Hurray! Some leagues never allowed flash anyway. That strobing experience has been helpful to me because timing the one exposure is crucial with strobes. Skillful timing helps even if you shoot in a 2 or 3 frame burst. Prior to the season, I’ll attend a practice or two and shoot single shots just to work on my timing. A Canon 70D will have a shutter lag of 65 milliseconds compared to a 1D X at only 36 milliseconds. That lag, along with your reaction time, must be accounted for in your technique. The adjustment will come quickly but if you don’t practice, you might find the exposures in your first match are just a tad too late.
All my shooting is done in RAW. I know some of you shoot for a newspaper on a deadline and need jpeg and if so, fine. If you have a choice, shoot RAW. Light cycling, noise, lighting spectra and changes in light because of brightly illuminated electronic billboards can all demand correction is post and RAW will do that best.
When you are focusing through the net, be sure to experiment with the number of auxiliary focus points, sensitivity, and switching speed for your auto focus. Since you are likely to be using large apertures, the shallow dof will reveal when the focus is on the net rather than the player. The brightness of the background and uniforms compared to the black netting can also affect which setting will track players best. Be sure the camera dioptric adjustment is set for your eyes so you can tell, in the viewfinder, when the focus strays. Being able to discern when focus leaves a player and locks on the net isn’t easy but it is hugely helpful in boosting your ‘keeper’ rate.
At a new venue, take a minute to assess where you can stand/sit/kneel, the backgrounds available, and what types of shots you can get. Most likely, you can’t get them all. Optimize the backgrounds for color, cleanliness, and setting. Nobody captures every type of shot at a single match. Capture what you can. Make a plan. Since it is unlikely that you will have access to both sides of the court, the setter will face your side for one game and have her back to you during the other game when the teams switch sides. The same issue (reversed) will apply to the serve shots. Decide when/how you want to capture those shots and front line action vs back row and remember to get some jube if the games are tight. Study your results, learn from them, modify your plan for next time, and keep shooting.
Don’t forget to have fun! You are there to capture young people totally alive and fully engaged during an event conducted for sport. Let their joy and enthusiasm infuse you and your images.
Phil Zivnuska
Samples: Find the types of images you like and replicate them in your gym with your team.
http://photography-on-the.net/forum/showthread.php?t=1224971
http://photography-on-the.net/forum/showthread.php?t=1232710
http://photography-on-the.net/forum/showthread.php?t=1226359
http://photography-on-the.net/forum/showthread.php?t=1221560
http://photography-on-the.net/forum/showthread.php?t=938979
http://photography-on-the.net/forum/showthread.php?t=775247
copyright 2013 Philip S. Zivnuska
zivnuska.zenfolio.com
Bonus Tip
Shooting through the net is always a challenge. Here's a tip to help. When you shoot through a net, the net is typically black. Camera focusing systems like to grab onto the contrast between the black net and a bright uniform and shift the focus to that net. Consider the following two photos:
1/1000 sec. f/2.8 400mm ISO 6400
1/1000 sec. f/2.8 300mm ISO 6400
Notice that the net is nearly invisible against the dark blue or the black uniform. At the same time, the netting is clearly visible against the light colored floor. Use that fact as part of your focusing strategy. When there are dark uniforms, place your focus point in the middle of the uniform where there is no contrast with the net and the net is essentially invisible for the camera. The only contrast available is from the bright number of the player and that's good.
Life gets more difficult with light uniforms.
1/1000 sec. f/2.8 300mm ISO 6400
In this case, I will focus on the black shorts, black knee pads or even black shoes just to avoid having the focus jump to the net. This won't work every time (At least not for me!) but it helps improve the odds when focusing is just plain tough.
A few more things. Try using few, if any, auxiliary focus points. I use four. The more aux focus points the more likely the camera will find something other than the player to focus upon. On a blocking shot, like the above, if the blockers are standing in position, I will try to get the focus on the player(s) (in this case I used the black shorts as my target) and then release the back button (thereby holding the focus) as I raise my framing to get the tops of the hands for the block and fire the shutter button.
Please don't think these ideas are fool proof. This photographer has plenty of out of focus shots to prove I've been fooled plenty of times! Volleyball photography is a challenge and it can get extremely challenging when long focal lengths and larger apertures combine to produce a tiny depth of field.
Phil Zivnuska
Once you master the rules, you are ready to break the rules.
]]>
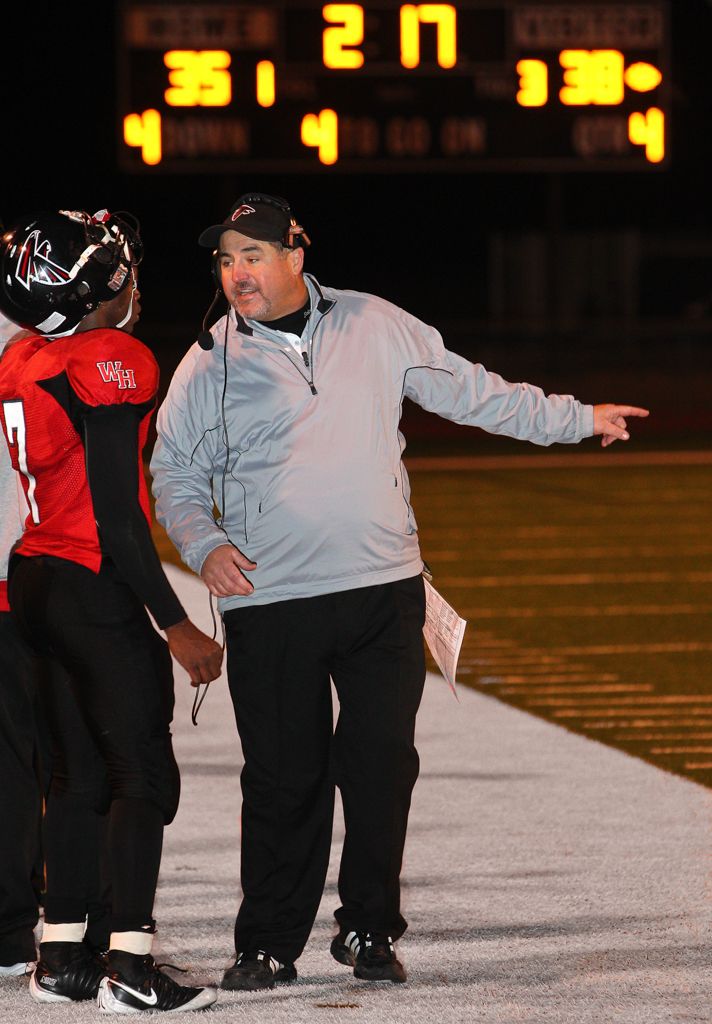
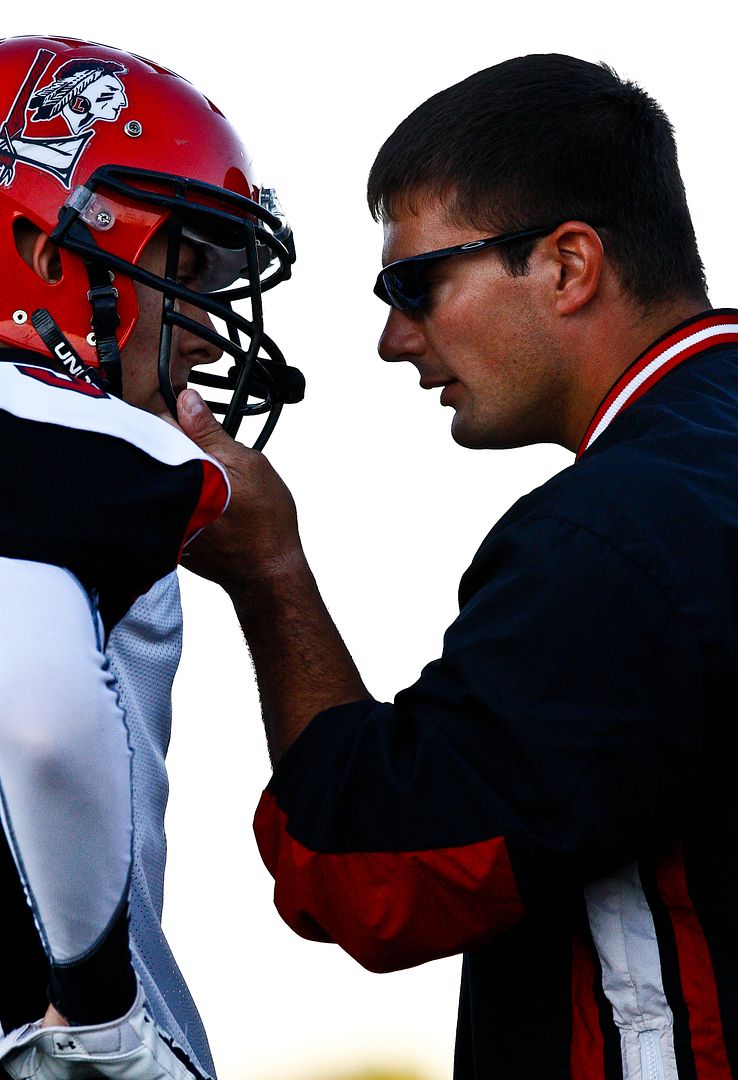
Without the scoreboard, the image below is just a coach talking to his quarterback. Because the scoreboard is included, we can figure out that it is 4th and 4 for the other team who has a 38-35 lead and the ball with only 2:17 to play in the 4th quarter. This quarterback is going to have a tough challenge coming back if/when there is a change of possession because he has only 1 timeout left. Including the scoreboard shows this to be one of the key moments of the game and adds significance to this interaction between coach and player.
1/250 sec. f/3.5. ISO 1600, 200mm, Canon 1D Mark IV, Canon EF 70-200mm f/2.8L IS, flash
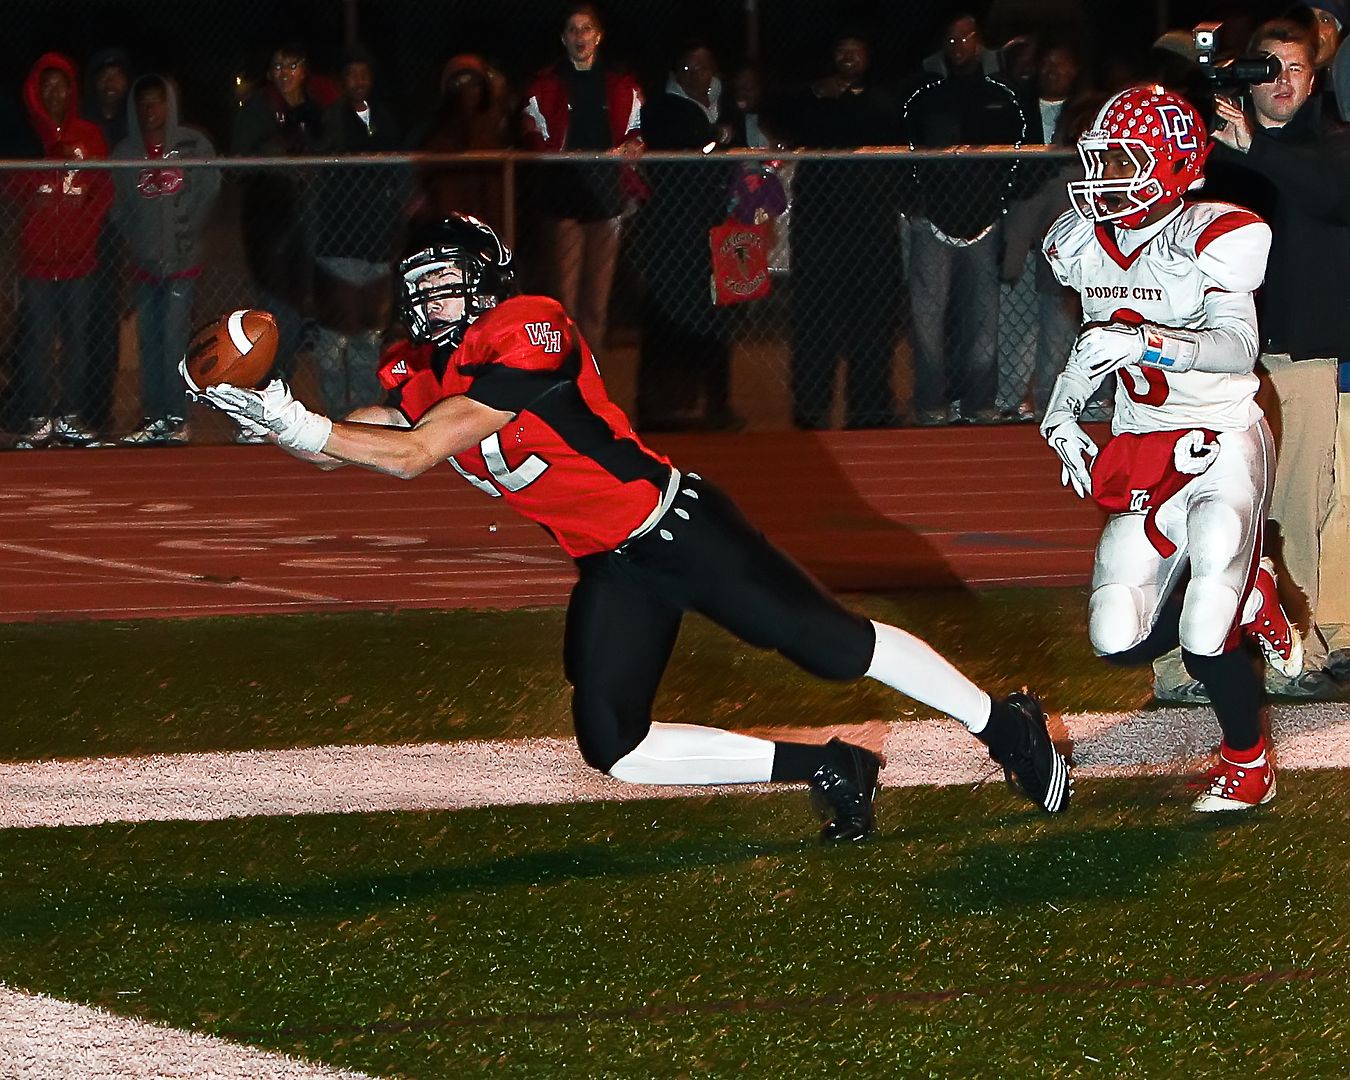
The game was for a berth into the state championship finals. There indeed was a change of possession, the QB did march his team down the field and about two minutes later, he threw this pass into the end zone for a touchdown and the win.
1/250 sec. f/3.5, ISO 1600, 70mm, Canon 1D Mark IV, Canon EF 70-200mm f/2.8L IS, flash
How do you frame this scoreboard shot with the focus you desire?
If you use Back Button Focus as I do, simply put your focus point on your foreground subject, push then release the back button. Your focus is set. Recompose to include the scoreboard and depress the shutter button to fire away. The focus will stay on the spot where you pushed in the back button. The shutter button won't affect the focus. Back Button Focus is a great advantage to the sports photographer because it allows you to have your camera set to servo focus (where it is already set to follow action) and still get the focus where you want it without having to change the location of focus points. That's a huge help when you have only seconds to get the shot focused, change the framing, and then expose the image. The settings to activate a back button and remove the focus from the shutter button will vary with the camera body.
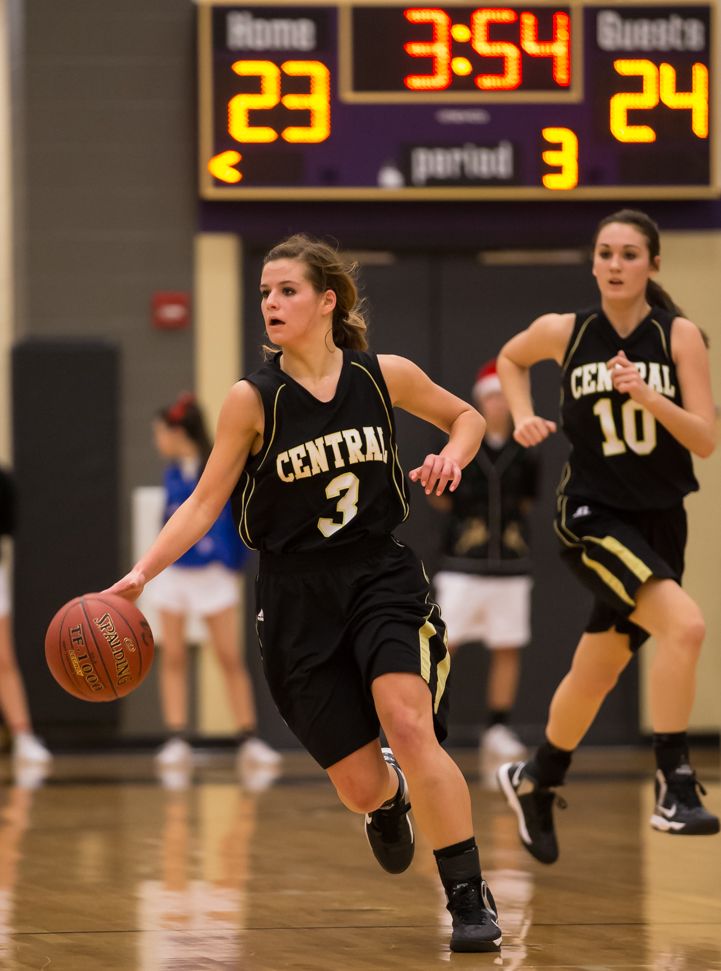
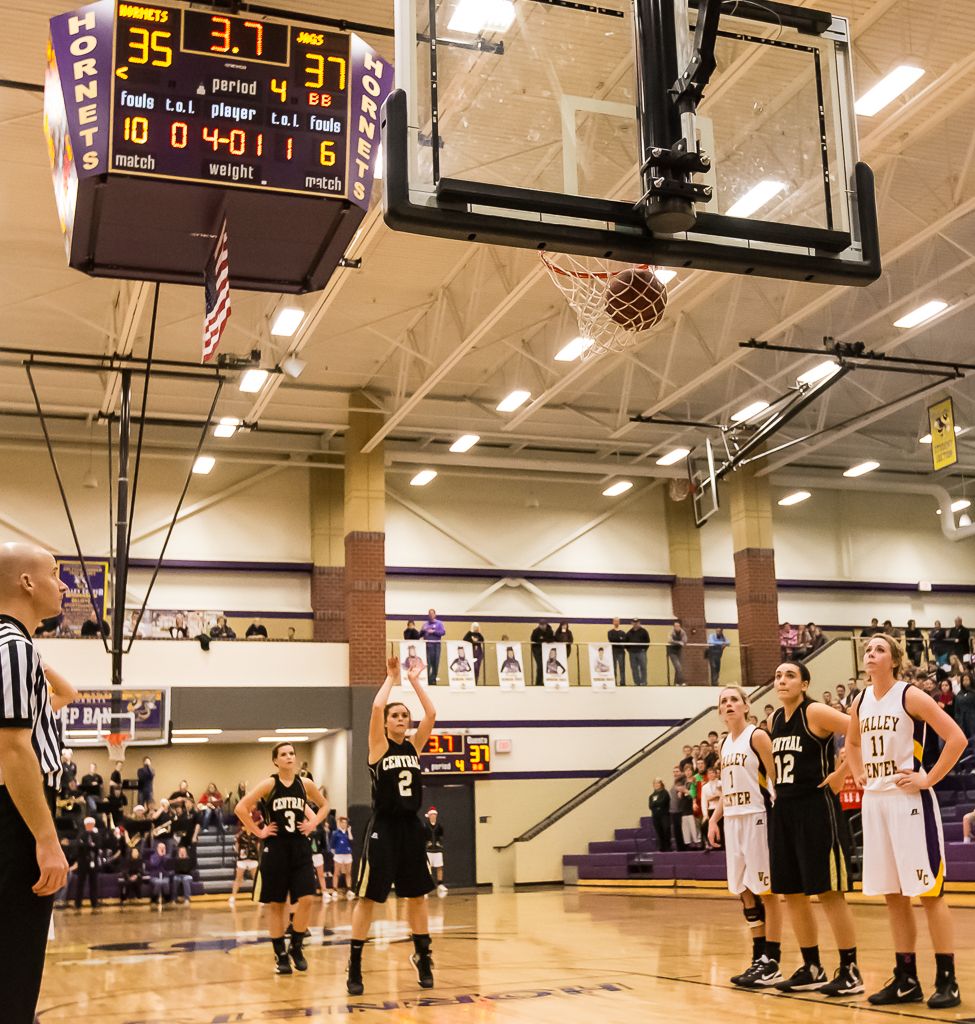
I'll use the same technique in basketball to focus on a free throw shooter and then recompose to include the scoreboard and expose. If it suits your needs, you could then focus on the scoreboard (back button), recompose to include the shooter, and then expose the image (shutter button). Either way, Back Button Focus puts you in artistic control.
1/800 sec. f/2.8, 200mm, ISO 6400, Canon 1D X, Canon EF 70-200mm f/2.8L IS II
1/1000 sec. f/4.5, 105mm, ISO 600, Canon 1D Mark IV, Canon EF 70-200mm f/2.8L IS II
1/800 sec. f/4.0, 27mm, ISO 12,800, Canon 1D X, Canon EF 16-35mm f.2.8L II
If you want the above shot, think ahead and sit down in a spot where the scoreboard appears next to the backboard but is not obscured by it. As an alternative, this shot could have been made to include the scoreboard on the wall instead. The photographer would need to move to camera right to reveal it unobscured. As photographer, you get to choose how to frame the shot. Plan ahead. Don't rely on luck.
Phil Zivnuska
* "Use a picture. It's worth a thousand words." was originally said by newspaper editor Arthur Brisbane. He was quoted in a 1911 article about journalism. Variations of the quote have also been attributed to Napoleon, an ancient Japanese or Chinese philosopher and also Frederick R. Barnard in 1921.
]]>
Everyone loves to shoot with soft, warm sunlight at their backs. We love the images that can be obtained from either golden hour sunlight or the sunlight that is filtered through puffy cumulus clouds that form a giant soft box in the sky.
But what about those days when the sun is harsh, with no clouds overhead and the athletes are wearing a helmet, cap or visor? The shadows can detract from what would otherwise be a good photo.
The solution can be to shoot into the sun. When the helmet or visor puts the athlete's face in total shadow, the harsh shadow lines are eliminated.
Compare the harsh facial shadows in this image:
With this image shot into the direction of the sun.
Compare this shot with the sun at my back:
With this shot into the setting sun:
As you look at the images shot in the direction of the sun, you will notice that the shoulders and the top of the head appears over exposed or even completely burned out. This is the unavoidable consequence of the over exposure (as metered by the camera) required to properly expose for the face which is now in full shadow. How much exposure compensation is appropriate? Since I often shoot football at +1/3 EC (exposure compensation), I will usually shoot Aperture preferred at +2/3 or even +1.0 EC when shooting into the sun. I use the histogram, the "blinkies", and the LCD to get the exposure correct. A light meter can be used as well. If the light levels are static, you can shoot Manual once you've figured out the proper exposure.
1/3200 sec. f/2.8, 400mm, ISO 400, Canon 1D Mark IV, Canon EF 400mm f/2.8L IS
The bottom line? If the shadows are harsh consider shooting into the sun. Boost the exposure as necessary to properly expose the face. Shooting tight will help the shot. This is an ideal technique when the athletes are wearing head gear but can be used when none is worn as well. Since the athletes are not looking into the sun, their eyes will be wide open. Let the top of the shoulders and head burn out if necessary.
Sometimes I shoot into the sun by choice and other times by necessity. Either way, it is a good technique to have available and a must to have as part of the complete photographer's bag of tricks.
Phil Zivnuska
]]>
How to Photograph Football
by Phil Zivnuska
Insights for Photographers New to the Game
Football is a great game that offers terrific opportunities for the photographer. There is plenty of action occurring simultaneously in different places. There are also significant challenges, especially for those who begin their football photography careers at the high school level. Attempting to capture fast moving action as darkness approaches is a challenge for even gifted, experienced, shooters. This tutorial is directed toward but not limited to those shooting high school football since it is not only the most difficult but because this is where many photographers get their first exposure to the game. A thorough knowledge of dslr fundamentals will be required so novices may occasionally need to expand their skill set.
The Prime Directive--Remember that the game is about the student athletes on the field, not about you, not about your pictures. The hierarchy of courtesy has the student athletes, AD, coaches officials, parents, and fans all above the photographer. Stay out of harms way, blend into the background, be respectful, and if you are told to do something by an official or administrator, do it. If you disagree, comply now and talk it over calmly at a later date. Build cooperative relationships with those who have authority/responsibility for conducting the game. Contact the AD ahead of time and learn the local rules for access. Get permission well in advance of the event. Talk to the AD or administrators before the contest to see where you may and may not go to photograph. Don't push the limits. Did I mention building cooperative relationships with those who have authority/responsibility for conducting the game?
Access to the field, court, or track is gradually getting more restrictive. You are a guest and have been granted privileges. Using those privileges with humility, grace, and courtesy will help insure access for your photography colleagues who come along after you. We need to work together responsibly for the benefit of all.
Know the Game--It's quite possible to photograph a football game without much knowledge of the game or the teams. Lots of folks do exactly that. However, those who know the game and the teams will be able to anticipate the action much better than those who don't. That means better positioning for more compelling action and better images. Ask yourself. Who are the best players on the offense and defense of each team? Does this team prefer to run or pass? If they pass, who are the leading receivers? If they run, do they run between the tackles or do they have a speedster who likes to run wide? Who are the "Big Hitters" on special teams? Does one team prefer to run or throw to one side of the field more than the other? Which formations typically mean pass and which ones mean a run is more likely?
If you know the answers to those questions, you will be able to play the percentages and put yourself in position for a 'lucky' shot.
Shoot Early in the Day (Pre-game), Early in the Game, Early in the Season--
Given the choice between golden hour sunlight and ultra high ISO (or flash), the decision is easy. Use all the natural light that mother nature is going to provide.
The first opportunity is to shoot the pre-game activities. There is a small army of people who arrive at about 5pm (or earlier) to prepare for that 7pm kickoff. These include the booster club folks, the barbecue crew, tailgaters, concession stand workers, announcer, the AD, color guard, dance team, and the band. These folks make the game an event and they enjoy pictures of themselves too. BTW, those who can make your life easy or difficult (AD, coaches, administrators) are here now.
Secondly, shoot the early part of the game. Depending on your purposes, you may be able to get the shots you need in the first half of the game when there is considerable ambient light available. Even that small opening will close soon enough. On September 1 in my home town of Wichita Kansas, sunset is at 8pm. By the end of October, the sun will be down at 6:30. That is a huge difference for Friday night football photography.
Shoot the warm ups before kickoff. This is a great time to get portrait type shots of players in uniform. There is no problem getting lots of shots of players who may not see much game time. Their parents love them too and would love to buy pictures. You can get uncommonly close to them during this time.
Don't forget the refs and coaches.
Images made with good ambient light are far more compelling than those done under the lights or with flash. Shadows are much less of a problem, ISOs are lower, and you can take full advantage of the burst mode in your camera. Shoot the heck out of the first half in those early season games.
1/1000 seconds, f/3.5, ISO 800, September 7, 2012 at 7:06:38 pm. You gotta love that light!
Remember that you are losing daylight as each week goes by. Some of us shoot every game all season long and have to cope with darker and darker conditions. If you have a choice, and lots of you do, shoot the early season games. Those early games provide opportunities for yearbook shots, images for the end of year banquet, programs, scrapbooks, publicity etc.
Positioning--
A. Get Low. The general rule for sports photography is to get low when taking your photographs. This will enable the athletes to look larger and give your images a different perspective than fans are used to. This usually means kneeling or sometimes even sitting on the ground as often as you can. Yes, this can be tiring, especially for an old geezer like me but that is what is required. Some shooters do this, others don't. The better ones do. Get some knee pads if you need them.
B. Get to the End Zone as Soon as You Have the Reach. The goal of the offense is to get into the end zone, the player with the ball will be looking in that direction most of the time, those players will be getting closer and closer to you, and there is a good view from sideline to sideline. Station yourself a few yards behind the end line when you have enough focal length to reach to the line of scrimmage and get a useable image. There is usually a dashed line to indicate the proper buffer distance from the field of play. Don't push it. Give extra space. There is no need to be so close to the field that the photographer interferes with the action or puts himself or players in danger. I'm usually 5-7 yards behind the end line. YMMV.
If the offense is backed up against its own end zone, this is a terrific time to get shots of the defense attacking. Try to get a shot of the eyes of the middle linebacker.
Having empty space behind your subject always helps isolate him from the background. This is often quite easy to do when you are shooting from the end zone.
Touchdown!
C. Try 2 Yards Behind or 15-20 yards Ahead of the Line of Scrimmage. If you are 2 yards behind the line, your view won't be blocked by the line judge or by the guy holding the down marker. On a run play, if the runner is heading wide, he will be running right at you for an excellent photo opportunity.
If the quarterback goes back to pass and you are on the side where his body faces you (and you should be), then get a shot of him.
One last thing about shooting just behind the line of scrimmage, this is also a great spot to shoot line play. I'll often grab a shot of a lineman immediately after the snap of the ball and then re-aim my camera on the ball carrier. There is a lot of action from the linemen on every play so don't forget to get a few images of that.
Downfield positioning is dependent on focal length. Twenty yards would be fine if you are shooting a 70-200mm lens. If you are shooting a 300 or 400mm, the distances will get closer to 50 yards. This also depends on whether you are shooting a full frame or crop camera body.
Before we leave the topic of positioning, there are a few other items we need to discuss. The sideline between the 25 yard lines is reserved for the teams. Therefore, you will be shooting from outside that area. That means adjusting your technique to accommodate this restriction. As you move from one end of the field to the other, use this opportunity to get images on the sideline. Coaches, athletes, trainers tending injured players, meetings of the offense and defense when the other squad is on the field, all can be compelling sideline images.
"Can you hear me now?"
As the offense approaches midfield, an you may find yourself at the 25 yard line, 25 to 40 yards downfield waiting for the action to approach (because you can't be between the 25s) and not having a long enough lens with sufficient reach. That is just one of the reasons many experienced football photographers will shoot with two cameras. One body will often have the 70-200mm zoom and the second camera will use a super telephoto lens. However, this is not a requirement and many fine images can be obtained using nothing longer than 200mm. Shorter focal lengths can be used but you will need to be more patient in letting the action come to you.
Portrait vs Landscape--
The general principle is that you want to fill the frame with the action. If you want to shoot an individual player, that can usually be optimized by shooting portrait.
When positioning or focal length results in a situation where the full height of a player can be captured in landscape orientation, the extra width available can be used to include other elements besides the player with the ball.
September 19, 7:38pm
When shooting mega-tight on the quarterback, I like to shoot landscape to include the arm with the ball reaching back as the front arm reaches forward.
A few words about special teams.
Special teams often furnish key plays in a game. A blocked punt or kick can be a huge turning point. The only problem is that you never know when it is going to occur. Don't be afraid to shoot 10 punts and come up with nothing. Get behind the punter/kicker and shoot through the kick. It's worth the effort for the day when you capture that key block. One other idea is instead of shooting the kicker's leg striking the ball, get the reaction shot when he learns whether the kick is good or not. That is often far more compelling.
It's Time for Some Tech Talk
Shoot RAW--
When I first wrote this tutorial in 2009, my advice was to shoot jpeg. No more. The improvements in software and storage space make the handling of RAW files easy and seamless. The amount of information contained in RAW files is staggering. If you are skeptical or just undecided, perhaps a before and after RAW image can convince you. I was setting up to photograph two football players for a pre season preview edition of a high school sports magazine. One of the players stood in the frame while I tested the exposure of the sky.
RAW Image Straight Out of the Camera
The exposure was adjusted, a gelled flash was added, the players got their uniforms on, and a final image was obtained. Later, I needed an improperly exposed test image to see just how much detail could be pulled out of a picture that would otherwise be unusable. Here is the same RAW image after post processing in Lightroom.
RAW Image after Processing in Lightroom
It's the same image! Now this isn't perfect and it's certainly not meant to be a justification for poor exposures in camera but if this level of recovery is possible in a poor image, just imagine what can be done to improve a shot with minor flaws. Take another look at the shoes in the before RAW image. Would you ever imagine that this file could produce the after image?
I make mistakes. RAW helps me correct and produce the best result possible. Even if you never make an error, RAW will allow you to get better results for your final product. Shoot RAW.
Settings--
Shoot aperture preferred (Av) when the light is variable from clouds or the setting sun. The faces are inside helmets and hence shadow so add about +1/3 stop of exposure compensation. It's fine if a small portion of a white uniform burns out if that helps you see faces more clearly. That can be especially important in photographing athletes of color. Manual mode is fine if the light is stable and you have experience with it. Servo focus is a must, set to auto white balance (AWB), and I use the back button focus technique. Shutter speeds should be 1/640 sec or faster and I prefer 1/1000 sec if the light and ISO capabilities of my camera allow it. Large apertures like f/2.8 give faster SS and blur backgrounds. At night with flash, I'll stop down to f/3.5 to f/5.0 to get more DOF (depth of field) since backgrounds are dark and therefore I don't need to blur them. I'm shooting Manual at the maximum sync speed (often 1/200 sec or 1/250 sec) for flash. Speaking of flash and low light, know how high you are able to push the ISO in your camera and still get acceptable image quality.
Built in 'pop up' flashes don't have enough power to be useful. Something similar to the Canon 580 or 600 series flashes is needed.
The 400mm f/2.8 lens is the supreme field sport lens because of the long reach, sharp images, and large aperture to blur backgrounds and stop action. The 70-200 f/2.8 is commonly seen because of its versatility and lower cost in an f/2.8 lens. The Sigma 120-300 f/2.8 EX DG HSM lens is also popular. Both Nikon and Canon make excellent products that will produce terrific results. Image stabilization is not required at the high shutter speeds used for sports. At least one of your lenses should be 200mm or longer. Using an f/2.8 or faster lens is recommended for Friday night football. An f/5.6 lens has 1/4 the light available for focus and that means more difficulty in low light focus, slower shutter speeds, higher ISOs, and less background blur. All are undesirable.
One more thing. If you are shooting a camera body that has Auto ISO capability, set your camera on Manual, your aperture and SS as desired and your ISO to Auto. This is a great way to shoot. It gives the best image quality in variable lighting conditions. Don't forget to add exposure compensation as needed.
Ok, I've been telling you to avoid shooting late in the game and/or late in the season. But some of us have to shoot all the games and many of the big games occur in October when twilight ends not long after the game begins. Now what?
Nighttime Football--High ISO vs Flash, Which is Better?
Answer----It's whatever gets you the best image. The type of photography that I do requires clearly visible faces. It also requires that the colors look as close to correct as possible. Some of you hate the look of flashed photography for high school football. You can't use the fps capability of your camera, there is red-eye to deal with, awkward shadows can be problematic, ghosting is an issue, and yes, the colors don't look the same. On the other hand, if you want to get light inside the helmet to see a player's face, flash will do it plus some venues are so dark that even a high ISO (20,000) won't do well. Shadows are something that must be addressed as well. Yes, the newest camera bodies are great at high ISO (>6400) but what if my body is marginal, or worse, at that level?
My bottom line is the following: The complete photographer must be able to shoot both high ISO and flashed. Once you have mastered both techniques, you can decide for yourself which way will get the best image for your venue, for your location at that venue, and for your equipment. My flash is going to be used a lot more on a 30D compared to a 1D Mark IV because of the limited ISO capability of the former. That's OK.
Let's break down the factors that I mentioned. In order to do that, I'm going to show you some ugly football images. There will be some good ones too but you need to see the pros and cons of each approach.
High ISO is not enough at some venues. The following image was taken at 7:23 pm on October 4. It was at a small rural high school about 15 miles from my house. The gear can't be blamed, it was shot with a Canon 1D X, and a 400mm f/2.8L IS II. The settings were 1/800 sec, f/2.8, ISO 20,000!
There is just no way to make this into a useable image. You might think that the problem was the result of poor, outdated lighting and that explanation is partially correct but only partially. Look at the highlights on the runners left arm, shoulder, and the top of his helmet. Compare those light levels to those of his face inside the helmet. As we can see, the problem is as much the result of shadows as it is the stadium lighting. Like most high school stadiums, this one has two (sometimes venues will have 3) light poles on each side of the field. They are located about the 15 to 20 yard line. Once a team gets inside the 15, the light comes from behind the player and there is typically no light coming from the goal line side of the player.
You may be thinking that my local field allows me to shoot at ISO 6400 and get good quality images. That may be true toward the center of the field but shadows can wreak havoc once you get down close to the goal line. Like this:
Or this
Supplemental lighting is the key for dealing in situations where the shadows get objectionable. So, how do you know when the shadows are bad enough to warrant flash? It's as plane as day. You only need to look for it. Once you see it, once you see the light and shadows in real time, your photography will never be the same. Sports photography, landscape photography, portrait, all will be transformed once you see the light.
The next time you are at a night game, go to the end zone as the team approaches from midfield. When it gets to the 15 or 20 yard line, watch for the shadows to appear on the player's uniforms. It will be most obvious on the white pants but you can easily see it even on colors. Down inside the 10, you may wonder why you never saw it before. Develop the discipline to look for those telltale shadows. Once you've seen them you may wonder why you've never seen them before. You are now a better photographer. Look for the light and shadow in your other forms of photography.
Before you think I'm strictly a flash football fan, let me conclude with some examples from the middle of the field where even light is available from all sides of the player.
1/800 sec, f/2.8, ISO 6400
1/800 sec, f/2.8, ISO 16,000
And also two flashed shots from the same game
Notice the 'ghosting' in the flashed images. Not too bad but present nonetheless. Study these photos. Study your own. You can decide for yourself which approach will work best for you. At most venues, my approach has become to shoot ambient until it is completely dark and the offense is inside the 25 yard line. Then I will switch to flash.
If the game is close and it's the 4th quarter, I'm almost always shooting with my 70-200 and my speedlight, a Canon 580 EX II. This is because I want to capture any touchdown and subsequent jube or any reactions from the bench. Spirits will be running high and shadows abound in the end zone and on the sideline. In this case, I wanted to tell the story of a coach instructing his quarterback before getting the ball back to start a final 2-minute game winning drive. If you know where the scoreboard is and think about it, then you can use it to your advantage.
Incidentally, I shoot with the speedlight mounted about 2' below the camera on my monopod. One thing I learned from my friend Fernando who works for the local paper is the importance of getting the shots immediately after the game. He always seems to be where the action is. If a coach is hugging his quarterback, Fernando is between the two of them! Don't you forget that in those big games, there are quality images to be captured after the final gun.
Here is a happy group of players and fans but there is one cheerleader on the lower right who is headed away from the celebration...
It turns out that this senior cheerleader was headed to be with her Dad, the coach who had just broken though to the state championship game after years of trying. This misty eyed moment was one of my favorites of the year.
Two last tips
First, have a plan. What are you there for? What are you trying to capture? Are you trying to capture the event for the yearbook? If so, be sure to get there early and get those shots of the band, the pom-pom dancers, the color guard and the burgers on the grill. If you are strictly an action photographer, find out who the big hitters are on special teams. Who are the leaders of each team. Study the stat sheet. If you are selling your images, you might want to get as many images as possible in the pre-game so you will include as many players as possible. If you have requests for images, make a brief list of who wants to purchase your prints. Decide how you are going to handle darkness. Quit at the end of twilight? Go to high ISO? Speedlights? All three approaches are valid depending on what gear you have and what your goals are. At the beginning of this tutorial I mentioned building cooperative relationships with those who have responsibility/authority for the game. If the coach or AD or Ref would like a photo of something or someone, get it for them and give it to them. They have plenty of people who want something from them and not many who want to do something for them. Have a plan that you could write down on a 3 x 5 notecard.
Second, have a mentor. My mentor, Chico, has been an enormous help to me through the years. Left to my own devices, I will invariably head off on a tangent and lose track of where I want to go. Chico will be the one to remind me of the thing I've forgotten, what I'm missing, or where I'm just plane wrong. Try to have your own mentor. It can be a fellow enthusiast, a photog for the local paper, or even the photographer who did your family portrait.
BTW, don't forget to have fun. You are capturing young people fully engaged in an activity they are doing for sport. Let their joy and enthusiasm infuse and inform your images.
Phil Zivnuska
]]>
Consider two cities in the central time zone; Pensacola, Florida (east) and Garden City, Kansas (west) and look at the difference in sunset times and how fast the days are getting shorter at each location.
Sunsets for each city September 1 September 30
Pensacola 7:12 pm 6:36 pm
Garden City 8:14 pm 7:29 pm
As you might expect, there is about an hour's difference in the sunsets across the time zone. That's huge in determining your technique and the value of shooting early in the game. Exploit every minute of sunlight.
Professional photojournalists and avid enthusiasts will have the equipment to deal with dark conditions but even then, images captured in daylight will be far more compelling than the same capture at night--and a lot easier to get. If you have a choice, shoot early. Early in the game and early in the season give the best results.
1/640 sec, f/3.5, 155mm, ISO 1600, Canon 1D Mark IV, Canon EF 70-200 f/2.8L IS II
September 21, 2012; 7:16pm ; Wichita, Kansas
___________
October 31, 2008; 7:04pm; Wichita, Kansas; Opening Kickoff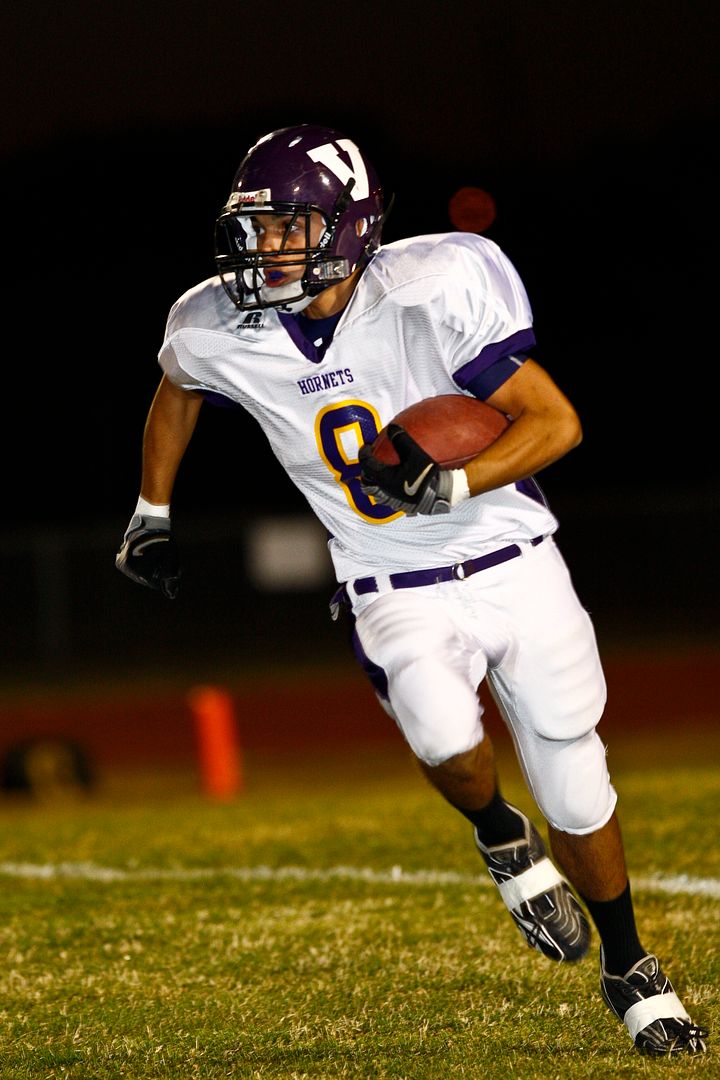
1/300 sec, f/3.5, 300mm, ISO 1250, Canon 1D Mark III, Canon 300mm f/2.8L IS, flash ETTL +1/3
Phil Zivnuska
]]>
When I shoot an event, I like to try different things to attempt to improve my images. It might involve a new angle or tweaking my settings to trade SS for ISO or aperture. I'm always trying something to work the images. Recently, a tennis tournament was held at my favorite tennis venue. Access and backgrounds at Goddard, Kansas are the best for tennis in this area. It was a perfect opportunity to try a new technique--new to me at least.
Last fall, there was a ladies high school tournament at that site. When shooting from the end of the court across the net to the other end, I had the 400mm f/2.8L IS II and was trying to capture the player when hitting either the forehand or backhand. The problem was in choosing where to select the focus point. If the forehand placed the player on camera right and the ball and racquet on the left then the backhand was the reverse and the situation was the opposite for left handers. There wasn't enough time to move focus points between strokes so I tried something else. I tried a few shots with the 61 point auto selection AF mode plus iTR (face recognition) AF so I could stay focused on the athlete regardless of which side of the court he/she moved toward. It seemed to work but I needed to test it further.
With this springs mens tournament at Goddard, I decided to shoot the whole tournament with the full 61 point auto selection with iTR and just see how well it worked out.
It was great!
Goddard has wonderful backgrounds that become a soft buttery blue blur when shooting with the 400 at a large aperture (f/2.8 to f/3.5). When the player has a solid colored uniform, it makes it easy for the camera to use color to help track the skin tones against the solid colors. Additionally, the face recognition technology has an excellent opportunity to perform. The photographer simply initializes the focus on the player's face and the X will track that face as long as it stays within the focus area. The camera displays which of the 61 points are being used so you can easily see if the camera is locked on the appropriate spot. The day of this tournament was marked by winds from 25 to 35mph and I had my hands full keeping a steady aim. Whenever I messed up my aiming, the displayed focus points clearly and immediately showed that fact and I was able to re-acquire the proper target. Unlike yours truly, the 1DX was flawless. I was stunned to see that not only was the player in focus but the face recognition technology kept the eyes sharp. Every time. Wow. Let me be clear, I make plenty of mistakes but the X did not. It was remarkable.
It also worked with the 70-200mm
Keep in mind that at 30 feet, the 400mm will have a depth of field of about 4 inches. On these shots, I'm able to count the young man's eyelashes in each shot. Originally, I was skeptical of this technology but now I'm a believer--for tennis anyway.
Rudy Winston of Canon recommended giving this a try (on one of his training videos) and I'm glad he did. Try it!
Phil Zivnuska
]]>
Action photographers will often spend large sums of money, as much as they can afford, in order to purchase a camera body with the most advanced focusing system possible. They will tweak the focus point location, the number of auxiliary focus points, how fast or slow the focus changes from one object to another, the case of focus tracking and how the camera will react to acceleration. Sadly, many photogs will omit adjusting the adjustment available on almost all dslrs that assists your most important focus aid--Your Eyes!
It's vitally important to be able to discern when your camera's focus system is locked on the desired subject and when the camera has locked onto a subject close to the desired but not exactly the one intended. That can be the difference between a tack sharp image and one that is disappointingly soft. If you can't tell the difference in the viewfinder, don't be surprised if you camera's focus remains locked momentarily off target even if you've re-aimed the focus point properly. You can often adjust the length of the lag before the camera refocuses but there will always be a slight lag. You often hear action photogs complain that the focus is misplaced even though the focus point is properly located at the moment of exposure. More often than not, the focus point was misplaced earlier and the focus had not yet relocked on the target.
How can you improve your eyes ability to see proper focus? With the dioptric adjustment.
Many shooters have visual impairments that can be improved upon with an adjustment of the diopter of the viewfinder. That adjustment is usually located adjacent to the viewfinder. It may be to the left or right depending on the manufacturer. Check your owners manual. A Canon installation is shown below.
Adjust the wheel until the image appears as sharp as possible. Note the amount of adjustment and repeat this several times in order to get a consistent outcome. It should be that simple. For most folks, it is. However, some people have a discrepancy in excess of the maximum adjustment. This can occur when a photog uses glasses but wants to shoot without them for some reason. Be aware that some camera manufacturers offer adjustment lenses that dramatically extend the amount of adjustment available. You may want to consult your optometrist for a recommendation of how much diopter adjustment you will require.
You are ready to shoot. Now that you can tell when the focus has drifted off target and are using back button focus (yes, back button focus), you can use the "Bump Focus" technique to correct.
Bump focus refers to the practice of releasing and immediately re-pressing the back button for focus. This will expedite the acquisition of a new focus lock on the subject centered on the focus point. In fast moving sports with numerous targets such a basketball or football, it is easy for the focus system to lock on another player or a referee. Proper dioptric adjustment lets you recognize when you need to acquire a new lock with a bump focus. A higher keeper rate is your reward.
Phil Zivnuska
Volleyball shooters
Can you tell in the viewfinder when you are focused on the player and when you are focused on the net? Not without a proper dioptric adjustment!
]]>
Get your tour from Chief Tsosie's tours of Antelope Canyon. Rob is a great guide.
www.antelopeslotcanyon.com
Next time, back to sports.
Phil Zivnuska
]]>
In Praise of Gaffer Tape
Gaffer tape is one of those non-secret, secrets that lots of photographers use regularly but others have never even heard of. It is an inexpensive cotton cloth tape that is durable and holds strong yet has the ability to be readily removed from a surface without leaving any residue. As the name Gaffer implies, this tape is often used in electrical applications to hold wires to wood, carpet, tile or any other flooring material. In photographic applications, this tape can mitigate a possible trip hazard from wires of all types. The lack of a residue will be appreciated by the maintenance staff and is a must for many venues.
Since it is a cloth material, it is useful to cover metal or other surfaces that can be cold or hot to the touch. If you own a monopod or tripod and frequently find yourself holding cold surfaces, simply wrap the area with gaffer tape and voila, instant comfort. A similar improvement can be for offending areas of a camera body. This tape is also used for the lens caps of Canon 'Big White' lenses. It makes touching the cap comfortable and is a nice reinforcement when the lens cap has a crack.
Since we're speaking of monopods, let me mention another use. When I shoot high school football, I clamp a speed light to my monopod using hose clamps. Wrapping the monopod shaft with 3 turns of gaffer tape will prevent the clamps from scratching the metal and keeps the clamps from sliding.
If you've ever had lens switches move inadvertently, a small piece of gaffer tape can prevent that from recurring and if you want the focus to remain unchanged for a remote set-up, gaffer is the ticket. Camera bodies can benefit from some tape applied to covers that tend to come loose or open. When I ship a body to Canon for inspection and cleaning, I'll tape over the area exposed by the removal of the battery.
This material also makes a great impromptu clamp for temporary positioning of speed lights, PocketWizards, or even a light stand--especially if a light is mounted on the end of a monopod. Take your shots and toss the used tape. It's fast, cheap and easy.
There are many wonderful ways to attach gels to a speed light. All too often however, I find myself with the need to attach a 1/2 cto or other gel and no way to do it. I just put some short lengths of gaffer on my 580 EX II so if I ever need it, I can remove and use a bit to attach a gel. It peels off when I'm done with no ill effects.
One last use is to mark repeat locations on a floor or other surface. This can be handy for camera remotes or any application that will be repeated from time to time.
OTHER IDEAS: How do you use gaffer tape? Post your ideas. Thanks.
Phil Zivnuska
]]>
The first thing to do is to get your lens as close as possible to the fence or net. I don't place the lens touching the fence, just close. It can be so close that your left hand touches the fence at the end of your lens cap. If you are behind the plate, be sure you and your lens won't be hit by a deflected pitch. Have your lens location such that the spaces between the links are maximized for the clearest view.
Second, use a fast lens. You want the largest diameter lens you can use. That will maximize the view and minimize the effect of your obstruction.
Third, try to shoot perpendicular to the fence. Anything more than a very slight angle and the metal or net will have a greater and greater effect in degrading the image quality.
Here is an image taken with the 400mm f/2.8L IS and a 1D Mark IV through a chain link fence. This large diameter lens is more than a match for a chain-link fence. You can see the detail and sharpness.
This was taken using the 300mm f/2.8 IS and again the 1D Mark IV.
While the larger diameter super-telephoto lenses are best, fine images can be obtained using something far less expensive. Here a 70-200mm f/2.8L IS is used through chain-link moments before sundown. The body is a 1D Mark III in this photo from 2010.
Pixel peepers will be able to tell that there is a slight loss of detail in images shot through a fence but that will only be apparent at very large print sizes and even then, the differences will be subtle. Remember, use fast, long lenses, get close to the fence and shoot directly through the spaces. One last tip: These images are exceptional in part because of the light. Late afternoon golden hour light is low in the sky. When the diamond is laid out in the conventional orientation, that light will come from the west and illuminate the face and especially the eyes of the right handed pitcher without a shadow from the cap.
Phil Zivnuska
]]>
By Phil Zivnuska
The Long Jump and its cousin the Triple Jump are relatively straight forward to photograph but there are several simple techniques to improve your ordinary images and make them noteworthy.
The biggest photographic problems are poor backgrounds. The typical high school track meet will have numerous obstructions in the background and other competitors will be standing, sitting, loitering, or otherwise just be hanging out in the area you would prefer to be clean for your image. Nothing says "Who Cares" like a disinterested high school student appearing in the background of your capture. Additionally, the athletes who aren't competing at that moment will be wearing an assortment of coats, hoodies, shirts etc. and they will often look a bit tattered.
Fortunately, there are strategies to employ. First, the runway has to be clear for the long jumper to run on his approach. If you are lined up directly in line with the runway, that will allow you to have at least the area directly behind the jumper clear.
Next, be sure you are shooting at a large aperture, perhaps f/2.8 or at least something close to that. That will assure as much background blur as possible.
Third, get low. A low angle allows you to view the jumper against the sky. For this shot, I was literally laying in the dirt with my elbows on the ground. My position was right next to the officials with the rakes.
This extreme position was required to isolate the jumper against the sky instead of the cluttered group of onlookers.
When you are about to shoot a jumper, keep an eye on them all the way through from beginning to end. There can be a lot of intensity as the athlete runs to the takeoff point.
The landing is always a popular shot due to the spray of sand.
I wrote earlier about aligning yourself with the runway. At most high schools, the football field runs north and south. The long jump and triple jump areas also often run north and south on the edge of the field. In the typical 'after school' track meet, this means that the shadows from the setting sun will divide the face of the jumper into sun and shadow. In strong sun, that can make for a compromised image (see immediately above and below).
Moving to the side of the pit will help with the sun angle but as seen earlier, be sure to get extremely low to view the jumper against the sky instead of obstacles. One last tip: If you are going to shoot against the sky as your backdrop, consider using a circular polarizing filter. The sky will be bluer, the clouds look whiter, and the colors will pop.
A polarizing filter was used for the last two images as well as the Derby jumper (in green) further above.
Sometimes, the long jump is pictured directly from the side. This emphasizes the height reached by the competitor. In this case, the background is even more critical to the success of the shot. Consider shooting this with the sun at your back or even shooting into the sun and having the athlete silhouetted against the sky for an artistic view of the event.
Phil Zivnuska
From 2009:
http://photography-on-the.net/forum/showthread.php?t=735799
]]>
Many photographers have a very limited understanding of depth of field. That understanding is often limited to the notion that larger apertures (smaller aperture numbers) are associated with a small depth of field. That's useful to clean up distracting backgrounds but there's more the action photographer should know. The focal length of the lens has a huge role in determining the depth of field and that fact is both useful and often unappreciated.
First, let's consider the typical situation, long focal length (300mm) and large (f/2.8) aperture. Here the combination produces a creamy background that makes the player pop off the page.
But what if you want the other effect? A large depth of field.
This is exactly the situation I was in two weeks ago. My goal was to capture basketball players on the court and include the overhead scoreboard. Both needed to be in focus. My mentor Mike 'Chico' LaBarbera was visiting from Eau Claire, Wisconsin and he was using my 1D X and the 70-200mm f/2.8 IS II. That left me using the 1D IV with a 24-70mm f/2.8 II. My buddy Mark Weaver had strobe lights set up but wasn't using them for this tournament game. This gave me control over the two key factors--Aperture and Focal Length. The first thing I did was to zoom to the wide (short focal length) end of the lens, 24mm. Then because I was using the stobes, a small aperture was chosen, f/8.0, with only a modest increase in ISO to 640. I pre-focused on the backboard, about 12 feet away.
Small apertures and short focal lengths = large Depth Of Field. So, how large is that DOF?
There is a handy DOF calculator on the internet.
www.dofmaster.com/dofjs.html
Plugging in the values of 1D Mark IV, 24mm, f/8.0, and 12 feet yielded the DOF.
Everything from five and a half feet to infinity was going to be in focus!
Because the DOF was going to be quite large, I modified my technique to take advantage. I always use back button focus so once I pre-focused on the back board, I just avoided the back button and my focus would remain fixed at about 12 feet. There was no need to worry about focusing because everything was going to be in focus. The camera was set on the ground for visual effect and because the focal length was so wide, aiming merely consisted of pointing the camera toward the area of action with a slight upward tilt. No looking through the viewfinder. No focus tracking. Just rough aiming 'from the hip'. Not even from the hip since the camera was literally on the ground.
Here is the result.
The Garden City Buffaloes beat the defense downcourt and seal the win.
How far can you take these principles? Well, if you want to show three wrestlers and the arena where the state championships are held, you can shoot at 12mm (fisheye) and f/5.0 from 5 feet to get a DOF that extends from 27 inches to infinity. The arena, the crowd and these three top wrestlers are all part of the story.
Let's take a closer look at the role of the lens focal length in depth of field. Consider the case where a photographer is using a Canon 7D to photograph sports and that he is at f/8.0 at a distance of 12 feet. I've been alluding to the fact that focal length is important in calculating DOF. Let's check the DOF at 24mm and at 200mm under those conditions.
24mm focal length DOF = 286 Feet From 6 ft to 292 ft.
200mm focal length DOF = 4 Inches! Just 12 feet +/- 2 inches
Consider focal length before aperture as you plan your depth of field.
Put the depth of field calculator and the principles of DOF to work in your images for your purposes. The focal length of the lens is a key aspect of that calculation.
Phil Zivnuska
PS Don't forget that you can often pre-focus and shoot "From the Hip" when necessary at those wide focal lengths! Think of how you might use this DOF information with a wide angle remote during the upcoming track season to obtain a memorable shot that average shooters won't think to get.
]]>
Today I'm going to show you some images using the FourSquare technique of Dave Black and the stop action water technique of Daves Digs. To do this, my friend Mark and I pooled our Canon 600 EX RT flashes along with our FourSquare light boxes. We added a black backdrop and some water balloons and voila!
This technique can be used for other sports as well.
As you can tell, one problem is getting the athlete to keep their eyes open during the shot. Once they get the splash off the first attempt, the urge to flinch is quite strong. Obviously, timing is a huge factor. If you as the photographer are too early, you will get a shot of the water balloon.
Give it a try for baseball! Have fun! FWIW, My settings for most of my soccer pics were 1/2000 seconds, f/5.0, and ISO 400 using my 135mm f/2.0 canon lens and a 1D X. Mark and I had two FourSquare boxes, one camera right and the other camera left, with one flash behind the athlete from each side as sort of a rim light.
Here are some links:
Dave Black:
https://www.youtube.com/watch?v=_ZANzwKXwZs
https://www.youtube.com/watch?v=uclkmd5Zt98
Daves Digs:
https://www.youtube.com/watch?v=qz4Y09v9D9M
Phil Zivnuska
]]>
Sports photographers, especially new ones, often concentrate so much on capturing action that they neglect factors that affect image quality. One way to improve the vibrance and saturation of colors while reducing haze is to use a circular polarizing filter when conditions warrant. Landscape photographers often use them in their work but they are rarely seen at sporting events. I like them in sports photography whenever my images will include a lot of sky or if I am dealing with low sun angles where reflected light may be an issue. Those days when the skies are an ugly milky white can't always be avoided but a CPL will draw out whatever definition in the clouds is possible.
A circular polarizing filter is a photographic filter that screws on to the end of a lens (usually) and reduces or eliminates reflected sunlight. The size will depend on the size of the lens. Both 77mm and 82mm are popular sizes. Quality is variable and so are the prices. Read the reviews and get a good one. These filters rotate to maximize their effect and so it will be necessary to recalibrate when changing from portrait orientation to landscape. It is important to note that the effect is apparent as one looks through the viewfinder. Simply look in the viewfinder while rotating the filter and you will see the polarizing effect maximize, then minimize, then maximize again. WYSIWYG so when the scene has the best appearance to your eye, that will be the best for your capture. When reflections are gone, the colors will appear richer, skies bluer, clouds whiter, and haze will be reduced. It comes at the expense of 1 to 2 stops of light.
Light loss is less of an issue than you might expect. Remember that we are talking about reflected sunlight so by definition we won't be using it for indoor, night, or even overcast days. That means there will be ample light for fast shutter speeds at fairly low ISOs for good image quality. The polarizer has minimal effect when shooting into the sun or with the sun at your back and it's most useful when shooting at 90 degrees to the sun. It's also possible to have variable effects when shooting with extremely wide angled lenses because different areas of the image will be at different angles to the sun. Check and double check the viewfinder!
What types of sports images can use a circular polarizer?
Pole vault. To the naked eye, the sky was almost all a murky white with no definition. With the polarizer, the sky became at least a little interesting.
Long jump
And the high jump
Try a circular polarizing filter for your landscape images and then use those polarizing properties to best advantage in sports. Nearly everyone loves images with bold colors that are free of glare or haze.
Phil Zivnuska
]]>
Focus is non-negotiable. It has to be sharp. If it isn't, toss the pic in the trash. High ISO noise can be dealt with in post production but if the image is blurry from either motion blur or a misplaced focus, that image cannot be recovered. Second, a good image must have a face and newspapers prefer to see two faces. Shakespeare wrote: "The Eyes are the window to your soul." If your image of the face gets a look at the eyes, that's good. If you are tight enough to have those eyes reveal the emotion, intensity, and character of the athlete, i.e. his soul, that's outstanding.
The action captured should be peak action. If you look at the image and see that it is just after the tag or just after the athlete completed the play and is starting to relax, you've missed the shot. Last, if there is an object used in the sport, that object should be included in the image. It can be a ball, a puck, a shuttlecock, whatever. If the athletes use it, have it in the picture. When you have an image that requires a peculiar crop to include the object, that's probably a sign that the photo won't work.
Now that you know the rules, let's break them. First, consider two of the greatest sports photos of all time. These are iconic images for those old enough to remember them.
Y.A. Tittle was the NFL MVP in 1963. On this play in late 1964, he suffered a bone-jarring hit while throwing. The pass was intercepted and returned for a touchdown. The 38 year old Tittle, a great and valiant warrior, bloodied and injured, was finished. No game action, no ball here, and the image quality is poor by today's standards, but this memorable moment fifty years ago, yielded one of the most enduring sports images of all time. This photo was taken by the late Morris Berman. Mr. Berman submitted this photo to his editor who refused to print it. He wanted action. The editor knew the 'rules' of a good sports photograph but was too rigid to recognize greatness that fell outside the lines. Grain or noise in the image? Horizon off? Who cares.
Fair Use--Commentary
Muhammad Ali referred to himself as the "Greatest of All-Time." When he defeated Sonny Liston, the world paused to view this brash, supremely talented fighter. This iconic image from 1965 didn't capture the decisive punch and although it wasn't peak action, it was the emotional peak of this fight and his career. Notice all the pro photographers in the background who were in the wrong place at the wrong time. We aren't the only ones who miss great moments! Think of peak action in a larger sense where it can include peak emotion and great storytelling. Once again, we could quibble about image quality (noise and contrast) but that would miss the point.
Fair Use--Commentary
Most of us will never shoot all-time greats but we have the opportunity to shoot excellent images that break the rules. These captures will be a smaller percentage of our total but really add something. Be sure to look for peaks of emotion or intensity--not just action. Jube shots are important examples of this peak emotion. Here are some other examples from high school athletic contests.
Can you hear me now?
1/1600 sec. f/5, 300mm, ISO 1600, Canon 1D Mark III, Canon EF 300mm f/2.8L IS
The talented freshman makes a mistake--and knows it.
1/800 sec. 200mm, f/2.8, ISO 6400, Canon 1D X, Canon EF 70-200mm f/2.8L IS II
Pure athleticism.
1/8000 sec. f/3.2, 400mm, ISO 400, Canon 1D Mark IV, Canon EF 400mm f/2.8L IS
]]>
We must start with fundamentals. In this case, the fundamentals are the elements that will make for a good shot. Those are focus, face, peak action, and backgrounds. For me, faces are essential. In order to see faces, get to the event early and observe the athlete as he/she approaches the bar. Observe the jump to determine what vantage point will give the best facial view. Snap a few practice frames if you need to. It's not as simple as shoot from the opposite/same side as the approach. Plus, some jumpers will photograph better from the landing side, some from approach. This is extremely variable at the lower levels of competition such as middle or high school.
The following athlete throws her head back so her face can be photographed very well from the landing side of the bar.
In this shot from the Kansas State Track Meet in 2013, I attempted to photograph this athlete from the landing side. Mediocre result.
In 2014, again at the state meet, I was able to get to a vantage point on the approach side and shoot this burst.
Compare the head position here to that of the jumper in the first shot.
It's the exact same venue, same athlete, just a different side of the bar with a much better view of the face. It's worthwhile to note that the second set of images have a busier background but the better view of the face offsets that fact. However, that does bring us to backgrounds. If you shoot standing, you'll have a better angle to see the face but often a busy background.
These shots are from 2011. In the first shot, there is nice action but a busy distracting background.
Kneeling or sitting on the ground can correct this problem by projecting the jumper against the sky. Note that with this jumper, the photographer must be on the camera right side of the bar. A polarizing filter might have helped give some definition to an ugly, milky white sky.
One other item. If you are going to include the sky in the picture, use a polarizing filter to get the most dramatic sky possible. The polarizer will make the blue of the sky bluer and the white clouds far more dramatic. Put all these elements together and you get shots like this from this (May 30, 2014) weekend.
Standing perspective. Both of the following shots use a circular polarizing filter. With this athlete, the photographer must be on the camera left side of the bar to see the face.
Sitting on the ground, shooting skyward. Wonderful isolation and the polarizer renders a pleasing, colorful sky with defined clouds.
Some final issues to deal with. What about focusing? Is it better to track the athlete through the approach or to pre-focus on the bar and let the athlete jump into the focus plane? If I can track the athlete through the whole approach, I will track in servo focus through the jump. That is often not possible when shooting from the landing side due to obstacles and/or because the athlete takes an extreme angle during his approach. In those cases, I back button pre-focus on the label in the center of the bar and shoot a burst as the athlete jumps. In this case, I prefer to use a smaller aperture to give me extra latitude from an expanded depth of field. At 70mm focal length, full frame, 15 feet away from the bar, using f/5.6, I'll have a depth of field of about 4.8 feet. If you are shooting against the sky, there is no need for background blur so make the focusing easy on yourself by using a small aperture. A fast shutter speed is easy to obtain outdoors. Use 1/1000sec or faster.
Conclusions
Watch the warm ups to determine what possible camera location has the best view of the jumpers face. Check the possible backgrounds. If you can shoot from a low vantage point, the athlete may be isolated against the sky instead of a cluttered stadium Consider using a circular polarizing filter to make the sky more striking. Use large apertures to blur a cluttered background. A small aperture will give more leeway in depth of field and can be helpful when background blur isn't needed (ex. sky background). Different jumpers may need to be shot from different locations.
Next time, more on circular polarizing filters.
Phil Zivnuska
]]>
The Shot Put is an event for powerful men and ladies. If you shoot high school sports, it can be a challenge to photograph this event in a way that is complimentary to the appearance of both ladies and the men. For men, there is usually less of a problem if the athlete's face is contorted. High school girls may be more sensitive about how they appear in photos. Depending on how the image is to be used, both men and women might like to have a photo of themselves competing that shows intensity yet is pleasing from a photogenic aspect.
Here's an approach that can be used for both sexes and also might be helpful if access is limited, the background is distracting, or the sun angle is troublesome. Consider shooting from behind the athlete instead of the conventional position in front.
Consider the problems with this:
Compared to this:
Or this:
Compared to this:
Or this:
Compared to this:
This is not to say that shooting behind the athlete will always be a better vantage point. The same issues of light and background can conspire to work in the opposite direction. Additionally, the action of the launch of the shot put can be compelling and gender stereotypes of what looks appealing may just be flat wrong. What I am suggesting is that when you go to photograph the shot put, consider the light, background, access, desires of the athlete, and how the image is to be used when you choose where you, the photographer, should position yourself.
Phil Zivnuska
]]>Without the scoreboard, the image below is just a coach talking to his quarterback. Because the scoreboard is included, we can figure out that it is 4th and 4 for the other team who has a 38-35 lead and the ball with only 2:17 to play in the 4th quarter. This quarterback is going to have a tough challenge coming back if/when there is a change of possession because he has only 1 timeout left. Including the scoreboard shows this to be one of the key moments of the game and adds significance to this interaction between coach and player.
1/250 sec. f/3.5. ISO 1600, 200mm, Canon 1D Mark IV, Canon EF 70-200mm f/2.8L IS, flash
The game was for a berth into the state championship finals. There indeed was a change of possession, the QB did march his team down the field and about two minutes later, he threw this pass into the end zone for a touchdown and the win.
1/250 sec. f/3.5, ISO 1600, 70mm, Canon 1D Mark IV, Canon EF 70-200mm f/2.8L IS, flash
How do you frame this scoreboard shot with the focus you desire?
If you use Back Button Focus as I do, simply put your focus point on your foreground subject, push then release the back button. Your focus is set. Recompose to include the scoreboard and depress the shutter button to fire away. The focus will stay on the spot where you pushed in the back button. The shutter button won't affect the focus. Back Button Focus is a great advantage to the sports photographer because it allows you to have your camera set to servo focus (where it is already set to follow action) and still get the focus where you want it without having to change the location of focus points. That's a huge help when you have only seconds to get the shot focused, change the framing, and then expose the image. The settings to activate a back button and remove the focus from the shutter button will vary with the camera body.
I'll use the same technique in basketball to focus on a free throw shooter and then recompose to include the scoreboard and expose. If it suits your needs, you could then focus on the scoreboard (back button), recompose to include the shooter, and then expose the image (shutter button). Either way, Back Button Focus puts you in artistic control.
1/800 sec. f/2.8, 200mm, ISO 6400, Canon 1D X, Canon EF 70-200mm f/2.8L IS II
1/1000 sec. f/4.5, 105mm, ISO 600, Canon 1D Mark IV, Canon EF 70-200mm f/2.8L IS II
1/800 sec. f/4.0, 27mm, ISO 12,800, Canon 1D X, Canon EF 16-35mm f.2.8L II
If you want the above shot, think ahead and sit down in a spot where the scoreboard appears next to the backboard but is not obscured by it. As an alternative, this shot could have been made to include the scoreboard on the wall instead. The photographer would need to move to camera right to reveal it unobscured. As photographer, you get to choose how to frame the shot. Plan ahead. Don't rely on luck.
Phil Zivnuska
* "Use a picture. It's worth a thousand words." was originally said by newspaper editor Arthur Brisbane. He was quoted in a 1911 article about journalism. Variations of the quote have also been attributed to Napoleon, an ancient Japanese or Chinese philosopher and also Frederick R. Barnard in 1921.
]]>
Everyone needs someone to critically evaluate their work. In effect, everyone needs an editor or someone who can look at your images with fresh eyes. This is due to several reasons. We all tend to get in a rut where we make the same mistakes over and over. I see this from photographers who only shoot landscape or just portrait orientation. It can be something we do such as chronically making the white balance too warm or saturation too high on our galleries. On the other hand, it may be something we omit such as the failure to include jube shots or emotional shots of the coaches or fans. Your eyes may lock on the compelling action in an image and fail to notice that you are not paying enough attention to the cluttered backgrounds. Mentors can be hugely helpful in these cases.
The role of mentor is not to be taken lightly. To do this properly, time is required to really look at your photos in detail. Then the mentor must be willing to take the time and effort required to offer a detailed critique. When I say critique, understand that I'm not referring to criticism alone. A proper evaluation should include the positive aspects as well as the negative. We all have egos and an unrelenting barrage of complaints won't be helpful for long. This is something to remember when you are mentoring as well as being mentored. There is an old rule of thumb that says when critiquing, one should start with two things you like about the image(s) before starting in on the items to improve upon for the next shoot. Ideally, this should be someone with a breadth of experience.
Where can you get one of these people who will offer their time and expertise for no money? Surprisingly, there are lots of folks who will do this in the photography community but it may require the establishment of a relationship before you can expect significant help. There are likely many professional or skilled non-professional photographers in your community. Do you know any of them personally? If so, I'd start there. If not, do you know an experienced employee at a photography store? How about an editor at the local paper? Perhaps a person at the high school who edits the yearbook or paper? I've had the privilege of getting to know several highly skilled photographers just by taking the time to introduce myself at high school events where both of us are shooting. When you meet and greet a photog for the third or fourth time, it becomes much easier to engage in a conversation about the art and science of sports photography.
My mentor is Mike "Chico" LaBarbera. We became best friends in 9th grade (46 years ago) and he is the one who encouraged me to start sports photography. I cringe when I think of how terrible my early images actually were and how wonderful I thought they were! Fortunately, Mike was patient and he knew how to suggest just one or two improvements at a time and he was skilled in suggesting things that were appropriate to my skill level. We only see each other in person about once or twice per year. We talk photography once or twice per week and Mike evaluates my images on zenfolio several times per month. That is enormously useful.
The electronic age offers its own opportunities for growth. Photography forums are very helpful. Personally, my current favorite is
photography-on-the.net/forum/
also known as the Canon forum. There is a photo sharing forum for sports where you can post images and get feedback. The critiques can sometimes be harsh but the proper attitude to take is that even an unfairly negative evaluation can contain useful information for future events. It won't take long before you know who is talented and who is a poseur. There are incredibly talented folks who post there (and other forums too) and I'm always pleasantly surprised by how these gifted photographers are willing to share their insights.
This is the best time in the history of mankind to learn photography. Dive in. Join the party. The technology is incredible. Use it to realize your photographic vision. Have a mentor help guide your journey. Make it your task of tasks to do it now.
Phil Zivnuska
]]>
Burst shooting is a valid photographic technique. Which one of the following images would you have captured using a one shot technique?
]]>
Many photographers have a very limited understanding of depth of field. That understanding is often limited to the notion that larger apertures (smaller aperture numbers) are associated with a small depth of field. That's useful to clean up distracting backgrounds but there's more the action photographer should know. The focal length of the lens has a huge role in determining the depth of field and that fact is both useful and often unappreciated.
First, let's consider the typical situation, long focal length (300mm) and large (f/2.8) aperture. Here the combination produces a creamy background that makes the player pop off the page.
But what if you want the other effect? A large depth of field.
This is exactly the situation I was in two weeks ago. My goal was to capture basketball players on the court and include the overhead scoreboard. Both needed to be in focus. My mentor Mike 'Chico' LaBarbera was visiting from Eau Claire, Wisconsin and he was using my 1D X and the 70-200mm f/2.8 IS II. That left me using the 1D IV with a 24-70mm f/2.8 II. My buddy Mark Weaver had strobe lights set up but wasn't using them for this tournament game. This gave me control over the two key factors--Aperture and Focal Length. The first thing I did was to zoom to the wide (short focal length) end of the lens, 24mm. Then because I was using the stobes, a small aperture was chosen, f/8.0, with only a modest increase in ISO to 640. I pre-focused on the backboard, about 12 feet away.
Small apertures and short focal lengths = large Depth Of Field. So, how large is that DOF?
There is a handy DOF calculator on the internet.
www.dofmaster.com/dofjs.html
Plugging in the values of 1D Mark IV, 24mm, f/8.0, and 12 feet yielded the DOF.
Everything from five and a half feet to infinity was going to be in focus!
Because the DOF was going to be quite large, I modified my technique to take advantage. I always use back button focus so once I pre-focused on the back board, I just avoided the back button and my focus would remain fixed at about 12 feet. There was no need to worry about focusing because everything was going to be in focus. The camera was set on the ground for visual effect and because the focal length was so wide, aiming merely consisted of pointing the camera toward the area of action with a slight upward tilt. No looking through the viewfinder. No focus tracking. Just rough aiming 'from the hip'. Not even from the hip since the camera was literally on the ground.
Here is the result.
The Garden City Buffaloes beat the defense downcourt and seal the win.
How far can you take these principles? Well, if you want to show three wrestlers and the arena where the state championships are held, you can shoot at 12mm (fisheye) and f/5.0 from 5 feet to get a DOF that extends from 27 inches to infinity. The arena, the crowd and these three top wrestlers are all part of the story.
Let's take a closer look at the role of the lens focal length in depth of field. Consider the case where a photographer is using a Canon 7D to photograph sports and that he is at f/8.0 at a distance of 12 feet. I've been alluding to the fact that focal length is important in calculating DOF. Let's check the DOF at 24mm and at 200mm under those conditions.
24mm focal length DOF = 286 Feet From 6 ft to 292 ft.
200mm focal length DOF = 4 Inches! Just 12 feet +/- 2 inches
Consider focal length before aperture as you plan your depth of field.
Put the depth of field calculator and the principles of DOF to work in your images for your purposes. The focal length of the lens is a key aspect of that calculation.
Phil Zivnuska
PS Don't forget that you can often pre-focus and shoot "From the Hip" when necessary at those wide focal lengths! Think of how you might use this DOF information with a wide angle remote during the upcoming track season to obtain a memorable shot that average shooters won't think to get.
]]>
Focus is non-negotiable. It has to be sharp. If it isn't, toss the pic in the trash. High ISO noise can be dealt with in post production but if the image is blurry from either motion blur or a misplaced focus, that image cannot be recovered. Second, a good image must have a face and newspapers prefer to see two faces. Shakespeare wrote: "The Eyes are the window to your soul." If your image of the face gets a look at the eyes, that's good. If you are tight enough to have those eyes reveal the emotion, intensity, and character of the athlete, i.e. his soul, that's outstanding.
The action captured should be peak action. If you look at the image and see that it is just after the tag or just after the athlete completed the play and is starting to relax, you've missed the shot. Last, if there is an object used in the sport, that object should be included in the image. It can be a ball, a puck, a shuttlecock, whatever. If the athletes use it, have it in the picture. When you have an image that requires a peculiar crop to include the object, that's probably a sign that the photo won't work.
Now that you know the rules, let's break them. First, consider two of the greatest sports photos of all time. These are iconic images for those old enough to remember them.
Y.A. Tittle was the NFL MVP in 1963. On this play in late 1964, he suffered a bone-jarring hit while throwing. The pass was intercepted and returned for a touchdown. The 38 year old Tittle, a great and valiant warrior, bloodied and injured, was finished. No game action, no ball here, and the image quality is poor by today's standards, but this memorable moment fifty years ago, yielded one of the most enduring sports images of all time. This photo was taken by the late Morris Berman. Mr. Berman submitted this photo to his editor who refused to print it. He wanted action. The editor knew the 'rules' of a good sports photograph but was too rigid to recognize greatness that fell outside the lines. Grain or noise in the image? Horizon off? Who cares.
Fair Use--Commentary
Muhammad Ali referred to himself as the "Greatest of All-Time." When he defeated Sonny Liston, the world paused to view this brash, supremely talented fighter. This iconic image from 1965 didn't capture the decisive punch and although it wasn't peak action, it was the emotional peak of this fight and his career. Notice all the pro photographers in the background who were in the wrong place at the wrong time. We aren't the only ones who miss great moments! Think of peak action in a larger sense where it can include peak emotion and great storytelling. Once again, we could quibble about image quality (noise and contrast) but that would miss the point.
Fair Use--Commentary
Most of us will never shoot all-time greats but we have the opportunity to shoot excellent images that break the rules. These captures will be a smaller percentage of our total but really add something. Be sure to look for peaks of emotion or intensity--not just action. Jube shots are important examples of this peak emotion. Here are some other examples from high school athletic contests.
Can you hear me now?
1/1600 sec. f/5, 300mm, ISO 1600, Canon 1D Mark III, Canon EF 300mm f/2.8L IS
The talented freshman makes a mistake--and knows it.
1/800 sec. 200mm, f/2.8, ISO 6400, Canon 1D X, Canon EF 70-200mm f/2.8L IS II
Pure athleticism.
1/8000 sec. f/3.2, 400mm, ISO 400, Canon 1D Mark IV, Canon EF 400mm f/2.8L IS
]]>
Compared to an f/4.0 lens, the f/2.8 lens will let in twice as much light and that light can be used to increase shutter speed, lower ISO, or both. Indoor sports or outdoor events in low light can push the image quality capabilities of a camera body to the limits. Having the ability to get twice as much light is a good thing. BTW, compared to an f/5.6 lens, the 2.8 will garner four times as much light.
There are three other reasons that are important. First, the faster lens supplies more light for focusing. Even if the lens is shot at f/22, the lens supplies focusing light based upon its largest aperture i.e. f/2.8. That's extremely helpful in low light levels. The second reason is bokeh. The wider the aperture used, the smaller the depth of field (dof) and the better the bokeh compared to small apertures. That can be vital when the backgrounds are busy and distracting. To be a bit crude, a soft blue glow in the background is much better than a port-o-potty in sharp focus. Last, the fast super telephoto lens can be used with a 1.4 or 2.0 teleconverter and most camera bodies will still be able to focus.
Gathering more light means larger diameter lenses with more glass and that means heavier. Remember, you don't have to shoot at the maximum aperture to get the extra light for focusing. You the photographer are in control of your gear and hence, your image.
[I hope you won't mind looking at some young ladies in addition to traditional sports images]
1/1000 sec. f/2.8, 35mm, ISO 3200, Canon 1D Mark IV, Canon EF 16-35mm f/2.8L II
1/1250 sec. f/2.8, 38mm, ISO 100, Canon 1D Mark IV, Canon EF 24-70 f/2.8L II
1/2500 sec. f/2.8, 200mm, ISO 1600, Canon 1D Mark III, Canon EF 70-200mm f/2.8L IS
Fast lenses have uses beyond sports. These two high school ladies are playing the wicked step sisters of Cinderella in the school play.
1/500 sec. f/2.8, 300mm, ISO 3200, Canon 1D Mark III, Canon EF 300mm f/2.8L IS
1/1000 sec. f/2.8, 400mm, ISO 640, Canon 1D X, Canon EF 400mm f/2.8L IS
Don't forget, just because it is an f/2.8 lens, that doesn't mean you have to shoot at that aperture. Fast L lenses are high quality at any aperture.
1/250 sec. f/5.6, 35mm, ISO 100, Canon 1D Mark IV, Canon EF 16-35mm f/2.8L II, 580 EX II with hand-held Rogue Flashbender
One last thought. Used lenses can give great value. My first 400mm, an f/2.8L IS was purchased used. I had it for three years, used it heavily, and sold it for the same price I paid. I then purchased a flawless Canon 400mm f/2.8L IS II used and saved well over $1,000 compared to a new one. That's the lens I use today. Buying and later selling a used Canon EF 400mm f/2.8L IS can be justified if the net cost is below what an occasional rental would cost. The similar calculation can be made for any of the 'Big White' super telephotos. Consider that if your circumstances permit.
Phil Zivnuska
]]>
If you have the chance to shoot JUCO football, make it a point to shoot rising stars. The defensive end pictured below is Tank Carradine as seen in his days playing for the Butler County Grizzlies. Later, he starred for the Florida State Seminoles and is now playing for the San Francisco 49ers.
1/3200 sec. f/2.8, 400mm, ISO 400, Canon 1D Mark IV, Canon EF 400mm f/2.8L IS
On that same team was quarterback Zach Mettenberger. He left Butler and is now a very high profile player for the LSU Tigers.
1/800 sec, f/3.5, 400mm, ISO 400 Canon 1D Mark IV, f/3.5, Canon EF 400mm f/2.8L IS
The opportunity to photograph rising stars requires no exceptional talent, just some homework. Today's JUCO stars are the D1 and possibly pro players of the future. The feature shots you take today may have value in the future. That may be in cash, creating a portfolio, or in obtaining credentials for higher levels of competition.
1/1250 sec, f/4.0, 560mm, ISO 125, Canon 1D X, Canon EF 400mm f/2.8L IS II Plus 1.4x TC III
1/1250 sec, f/4.0, 560mm, ISO 640, Canon 1D X, Canon EF 400mm f/2.8L IS II Plus 1.4x TC III
1/1250 sec, f/4.0, 560mm, ISO 320, Canon 1D X, Canon EF 400mm f/2.8L IS II Plus 1.4x TC III
One last item. Dont forget to get some shots of the coaches. They are on their way up the ladder just as you are. Do them a favor and they just may return it.
This shot of the head coach is still present on the team website.
1/3200 sec, f/3.5, 400mm, ISO 1600, Canon 1D Mark III, Canon EF 400mm f/2.8L IS
The assistant head coach.
1/1250 sec, 560mm, f/4.0, ISO 125, Canon 1D X, Canon EF 400mm f/2.8L IS II Plus 1.4x TC III
Every coach's wife likes to see her husband depicted in a favorable light. Don't underestimate the power of that!
;-)
Phil Zivnuska
]]>
Jubilation: noun A feeling of great happiness or triumph.
Jube
Shots of 'Jube' or jubilation are vastly underestimated in importance for many sports photographers. If you are submitting your photographs to a newspaper, magazine or even a high school yearbook, don't be surprised if an image of celebration gets top billing over your action shots. A good way to check and see what images are selling is to check the ESPN photo wire.
espn.go.com/espn/photos
You may be surprised to see how often it is the reaction rather than the action that is the image that gets chosen to tell the story.
If you are shooting a hard fought or important game, there is a good chance there will be good jube shots near the end of that game. It's often more important to position yourself to capture that than to shoot the last minute of the game. So, position yourself to capture jube. In some sports, that's relatively easy. In volleyball, there is usually one or two players who are especially expressive. When a close game gets near the end, stay focused on those players and be ready to react as they do. The players will often face the bench as they react in pure jubilation.
They will react individually:
Or in groups.
And it can be in any sport.
Jube photos tell the story of the game as well as action photos. Be sure to include them in your gallery of the game.
Phil Zivnuska
]]>
Action photographers will often spend large sums of money, as much as they can afford, in order to purchase a camera body with the most advanced focusing system possible. They will tweak the focus point location, the number of auxiliary focus points, how fast or slow the focus changes from one object to another, the case of focus tracking and how the camera will react to acceleration. Sadly, many photogs will omit adjusting the adjustment available on almost all dslrs that assists your most important focus aid--Your Eyes!
It's vitally important to be able to discern when your camera's focus system is locked on the desired subject and when the camera has locked onto a subject close to the desired but not exactly the one intended. That can be the difference between a tack sharp image and one that is disappointingly soft. If you can't tell the difference in the viewfinder, don't be surprised if you camera's focus remains locked momentarily off target even if you've re-aimed the focus point properly. You can often adjust the length of the lag before the camera refocuses but there will always be a slight lag. You often hear action photogs complain that the focus is misplaced even though the focus point is properly located at the moment of exposure. More often than not, the focus point was misplaced earlier and the focus had not yet relocked on the target.
How can you improve your eyes ability to see proper focus? With the dioptric adjustment.
Many shooters have visual impairments that can be improved upon with an adjustment of the diopter of the viewfinder. That adjustment is usually located adjacent to the viewfinder. It may be to the left or right depending on the manufacturer. Check your owners manual. A Canon installation is shown below.
Adjust the wheel until the image appears as sharp as possible. Note the amount of adjustment and repeat this several times in order to get a consistent outcome. It should be that simple. For most folks, it is. However, some people have a discrepancy in excess of the maximum adjustment. This can occur when a photog uses glasses but wants to shoot without them for some reason. Be aware that some camera manufacturers offer adjustment lenses that dramatically extend the amount of adjustment available. You may want to consult your optometrist for a recommendation of how much diopter adjustment you will require.
You are ready to shoot. Now that you can tell when the focus has drifted off target and are using back button focus (yes, back button focus), you can use the "Bump Focus" technique to correct.
Bump focus refers to the practice of releasing and immediately re-pressing the back button for focus. This will expedite the acquisition of a new focus lock on the subject centered on the focus point. In fast moving sports with numerous targets such a basketball or football, it is easy for the focus system to lock on another player or a referee. Proper dioptric adjustment lets you recognize when you need to acquire a new lock with a bump focus. A higher keeper rate is your reward.
Phil Zivnuska
Volleyball shooters
Can you tell in the viewfinder when you are focused on the player and when you are focused on the net? Not without a proper dioptric adjustment!
]]>
Consider the following image. My task was to take a photo of two football players who were small in stature but were large in importance to their team. In order to check exposure on the sky, I took a shot with one of the players. It is straight out of the camera after importing into Lightroom.
As you can see, the sky was darker than desired and the player was almost totally black. It was only a test image to meter the sky but since it was taken in RAW, it was an interesting challenge to see how much detail could be recovered. The answer was, quite a bit. Lots more than anyone would expect from a badly exposed photo.
Take a look at the skin tones and especially the shoes. Yes, it's the same image. The adjustments were done in Lightroom. Everything visible in #2 was present in the RAW file of #1. If that level of transformation is possible on a poor exposure, just think of what is possible for a properly exposed image. Some may claim that they always get the perfect image straight out of the camera and therefore don't need to process with RAW but I submit that in most situations, it is impossible to control all the factors that go into a good photograph. One other thing to consider is that even if you are happy with your image now and you currently don't have the post processing skills to improve your picture, non-destructive processing in Lightroom, Aperture, etc. will allow you to go back years from now and give new life and perhaps an alternative interpretation of an old image. There are other reasons for using RAW but those will have to wait for another blog post.
The final image used a gelled speedlight (580 EX II, 1/2 CTO gel) to obtain the following shot:
3.
1/300 sec, f/10, 16mm, ISO 100, Flash, Canon 1D Mark IV, Canon EF 16-35mm f/2.8 L II
Phil Zivnuska
]]>
Proper shutter speed (SS) is determined, in part, by the pace of the action. For grade school or middle school, 1/500 second (or faster) would be appropriate for shooting players. In high school, the athletes are moving faster, so 1/640 second is needed. Eliminating motion blur on the ball will require an even faster SS. Personally, I'm a sharpness freak so 1/1000 sec. is my minimum. That's because I want to be able to "Read the Ball" with sharp lettering. I'll go much faster to stop the ball in baseball or tennis.
When using a 400mm or longer lens, I'll sometimes adjust to 1/1250 sec. as a new minimum. Keep in mind that I shoot with top notch camera bodies (Canon 1D Mark IV and Canon 1D X) so I'm not afraid of using high ISOs to obtain a fast shutter. Once you master the rules, there will be times to break them. Panning and artistic interpretations are both valid reasons for a slower SS. You may want slight motion of the ball and still have the players sharp. This is a common way to convey the speed and motion in athletics.
Obtaining maximum performance from a digital slr requires that the photographer embrace the Manual, Aperture Priority, and Shutter Speed Priority modes available and move past the generic "running man" or other programmed modes.
1/1000 second, 300mm, f/2.8, ISO 4000, Canon 1D Mark IV, Canon EF 300mm f/2.8L IS
1/2000 sec, f/3.2, 300mm, ISO 250, Canon 1D Mark IV, Canon EF 300mm f/2.8L IS
3. 1/1000 sec, f/3.5, 400mm, ISO 1000, Canon 1D X, Canon EF 400mm f/2.8 IS
Phil Zivnuska
www.zivnuska.zenfolio.com
]]>
Simply set your camera to Manual and specify your desired aperture and shutter speed. Set you ISO to Auto. The camera will meter and expose your images with your settings as choose the appropriate ISO as needed. For football, you can even set exposure compensation. How EC is set is dependent upon the camera body but more and more bodies have this feature.
1/1000 sec, f/2.8, ISO 400
1/1000 sec, f/2.8, ISO 2000
1/1000 sec, f/2.8, ISO 1600
1/1000sec. f/2.8 ISO 500
In each case the SS was 1/1000 sec and the aperture was f/2.8. Auto ISO was used (with EC of + 1/3) to get the lowest ISO possible compatible with my desired SS.
Phil Zivnuska
]]>
If your angle to the net is less than 30 degrees, you risk being blocked out by the spiking arm. Generally, the spiker's eyes will not go past 80 degrees on the follow through. Obviously, these rules must be adjusted for a left handed spiker. Since I typically won't move to shoot the spiker on the right side, I often shoot from about a 60 degree angle. Try different angles and see how your results work.
Phil Zivnuska
]]>
Getting low creates an upward angle for your shots and that makes the athletes seem larger and more impressive. The shorter the athlete, the more important it is to get low. Parents of little children, this means YOU! Sit down to shoot the little ones whether they are in an organized sport or just playing with the dog. BTW, there is nothing more fun than shooting the first t-ball game.
1/1250 sec, f/2.8, 400mm, ISO 200, Canon 1D Mark IV, Canon EF 400mm f/2.8L IS
Sometimes, I'll even lay on the ground just to be able to shoot up at the athlete. Here I wanted to view the long jumper against a lovely sky instead of a cluttered background. My head is barely a foot to the side of the rake used to smooth the pit. That position to the side also enabled me to shoot with the sun at a better angle (at my back) compared to the shots I was able to get just sitting at the end of the pit looking up the runway. Those images had a much more pronounced sun/shadow line running through the middle of the face/body.
1/1250 sec, f/2.8, 35mm, ISO 100, Canon 1D Mark IV, Canon EF 24-70 f/2.8L II
Additionally, having a unique angle to your images will make them more interesting to the viewer. Your pics should show them something they don't normally see. Sometimes that can be an overhead perspective but often a low angle will turn a good image into a "WOW" shot. Just be sure to avoid the cardinal sin of being boring.
1/1000 sec, f/2.8, 182mm, ISO 3200, Canon 1D X, Canon 70-200 f/2.8L IS II
Phil Zivnuska
www.zivnuska.zenfolio.com
]]>
Reproducing this tutorial in any form, in whole or in part, without written permission of Philip S. Zivnuska is prohibited.
How to Photograph Volleyball
By Phil Zivnuska
You might think it would be easy. After all, there are only 6 players on each team and the court is not all that big. Indoor volleyball, however, is one of the more challenging sports to photograph. The action is fast, the lighting marginal, players usually face the net and that net gets in the way of focusing. The key elements are the same as in most sports photographs; focus, face (especially the eyes), action, and the ball. “Shoot Tight and Crop Tighter” applies to volleyball too. This tutorial will discuss the elements needed to capture the 7 types of indoor volleyball photographs. A solid knowledge of dslr fundamentals is required. I write as tight as I shoot, so let’s start.
Your efforts will be far more successful if you learn the game, scout the teams, and study the players. Volleyball photography doesn’t follow the ball, it constantly anticipates where the ball is going to be and sets up for the shot ahead of time. Where will the serve be aimed? Why? Who will set the ball up for a spike? What direction will she (he) be facing? Which positions (players) will be doing the spiking and how do they approach the net from their respective positions? Don’t try to capture every hit of the ball. It can’t be done. Think one or two volleys ahead. Consider where you should be positioned to get the best capture of a particular position. Frame and focus on the player who will be hitting the ball before the ball gets there. The more you know about the game, the higher your capture rate will be. The examples here will be from ladies high school volleyball. If you shoot at this level, you will see that players who are novices will be unpredictable due to a lower skill level. Better teams will have a predictable strategy and the best teams will be sophisticated in strategy and disguise their intentions in order to fool the opposition and often you too!
The Prime Directive--Remember that the game is about the student athletes on the court, not about you, not about your pictures. The hierarchy of courtesy has the student athletes, AD, coaches, officials, parents, and fans all above the photographer. Stay out of harms way, blend into the background, be respectful, and if you are told to do something by an official or administrator, do it. If you disagree, comply now and discuss it at a later date. Build cooperative relationships with those who have authority/responsibility for conducting the game. Contact the AD ahead of time and learn the local rules for access. Get permission well in advance of the event. Talk to the refs before the contest to see where you may and may not go to photograph. Don’t push the limits. Did I mention building cooperative relationships with those who have authority/responsibility for conducting the game?
Philosophy--In my view, the best galleries are those which capture a variety of action from changing perspectives using different focal lengths. In order to accomplish that, I will go high, go low, go long (long focal length lenses), go wide (wider angle lenses), go to the side and go to the ends of the court. Here is a gallery of 8 shots using 8 different lenses at 8 different focal lengths from an assortment of elevations:
http://photography-on-the.net/forum/showthread.php?t=1091324
For the lowest perspective, the camera was resting on the floor. To gain a high perspective, I will haul a 400mm f/2.8L to the top of the rafters (as in the LR Event illustration) if it results in a better image. Obviously, the gear available, the venue, and the access permitted will affect what is possible. The complete photographer will be able to adjust to a variety of circumstances and still get the job done.
We will talk about the gear, the light, camera settings and the venue later. Let’s look at and analyze the 7 types of volleyball images now.
Serve, Pass, Set, Spike, Block, Jube, and Event Images
The Serve
The first image to consider is the serve. This shot is usually easy to focus, repeatable and readily available for capture. Sports photographers often attempt to photograph the moment of impact with the ball and they end up with a shot where the hitting arm blocks the view of the face. Consider the images on the left side of the illustration below. This moment is easy to capture and is often very flattering to the player as the arms provide a beautiful frame for the face. Shoot tight. Let the parents know about your photo. Sell them a print.
Since this position is predictable and repeated several times, it allows the photographer to vary his background. On the upper left, the fans and bleachers provide the setting. The lower left shot uses the scoreboard. Look for a pleasing backdrop and change your position to get a good view of the player and have the crowd, scoreboard or perhaps the flag complete the scene.
The movement is slower at this moment, so a one stop slower shutter speed and lower ISO can be used, if needed, to gain image quality. Taking a moment to think through the settings and background will help give you a winning image.
On a jump serve like on the right, getting low will emphasize the athleticism involved. Shooting from a balcony high on the opposite end of the court with a long telephoto will allow you to look straight at the player and give you a better chance to get a good view of the face. The venue, access and/or lenses available may determine which approach you choose to take.
UL-- 1D X, f/3.2, 300mm, 1/800 sec, ISO 6400
LL-- 1D Mark III, f/4.0, 135mm, 1/250 sec, ISO 400, Strobed with 4 Alien Bee B800s
R -- 1D Mark III, f/3.2, 70mm, 1/320 sec, ISO 400, Strobed with 4 Alien Bee B800s
The Pass (Bump, Bump Pass, Overhand pass)
These can be dramatic shots that are often easy to focus and capture. Choose a back row player whose face you can see clearly and who you determine is likely to return the serve (or spike). Good teams will pick an opposing player they want to force to return their serves and they will hit the ball to that person. Lesser teams are happy just to serve the ball inbounds. A weak player may be unable to make the return at all. Even if they can make a play on the ball, a poor pass may compromise the resulting set and therefore impair the opportunity for a successful attack. Here’s where knowledge of the teams can improve your chance of success as a photographer. A good coach will scout the opposition to gain an edge. So can you!
Note: a ‘Bump’ is an underhand pass.
Consider the following images of players digging for the return:
Three of the shots were taken from a vantage point quite close to the floor and the fourth (upper right) was shot from a very high angle looking down on the athlete. The image gains drama if the camera is at or near the floor.
The image on the lower right was taken almost abeam the player and the result is a profile shot. Moving to a 45 degree angle (lower left) gives a improved view of the face and both eyes are visible. Shooting under the net from the opposite side of the court (upper left) gives the best view of the face and especially the eyes. This is a superior quality shot but the sight line will often be blocked by another player. If you are positioned at the end of the court and the serve is being made from near you toward the opposite side, see if you have a clear view to a possible returner, pre-focus on that player, and with a bit of luck, you will get a shot of that player similar to the photograph on the upper left. Try it. As you frame this shot, remember that the players will often move forward and down to the floor as they dig to get a short serve or spike. Get low. Anticipate. Change the focus point if it will help frame the shot and capture the ball in the image. You will often guess incorrectly and focus on the wrong player as you anticipate the return. That’s OK. It’s part of the challenge. Welcome to volleyball photography.
UL-- 1D X, f/3.5, 200mm, 1/1000, ISO 3200, 70-200mm f/2.8L IS II
LL-- 1D X, f/2.8, 182mm, 1/1000, ISO 3200, 70-200mm f/2.8L IS II
UR-- 1D Mark IV, f/2.8, 400mm, 1/1000, ISO 1600
LR-- 1D Mark III, f/4.5, 85mm, 1/250, ISO 400, Strobed with 4 Alien Bee B800s
The set
The setter typically faces the same side of the court every time which is toward the strong side outside hitter (left front for right handed outside hitters). She is most often looking up to see the ball (if it is to be an overhand pass). Position yourself to see her face. Since the setter is looking up, a high vantage point is preferred to capture the action and the eyes. I’ll usually use a center focus point, center it on the face, and try to shoot tight as in the image on the right. The full body shot on the left side was framed to capture the sign on the scorers table for context because this was the very first match held at a new high school.
A wider angle will often capture the spiker preparing her move to the net. Both types of images can work.
Left: looking down from the bleachers. Coach’s daughter, brand new “Home of the Hornets.” I knew the paper would love this shot and use it. [Wrong again!]
Right: looking down from a balcony. Note the eyes of the right outside hitter (weak side) locked on the ball to see if the set is coming to her.
L-- 1D Mark IV, f/2.8, 200mm, 1/1000, ISO 4000
R-- 1D X, f/3.2, 300mm, 1/1250, ISO 12,800
The Spike (Hit, Attack)
The spike is considered the pinnacle of action and no gallery is complete without some images of it. Gyms with a balcony and most arenas will offer the opportunity for the photographer to get high and shoot down on the play. This yields views of offensive players where the faces are not obstructed by the top tape of the net, hitters seem to be jumping higher, and focusing is far simpler. The three hitters pictured in the red/black uniforms below were all shot from the top of an arena (see LL event image below) with a 400mm lens on a 1.3 crop factor camera body .
The players on the offensive left and right front are the outside hitters. For right handed attackers (the majority), the left front is the key position and left side hitter is hitting from her strong side. She is often the best spiker and most athletic. The other front row players are the middle and the right. Shoot these three tight enough to see the intensity/emotion of the players. Full bodies are not required. Strong side (left side for right handers) outside hitters usually approach the net from about 3 steps back. Track them through their approach and hit. Middles and weak side rights will sometimes have set plays to get them in position to attack. Study your team’s front row strategies.
Spikers hitting on their strong side will start out looking toward the setter/ball and their faces will rotate with their bodies as they strike the ball (UL). Positioning yourself 30 to 80 degrees to the net is ideal. Any less and you risk having the hitting arm blocking the face. The face will follow the flight of the ball. Middles will often hit sets that are lower and have more tempo than the typical higher set to strong side outside. They may aim left or right with their spikes to avoid a blocker.
If you can’t get high, you’ll have to focus through the net. The white tape on top of the net is often problematic for obscuring the face. Get higher or lower if you need to. In the LR shot below, the background is dark and the black netting is almost invisible against it. This helped me be able to focus on yellow #23. If the netting is interfering with auto focus, first try adjusting the cameras focus settings (number of aux points, location of focus point, sensitivity etc). Sometimes you can use a low focus point aimed on the legs below the net to get a good result. Every camera model is different and you may need to experiment to see which settings track best. Remember in your framing that hitters will jump and reach up to hit the ball. Allow room at the top of the frame and choose your focus points accordingly. Tight, properly focused images of spikers are challenging to capture but worth the effort.
The dof at 300mm and 50 feet is 1 to 1 1/2 feet at f/2.8 depending on crop factor.
Tighter is better. Tighter is more challenging. Lots more.
LL, UL, UR-- 1D Mark IV, f/2.8, 400mm, 1/1000, ISO 1600 High vantage point looking down.
LR-- 1D Mark IV, f/2.8, 300mm, 1/1000, ISO 4000--Camera is net high so face is close to getting obscured by the tape.
UR, LL: eyes follow the ball on the spike follow through
http://photography-on-the.net/forum/showthread.php?t=1242386
Block
The block has challenges similar to the spike. Try focusing through the net. However, since the blockers are positioned at the net, using a low focal point to focus on the legs may work in a pinch if the auto focus locks on the netting. Use back button focus to pre-focus (use the leg trick only if necessary) and adjust as needed. Don’t forget to frame the shot with space at the top. Blockers often come in pairs and rarely, a trio. Middles are often key blockers. They are usually tall and part of the strategy is to have the middle join an outside to block a spike. A good offense will try to deceive the middle into being out of position. Their goal is to have the spiker hitting against a single blocker rather than a pair of defenders. The tempo and direction of the set is part of that deception.
L-- 1D Mark IV, f/2.8, 400mm, 1/1250, ISO 6400
R-- 1D X, f/3.5, 300mm, 1/1250, 12,800
Jube
Volleyball has jube (jubilation or celebration) that is as good or better than any high school sport. Capturing that jube isn’t hard, it just requires the photographer seek it out. Every team will have one or more players who are exceptionally expressive. Take note of who they are during the games. When it gets to the final 2-4 points in a close game, I will stop shooting action and begin focusing almost exclusively on emotional jube shots. The proper time to switch will be marked by a soaring intensity that is unmistakable. Sometimes the celebrations will be directed at teammates and other times toward the coach/bench. Try positioning yourself behind the bench (emotion is often expressed in that direction), track the most animated player(s) and get those emotional peaks and valleys recorded. Get close and fire away in short bursts. After that last point, move around. Include the coaches if possible. Group and individual shots both work. Make the viewer of your images feel the joy and excitement. These shots are a must have.
UL-- 1D Mark IV, f/2.8, 400mm, 1/1000, ISO 1600
UR-- 1D X, f/2.8, 140mm, 1/1000, ISO 3200
LL-- 1D Mark IV, f/2.8, 200mm, 1/1000, ISO 6400
LR-- 1D Mark IV, f/2.8, 135mm, 1/1000, ISO 6400
The Event
There is a photo story behind and around every match. The venue, cheerleaders, fans, timeouts, faces in the crowd, anything associated with the contest can be a source for an image. Supply the viewer with an experience of the event.
UL-- 1D Mark IV, f/2.8, 400mm, 1/640, ISO 2000
UR-- 1D X, f/2.8, 70mm, 1/1000, ISO 6400
LR-- 1D Mark IV, f/4.0, 15mm, 1/800, ISO 3200
LL-- 1D Mark III, f/2.8, 16mm, 1/800. ISO 3200
Nitty Gritty
The tutorial so far has covered great ways to get the typical shots in volleyball.
BUT... ... . Something’s missing.
What’s missing is the heart, the soul, the hand to hand combat aspect of the game. There is something powerful, vibrant and dynamic about images where you get physically close to the action and capture net play when two or more players are battling at or above the net. Get low to the floor, be as close as permitted, use medium focal lengths and shoot when the peak action is in close quarters at the net. Focus can be tough, faces difficult to see, other players can block your view, access can be hard or impossible to get, plus there is no guarantee you’ll get a great shot anyway. Nonetheless, it is worth the try--especially on teams that have active, talented, middle hitters. The action will be fast and a responsive camera body and lens really help. Don’t try to shoot the outside hitter on the far side of the court. Too far away. Find closer action. If you are sitting on the side next to the strong side outside hitter, try a wide angle view of her spike when the opponents are doing a double block. You won’t see the face of the spiker but she will seem to be 10 feet in the air and the blockers will be prominent in the image. It’s fun to try this shot.
You can tell I love the nitty gritty part of the game. Just know that it can be frustrating to capture. Start with the conventional shots. Add these for spice.
UL, LR-- 1D Mark III, f/2.2, 135mm, 1/1000, ISO 3200
UR-- 1D X, f/2.8, 102mm, 1/800, iSO 6400
LL-- 1D Mark IV, f/4.5, 65mm, 1/1000, ISO 12,800
Lighting, Gear, Camera Settings, and Venues
Light has a huge role in determining which camera bodies and lenses can be used as well as affecting the final image quality. There is rarely any excess quantity of light and that drives the exposure settings. Use f/2.8 lenses (or faster) if at all possible. An f/4.0 lens will have half as much light to focus, require either a slower SS or higher ISO, and have a wider depth of field (dof). A 70-200mm f/2.8 lens is a great place to start for volleyball and much of sports photography in general. Since I use a variety of focal lengths, my lenses for volleyball are now all f/2.8. Shooters on a tight budget may want to try the 85mm f/1.8, the wonderful 135mm f/2.0 or other fast primes they already own. Ultra large apertures bring in more light but at the expense of a very shallow depth of field. My images are made exclusively with Canon gear but Nikon makes excellent products as well. Don’t change brands to chase the latest offering from a manufacturer. Trading lenses to match the body is far too large a hassle. I prefer a SS of 1/1000 and that speed will allow you to read the ball. Slightly slower is OK, especially for non-telephoto focal lengths. Use a SS of at least 1/640 unless you choose slower speeds for artistic reasons or because low light and high ISO noise force it. Camera bodies that have good image quality at ISO 6400 are wonderful and increasingly available for modest budgets. ISO 3200 at f/2.8 will work if the lighting is above average. Take a few test shots to determine your exposure settings and then enter those in Manual mode. I use the histogram and chimp on the lcd to evaluate the exposure. Expose to the right but don’t burn out the highlights. If you don’t use the histogram or don’t know how to use it, learn and use it now. That knowledge will help in all of your photography, not just volleyball, to properly expose and post process your images.
Mandates for energy efficiency have been a boon to lighting advances. Light is getting brighter with improved color rendering at many facilities in the US. Notice the photos on the right side of the jube shots above. They were shot at the same venue (a large arena), at almost exactly the same spot but a year apart. The LR image was taken in 2011 and the UR 2012. Improved lighting not only added a full stop of light but the improvement in skin tones (and other colors) is unmistakable. It was obvious to me just walking in the door that something had changed for the better. The skin tones in the earlier year appeared jaundiced even to the naked eye. The next year was great. Too many sports photographers consider only the quantity of light but not the quality of the light spectrum. We all know that golden hour light produces superior image quality when shooting outdoors but fail to consider that indoor light quality can vary as well.
These improvements are happening in high schools both old and new. Many of my older 1D Mark III images here were taken using 4 Alien Bee B800 strobes bounced off the ceiling. With the combination of improved lighting and camera sensor technology, I haven’t shot VB with strobes since 2010. Hurray! Some leagues never allowed flash anyway. That strobing experience has been helpful to me because timing the one exposure is crucial with strobes. Skillful timing helps even if you shoot in a 2 or 3 frame burst. Prior to the season, I’ll attend a practice or two and shoot single shots just to work on my timing. A Canon 70D will have a shutter lag of 65 milliseconds compared to a 1D X at only 36 milliseconds. That lag, along with your reaction time, must be accounted for in your technique. The adjustment will come quickly but if you don’t practice, you might find the exposures in your first match are just a tad too late.
All my shooting is done in RAW. I know some of you shoot for a newspaper on a deadline and need jpeg and if so, fine. If you have a choice, shoot RAW. Light cycling, noise, lighting spectra and changes in light because of brightly illuminated electronic billboards can all demand correction is post and RAW will do that best.
When you are focusing through the net, be sure to experiment with the number of auxiliary focus points, sensitivity, and switching speed for your auto focus. Since you are likely to be using large apertures, the shallow dof will reveal when the focus is on the net rather than the player. The brightness of the background and uniforms compared to the black netting can also affect which setting will track players best. Be sure the camera dioptric adjustment is set for your eyes so you can tell, in the viewfinder, when the focus strays. Being able to discern when focus leaves a player and locks on the net isn’t easy but it is hugely helpful in boosting your ‘keeper’ rate.
At a new venue, take a minute to assess where you can stand/sit/kneel, the backgrounds available, and what types of shots you can get. Most likely, you can’t get them all. Optimize the backgrounds for color, cleanliness, and setting. Nobody captures every type of shot at a single match. Capture what you can. Make a plan. Since it is unlikely that you will have access to both sides of the court, the setter will face your side for one game and have her back to you during the other game when the teams switch sides. The same issue (reversed) will apply to the serve shots. Decide when/how you want to capture those shots and front line action vs back row and remember to get some jube if the games are tight. Study your results, learn from them, modify your plan for next time, and keep shooting.
Don’t forget to have fun! You are there to capture young people totally alive and fully engaged during an event conducted for sport. Let their joy and enthusiasm infuse you and your images.
Phil Zivnuska
Samples: Find the types of images you like and replicate them in your gym with your team.
http://photography-on-the.net/forum/showthread.php?t=1224971
http://photography-on-the.net/forum/showthread.php?t=1232710
http://photography-on-the.net/forum/showthread.php?t=1226359
http://photography-on-the.net/forum/showthread.php?t=1221560
http://photography-on-the.net/forum/showthread.php?t=938979
http://photography-on-the.net/forum/showthread.php?t=775247
copyright 2013 Philip S. Zivnuska
zivnuska.zenfolio.com
Bonus Tip
Shooting through the net is always a challenge. Here's a tip to help. When you shoot through a net, the net is typically black. Camera focusing systems like to grab onto the contrast between the black net and a bright uniform and shift the focus to that net. Consider the following two photos:
1/1000 sec. f/2.8 400mm ISO 6400
1/1000 sec. f/2.8 300mm ISO 6400
Notice that the net is nearly invisible against the dark blue or the black uniform. At the same time, the netting is clearly visible against the light colored floor. Use that fact as part of your focusing strategy. When there are dark uniforms, place your focus point in the middle of the uniform where there is no contrast with the net and the net is essentially invisible for the camera. The only contrast available is from the bright number of the player and that's good.
Life gets more difficult with light uniforms.
1/1000 sec. f/2.8 300mm ISO 6400
In this case, I will focus on the black shorts, black knee pads or even black shoes just to avoid having the focus jump to the net. This won't work every time (At least not for me!) but it helps improve the odds when focusing is just plain tough.
A few more things. Try using few, if any, auxiliary focus points. I use four. The more aux focus points the more likely the camera will find something other than the player to focus upon. On a blocking shot, like the above, if the blockers are standing in position, I will try to get the focus on the player(s) (in this case I used the black shorts as my target) and then release the back button (thereby holding the focus) as I raise my framing to get the tops of the hands for the block and fire the shutter button.
Please don't think these ideas are fool proof. This photographer has plenty of out of focus shots to prove I've been fooled plenty of times! Volleyball photography is a challenge and it can get extremely challenging when long focal lengths and larger apertures combine to produce a tiny depth of field.
Phil Zivnuska
Once you master the rules, you are ready to break the rules.
]]>
Consider two cities in the central time zone; Pensacola, Florida (east) and Garden City, Kansas (west) and look at the difference in sunset times and how fast the days are getting shorter at each location.
Sunsets for each city September 1 September 30
Pensacola 7:12 pm 6:36 pm
Garden City 8:14 pm 7:29 pm
As you might expect, there is about an hour's difference in the sunsets across the time zone. That's huge in determining your technique and the value of shooting early in the game. Exploit every minute of sunlight.
Professional photojournalists and avid enthusiasts will have the equipment to deal with dark conditions but even then, images captured in daylight will be far more compelling than the same capture at night--and a lot easier to get. If you have a choice, shoot early. Early in the game and early in the season give the best results.
1/640 sec, f/3.5, 155mm, ISO 1600, Canon 1D Mark IV, Canon EF 70-200 f/2.8L IS II
September 21, 2012; 7:16pm ; Wichita, Kansas
___________
October 31, 2008; 7:04pm; Wichita, Kansas; Opening Kickoff
1/300 sec, f/3.5, 300mm, ISO 1250, Canon 1D Mark III, Canon 300mm f/2.8L IS, flash ETTL +1/3
Phil Zivnuska
]]>
Everyone loves to shoot with soft, warm sunlight at their backs. We love the images that can be obtained from either golden hour sunlight or the sunlight that is filtered through puffy cumulus clouds that form a giant soft box in the sky.
But what about those days when the sun is harsh, with no clouds overhead and the athletes are wearing a helmet, cap or visor? The shadows can detract from what would otherwise be a good photo.
The solution can be to shoot into the sun. When the helmet or visor puts the athlete's face in total shadow, the harsh shadow lines are eliminated.
Compare the harsh facial shadows in this image:
With this image shot into the direction of the sun.
Compare this shot with the sun at my back:
With this shot into the setting sun:
As you look at the images shot in the direction of the sun, you will notice that the shoulders and the top of the head appears over exposed or even completely burned out. This is the unavoidable consequence of the over exposure (as metered by the camera) required to properly expose for the face which is now in full shadow. How much exposure compensation is appropriate? Since I often shoot football at +1/3 EC (exposure compensation), I will usually shoot Aperture preferred at +2/3 or even +1.0 EC when shooting into the sun. I use the histogram, the "blinkies", and the LCD to get the exposure correct. A light meter can be used as well. If the light levels are static, you can shoot Manual once you've figured out the proper exposure.
1/3200 sec. f/2.8, 400mm, ISO 400, Canon 1D Mark IV, Canon EF 400mm f/2.8L IS
The bottom line? If the shadows are harsh consider shooting into the sun. Boost the exposure as necessary to properly expose the face. Shooting tight will help the shot. This is an ideal technique when the athletes are wearing head gear but can be used when none is worn as well. Since the athletes are not looking into the sun, their eyes will be wide open. Let the top of the shoulders and head burn out if necessary.
Sometimes I shoot into the sun by choice and other times by necessity. Either way, it is a good technique to have available and a must to have as part of the complete photographer's bag of tricks.
Phil Zivnuska
]]>
How to Photograph Football
by Phil Zivnuska
Insights for Photographers New to the Game
Football is a great game that offers terrific opportunities for the photographer. There is plenty of action occurring simultaneously in different places. There are also significant challenges, especially for those who begin their football photography careers at the high school level. Attempting to capture fast moving action as darkness approaches is a challenge for even gifted, experienced, shooters. This tutorial is directed toward but not limited to those shooting high school football since it is not only the most difficult but because this is where many photographers get their first exposure to the game. A thorough knowledge of dslr fundamentals will be required so novices may occasionally need to expand their skill set.
The Prime Directive--Remember that the game is about the student athletes on the field, not about you, not about your pictures. The hierarchy of courtesy has the student athletes, AD, coaches officials, parents, and fans all above the photographer. Stay out of harms way, blend into the background, be respectful, and if you are told to do something by an official or administrator, do it. If you disagree, comply now and talk it over calmly at a later date. Build cooperative relationships with those who have authority/responsibility for conducting the game. Contact the AD ahead of time and learn the local rules for access. Get permission well in advance of the event. Talk to the AD or administrators before the contest to see where you may and may not go to photograph. Don't push the limits. Did I mention building cooperative relationships with those who have authority/responsibility for conducting the game?
Access to the field, court, or track is gradually getting more restrictive. You are a guest and have been granted privileges. Using those privileges with humility, grace, and courtesy will help insure access for your photography colleagues who come along after you. We need to work together responsibly for the benefit of all.
Know the Game--It's quite possible to photograph a football game without much knowledge of the game or the teams. Lots of folks do exactly that. However, those who know the game and the teams will be able to anticipate the action much better than those who don't. That means better positioning for more compelling action and better images. Ask yourself. Who are the best players on the offense and defense of each team? Does this team prefer to run or pass? If they pass, who are the leading receivers? If they run, do they run between the tackles or do they have a speedster who likes to run wide? Who are the "Big Hitters" on special teams? Does one team prefer to run or throw to one side of the field more than the other? Which formations typically mean pass and which ones mean a run is more likely?
If you know the answers to those questions, you will be able to play the percentages and put yourself in position for a 'lucky' shot.
Shoot Early in the Day (Pre-game), Early in the Game, Early in the Season--
Given the choice between golden hour sunlight and ultra high ISO (or flash), the decision is easy. Use all the natural light that mother nature is going to provide.
The first opportunity is to shoot the pre-game activities. There is a small army of people who arrive at about 5pm (or earlier) to prepare for that 7pm kickoff. These include the booster club folks, the barbecue crew, tailgaters, concession stand workers, announcer, the AD, color guard, dance team, and the band. These folks make the game an event and they enjoy pictures of themselves too. BTW, those who can make your life easy or difficult (AD, coaches, administrators) are here now.
Secondly, shoot the early part of the game. Depending on your purposes, you may be able to get the shots you need in the first half of the game when there is considerable ambient light available. Even that small opening will close soon enough. On September 1 in my home town of Wichita Kansas, sunset is at 8pm. By the end of October, the sun will be down at 6:30. That is a huge difference for Friday night football photography.
Shoot the warm ups before kickoff. This is a great time to get portrait type shots of players in uniform. There is no problem getting lots of shots of players who may not see much game time. Their parents love them too and would love to buy pictures. You can get uncommonly close to them during this time.
Don't forget the refs and coaches.
Images made with good ambient light are far more compelling than those done under the lights or with flash. Shadows are much less of a problem, ISOs are lower, and you can take full advantage of the burst mode in your camera. Shoot the heck out of the first half in those early season games.
1/1000 seconds, f/3.5, ISO 800, September 7, 2012 at 7:06:38 pm. You gotta love that light!
Remember that you are losing daylight as each week goes by. Some of us shoot every game all season long and have to cope with darker and darker conditions. If you have a choice, and lots of you do, shoot the early season games. Those early games provide opportunities for yearbook shots, images for the end of year banquet, programs, scrapbooks, publicity etc.
Positioning--
A. Get Low. The general rule for sports photography is to get low when taking your photographs. This will enable the athletes to look larger and give your images a different perspective than fans are used to. This usually means kneeling or sometimes even sitting on the ground as often as you can. Yes, this can be tiring, especially for an old geezer like me but that is what is required. Some shooters do this, others don't. The better ones do. Get some knee pads if you need them.
B. Get to the End Zone as Soon as You Have the Reach. The goal of the offense is to get into the end zone, the player with the ball will be looking in that direction most of the time, those players will be getting closer and closer to you, and there is a good view from sideline to sideline. Station yourself a few yards behind the end line when you have enough focal length to reach to the line of scrimmage and get a useable image. There is usually a dashed line to indicate the proper buffer distance from the field of play. Don't push it. Give extra space. There is no need to be so close to the field that the photographer interferes with the action or puts himself or players in danger. I'm usually 5-7 yards behind the end line. YMMV.
If the offense is backed up against its own end zone, this is a terrific time to get shots of the defense attacking. Try to get a shot of the eyes of the middle linebacker.
Having empty space behind your subject always helps isolate him from the background. This is often quite easy to do when you are shooting from the end zone.
Touchdown!
C. Try 2 Yards Behind or 15-20 yards Ahead of the Line of Scrimmage. If you are 2 yards behind the line, your view won't be blocked by the line judge or by the guy holding the down marker. On a run play, if the runner is heading wide, he will be running right at you for an excellent photo opportunity.
If the quarterback goes back to pass and you are on the side where his body faces you (and you should be), then get a shot of him.
One last thing about shooting just behind the line of scrimmage, this is also a great spot to shoot line play. I'll often grab a shot of a lineman immediately after the snap of the ball and then re-aim my camera on the ball carrier. There is a lot of action from the linemen on every play so don't forget to get a few images of that.
Downfield positioning is dependent on focal length. Twenty yards would be fine if you are shooting a 70-200mm lens. If you are shooting a 300 or 400mm, the distances will get closer to 50 yards. This also depends on whether you are shooting a full frame or crop camera body.
Before we leave the topic of positioning, there are a few other items we need to discuss. The sideline between the 25 yard lines is reserved for the teams. Therefore, you will be shooting from outside that area. That means adjusting your technique to accommodate this restriction. As you move from one end of the field to the other, use this opportunity to get images on the sideline. Coaches, athletes, trainers tending injured players, meetings of the offense and defense when the other squad is on the field, all can be compelling sideline images.
"Can you hear me now?"
As the offense approaches midfield, an you may find yourself at the 25 yard line, 25 to 40 yards downfield waiting for the action to approach (because you can't be between the 25s) and not having a long enough lens with sufficient reach. That is just one of the reasons many experienced football photographers will shoot with two cameras. One body will often have the 70-200mm zoom and the second camera will use a super telephoto lens. However, this is not a requirement and many fine images can be obtained using nothing longer than 200mm. Shorter focal lengths can be used but you will need to be more patient in letting the action come to you.
Portrait vs Landscape--
The general principle is that you want to fill the frame with the action. If you want to shoot an individual player, that can usually be optimized by shooting portrait.
When positioning or focal length results in a situation where the full height of a player can be captured in landscape orientation, the extra width available can be used to include other elements besides the player with the ball.
September 19, 7:38pm
When shooting mega-tight on the quarterback, I like to shoot landscape to include the arm with the ball reaching back as the front arm reaches forward.
A few words about special teams.
Special teams often furnish key plays in a game. A blocked punt or kick can be a huge turning point. The only problem is that you never know when it is going to occur. Don't be afraid to shoot 10 punts and come up with nothing. Get behind the punter/kicker and shoot through the kick. It's worth the effort for the day when you capture that key block. One other idea is instead of shooting the kicker's leg striking the ball, get the reaction shot when he learns whether the kick is good or not. That is often far more compelling.
It's Time for Some Tech Talk
Shoot RAW--
When I first wrote this tutorial in 2009, my advice was to shoot jpeg. No more. The improvements in software and storage space make the handling of RAW files easy and seamless. The amount of information contained in RAW files is staggering. If you are skeptical or just undecided, perhaps a before and after RAW image can convince you. I was setting up to photograph two football players for a pre season preview edition of a high school sports magazine. One of the players stood in the frame while I tested the exposure of the sky.
RAW Image Straight Out of the Camera
The exposure was adjusted, a gelled flash was added, the players got their uniforms on, and a final image was obtained. Later, I needed an improperly exposed test image to see just how much detail could be pulled out of a picture that would otherwise be unusable. Here is the same RAW image after post processing in Lightroom.
RAW Image after Processing in Lightroom
It's the same image! Now this isn't perfect and it's certainly not meant to be a justification for poor exposures in camera but if this level of recovery is possible in a poor image, just imagine what can be done to improve a shot with minor flaws. Take another look at the shoes in the before RAW image. Would you ever imagine that this file could produce the after image?
I make mistakes. RAW helps me correct and produce the best result possible. Even if you never make an error, RAW will allow you to get better results for your final product. Shoot RAW.
Settings--
Shoot aperture preferred (Av) when the light is variable from clouds or the setting sun. The faces are inside helmets and hence shadow so add about +1/3 stop of exposure compensation. It's fine if a small portion of a white uniform burns out if that helps you see faces more clearly. That can be especially important in photographing athletes of color. Manual mode is fine if the light is stable and you have experience with it. Servo focus is a must, set to auto white balance (AWB), and I use the back button focus technique. Shutter speeds should be 1/640 sec or faster and I prefer 1/1000 sec if the light and ISO capabilities of my camera allow it. Large apertures like f/2.8 give faster SS and blur backgrounds. At night with flash, I'll stop down to f/3.5 to f/5.0 to get more DOF (depth of field) since backgrounds are dark and therefore I don't need to blur them. I'm shooting Manual at the maximum sync speed (often 1/200 sec or 1/250 sec) for flash. Speaking of flash and low light, know how high you are able to push the ISO in your camera and still get acceptable image quality.
Built in 'pop up' flashes don't have enough power to be useful. Something similar to the Canon 580 or 600 series flashes is needed.
The 400mm f/2.8 lens is the supreme field sport lens because of the long reach, sharp images, and large aperture to blur backgrounds and stop action. The 70-200 f/2.8 is commonly seen because of its versatility and lower cost in an f/2.8 lens. The Sigma 120-300 f/2.8 EX DG HSM lens is also popular. Both Nikon and Canon make excellent products that will produce terrific results. Image stabilization is not required at the high shutter speeds used for sports. At least one of your lenses should be 200mm or longer. Using an f/2.8 or faster lens is recommended for Friday night football. An f/5.6 lens has 1/4 the light available for focus and that means more difficulty in low light focus, slower shutter speeds, higher ISOs, and less background blur. All are undesirable.
One more thing. If you are shooting a camera body that has Auto ISO capability, set your camera on Manual, your aperture and SS as desired and your ISO to Auto. This is a great way to shoot. It gives the best image quality in variable lighting conditions. Don't forget to add exposure compensation as needed.
Ok, I've been telling you to avoid shooting late in the game and/or late in the season. But some of us have to shoot all the games and many of the big games occur in October when twilight ends not long after the game begins. Now what?
Nighttime Football--High ISO vs Flash, Which is Better?
Answer----It's whatever gets you the best image. The type of photography that I do requires clearly visible faces. It also requires that the colors look as close to correct as possible. Some of you hate the look of flashed photography for high school football. You can't use the fps capability of your camera, there is red-eye to deal with, awkward shadows can be problematic, ghosting is an issue, and yes, the colors don't look the same. On the other hand, if you want to get light inside the helmet to see a player's face, flash will do it plus some venues are so dark that even a high ISO (20,000) won't do well. Shadows are something that must be addressed as well. Yes, the newest camera bodies are great at high ISO (>6400) but what if my body is marginal, or worse, at that level?
My bottom line is the following: The complete photographer must be able to shoot both high ISO and flashed. Once you have mastered both techniques, you can decide for yourself which way will get the best image for your venue, for your location at that venue, and for your equipment. My flash is going to be used a lot more on a 30D compared to a 1D Mark IV because of the limited ISO capability of the former. That's OK.
Let's break down the factors that I mentioned. In order to do that, I'm going to show you some ugly football images. There will be some good ones too but you need to see the pros and cons of each approach.
High ISO is not enough at some venues. The following image was taken at 7:23 pm on October 4. It was at a small rural high school about 15 miles from my house. The gear can't be blamed, it was shot with a Canon 1D X, and a 400mm f/2.8L IS II. The settings were 1/800 sec, f/2.8, ISO 20,000!
There is just no way to make this into a useable image. You might think that the problem was the result of poor, outdated lighting and that explanation is partially correct but only partially. Look at the highlights on the runners left arm, shoulder, and the top of his helmet. Compare those light levels to those of his face inside the helmet. As we can see, the problem is as much the result of shadows as it is the stadium lighting. Like most high school stadiums, this one has two (sometimes venues will have 3) light poles on each side of the field. They are located about the 15 to 20 yard line. Once a team gets inside the 15, the light comes from behind the player and there is typically no light coming from the goal line side of the player.
You may be thinking that my local field allows me to shoot at ISO 6400 and get good quality images. That may be true toward the center of the field but shadows can wreak havoc once you get down close to the goal line. Like this:
Or this
Supplemental lighting is the key for dealing in situations where the shadows get objectionable. So, how do you know when the shadows are bad enough to warrant flash? It's as plane as day. You only need to look for it. Once you see it, once you see the light and shadows in real time, your photography will never be the same. Sports photography, landscape photography, portrait, all will be transformed once you see the light.
The next time you are at a night game, go to the end zone as the team approaches from midfield. When it gets to the 15 or 20 yard line, watch for the shadows to appear on the player's uniforms. It will be most obvious on the white pants but you can easily see it even on colors. Down inside the 10, you may wonder why you never saw it before. Develop the discipline to look for those telltale shadows. Once you've seen them you may wonder why you've never seen them before. You are now a better photographer. Look for the light and shadow in your other forms of photography.
Before you think I'm strictly a flash football fan, let me conclude with some examples from the middle of the field where even light is available from all sides of the player.
1/800 sec, f/2.8, ISO 6400
1/800 sec, f/2.8, ISO 16,000
And also two flashed shots from the same game
Notice the 'ghosting' in the flashed images. Not too bad but present nonetheless. Study these photos. Study your own. You can decide for yourself which approach will work best for you. At most venues, my approach has become to shoot ambient until it is completely dark and the offense is inside the 25 yard line. Then I will switch to flash.
If the game is close and it's the 4th quarter, I'm almost always shooting with my 70-200 and my speedlight, a Canon 580 EX II. This is because I want to capture any touchdown and subsequent jube or any reactions from the bench. Spirits will be running high and shadows abound in the end zone and on the sideline. In this case, I wanted to tell the story of a coach instructing his quarterback before getting the ball back to start a final 2-minute game winning drive. If you know where the scoreboard is and think about it, then you can use it to your advantage.
Incidentally, I shoot with the speedlight mounted about 2' below the camera on my monopod. One thing I learned from my friend Fernando who works for the local paper is the importance of getting the shots immediately after the game. He always seems to be where the action is. If a coach is hugging his quarterback, Fernando is between the two of them! Don't you forget that in those big games, there are quality images to be captured after the final gun.
Here is a happy group of players and fans but there is one cheerleader on the lower right who is headed away from the celebration...
It turns out that this senior cheerleader was headed to be with her Dad, the coach who had just broken though to the state championship game after years of trying. This misty eyed moment was one of my favorites of the year.
Two last tips
First, have a plan. What are you there for? What are you trying to capture? Are you trying to capture the event for the yearbook? If so, be sure to get there early and get those shots of the band, the pom-pom dancers, the color guard and the burgers on the grill. If you are strictly an action photographer, find out who the big hitters are on special teams. Who are the leaders of each team. Study the stat sheet. If you are selling your images, you might want to get as many images as possible in the pre-game so you will include as many players as possible. If you have requests for images, make a brief list of who wants to purchase your prints. Decide how you are going to handle darkness. Quit at the end of twilight? Go to high ISO? Speedlights? All three approaches are valid depending on what gear you have and what your goals are. At the beginning of this tutorial I mentioned building cooperative relationships with those who have responsibility/authority for the game. If the coach or AD or Ref would like a photo of something or someone, get it for them and give it to them. They have plenty of people who want something from them and not many who want to do something for them. Have a plan that you could write down on a 3 x 5 notecard.
Second, have a mentor. My mentor, Chico, has been an enormous help to me through the years. Left to my own devices, I will invariably head off on a tangent and lose track of where I want to go. Chico will be the one to remind me of the thing I've forgotten, what I'm missing, or where I'm just plane wrong. Try to have your own mentor. It can be a fellow enthusiast, a photog for the local paper, or even the photographer who did your family portrait.
BTW, don't forget to have fun. You are capturing young people fully engaged in an activity they are doing for sport. Let their joy and enthusiasm infuse and inform your images.
Phil Zivnuska
]]>
First of all, let me say that the vast majority of my images of this game were the typical 70-200mm shots.
The depth of field at 105mm and 17 feet distance is 1.33 ft.
When the game got down to the end of the second half, the score was tied at 46, there were 9 seconds left to play, and the team in blue (Kapaun) had the ball. A time out was called and I moved to Kapaun's end of the floor to shoot the final seconds. I was shooting with a 1D X and the 24-70mm f/2.8L II lens.
Here is how I set up the shot of the player and scoreboard:
1. I sat under the basket to the edge of the lane. How far off the edge of the lane? I positioned my sight line so that the edge of the backboard matched up with the edge of the scoreboard. This sight line also helped determine how far away from the baseline my position would be. Here I was about 8 feet from the baseline.
2. The shot desired was going to be from the floor--literally. The camera was going to be placed on the floor and angled up slightly to include the scoreboard mounted on the roof. The focal length had to include the floor therefore my focal length had to be wide. My choice was 35mm.
3. Pre-focus, using back button focus, on the rim. Approx. 17 ft. Pre-focusing was required since the camera was going to be placed on the floor and there would be no way to aim my focus point on any given player. Using back button focus allowed me to aim the camera in hand, focus at the desired distance, and later push the shutter button without any refocusing.
4. Since my ISO was 6,400, it was necessary to shoot the shot at f/2.8. How was my depth of field going to work? This is where a familiarity with dof calculations helped immensely.
www.dofmaster.com/dofjs.html
At 35mm and pre-focused at 17 feet, my depth of field extended from 12.5 to 26.4 feet. The total dof is 13.9 feet. That would be plenty to have my subjects in focus.
5. Place the camera on the floor and aim it up a bit so as to include the floor and the scoreboard. How much is a 'bit'? Trial and error will give you a good idea. Since I'm shooting very wide, my aim need not be perfect, just in the ballpark.
6. Follow the action with the camera. I wasn't looking through the viewfinder, just aiming the camera as it sits on the floor. (Tilted up slightly)
7. Get Lucky! Yes there is a large element of luck. You will have to have action that is visible to you roughly in front of the basket. This capture had it all.
8. Fire away in a burst as the action comes into view. Don't forget to include the rebound.
Kapaun senior Atir Cherne drives the lane with 3.3 seconds left to play to break a 46-46 tie and defeat Wichita Heights 48-46.
In this particular case, I was able to capture key action in the final seconds. You need not have that be the case to use these same principals for very wide angle shooting. Pre-focus, get the camera on the floor, practice your aiming, and fire away. If you can shoot at f/4.0 that will give you even more focusing leeway. Remember that the primary insight that makes this work is that depth of field increases rapidly as the focal length decreases. Wide angle lenses have a large dof.
These shots won't be the majority of your images but can add variety and a bit of spice. Try it for rebounding action.
BTW, I'm off to Kauai for two weeks so the next blog issue will be in 2015. Cheers.
Phil Zivnuska
]]>
Phil Zivnuska
]]>
Phil Zivnuska
]]>
Simply set your camera to Manual and specify your desired aperture and shutter speed. Set you ISO to Auto. The camera will meter and expose your images with your settings as choose the appropriate ISO as needed. For football, you can even set exposure compensation. How EC is set is dependent upon the camera body but more and more bodies have this feature.
1/1000 sec, f/2.8, ISO 400
1/1000 sec, f/2.8, ISO 2000
1/1000 sec, f/2.8, ISO 1600
1/1000sec. f/2.8 ISO 500
In each case the SS was 1/1000 sec and the aperture was f/2.8. Auto ISO was used (with EC of + 1/3) to get the lowest ISO possible compatible with my desired SS.
Phil Zivnuska
]]>Reproducing this tutorial in any form, in whole or in part, without written permission of Philip S. Zivnuska is prohibited.
How to Photograph Volleyball
By Phil Zivnuska
You might think it would be easy. After all, there are only 6 players on each team and the court is not all that big. Indoor volleyball, however, is one of the more challenging sports to photograph. The action is fast, the lighting marginal, players usually face the net and that net gets in the way of focusing. The key elements are the same as in most sports photographs; focus, face (especially the eyes), action, and the ball. “Shoot Tight and Crop Tighter” applies to volleyball too. This tutorial will discuss the elements needed to capture the 7 types of indoor volleyball photographs. A solid knowledge of dslr fundamentals is required. I write as tight as I shoot, so let’s start.
Your efforts will be far more successful if you learn the game, scout the teams, and study the players. Volleyball photography doesn’t follow the ball, it constantly anticipates where the ball is going to be and sets up for the shot ahead of time. Where will the serve be aimed? Why? Who will set the ball up for a spike? What direction will she (he) be facing? Which positions (players) will be doing the spiking and how do they approach the net from their respective positions? Don’t try to capture every hit of the ball. It can’t be done. Think one or two volleys ahead. Consider where you should be positioned to get the best capture of a particular position. Frame and focus on the player who will be hitting the ball before the ball gets there. The more you know about the game, the higher your capture rate will be. The examples here will be from ladies high school volleyball. If you shoot at this level, you will see that players who are novices will be unpredictable due to a lower skill level. Better teams will have a predictable strategy and the best teams will be sophisticated in strategy and disguise their intentions in order to fool the opposition and often you too!
The Prime Directive--Remember that the game is about the student athletes on the court, not about you, not about your pictures. The hierarchy of courtesy has the student athletes, AD, coaches, officials, parents, and fans all above the photographer. Stay out of harms way, blend into the background, be respectful, and if you are told to do something by an official or administrator, do it. If you disagree, comply now and discuss it at a later date. Build cooperative relationships with those who have authority/responsibility for conducting the game. Contact the AD ahead of time and learn the local rules for access. Get permission well in advance of the event. Talk to the refs before the contest to see where you may and may not go to photograph. Don’t push the limits. Did I mention building cooperative relationships with those who have authority/responsibility for conducting the game?
Philosophy--In my view, the best galleries are those which capture a variety of action from changing perspectives using different focal lengths. In order to accomplish that, I will go high, go low, go long (long focal length lenses), go wide (wider angle lenses), go to the side and go to the ends of the court. Here is a gallery of 8 shots using 8 different lenses at 8 different focal lengths from an assortment of elevations:
http://photography-on-the.net/forum/showthread.php?t=1091324
For the lowest perspective, the camera was resting on the floor. To gain a high perspective, I will haul a 400mm f/2.8L to the top of the rafters (as in the LR Event illustration) if it results in a better image. Obviously, the gear available, the venue, and the access permitted will affect what is possible. The complete photographer will be able to adjust to a variety of circumstances and still get the job done.
We will talk about the gear, the light, camera settings and the venue later. Let’s look at and analyze the 7 types of volleyball images now.
Serve, Pass, Set, Spike, Block, Jube, and Event Images
The Serve
The first image to consider is the serve. This shot is usually easy to focus, repeatable and readily available for capture. Sports photographers often attempt to photograph the moment of impact with the ball and they end up with a shot where the hitting arm blocks the view of the face. Consider the images on the left side of the illustration below. This moment is easy to capture and is often very flattering to the player as the arms provide a beautiful frame for the face. Shoot tight. Let the parents know about your photo. Sell them a print.
Since this position is predictable and repeated several times, it allows the photographer to vary his background. On the upper left, the fans and bleachers provide the setting. The lower left shot uses the scoreboard. Look for a pleasing backdrop and change your position to get a good view of the player and have the crowd, scoreboard or perhaps the flag complete the scene.
The movement is slower at this moment, so a one stop slower shutter speed and lower ISO can be used, if needed, to gain image quality. Taking a moment to think through the settings and background will help give you a winning image.
On a jump serve like on the right, getting low will emphasize the athleticism involved. Shooting from a balcony high on the opposite end of the court with a long telephoto will allow you to look straight at the player and give you a better chance to get a good view of the face. The venue, access and/or lenses available may determine which approach you choose to take.
UL-- 1D X, f/3.2, 300mm, 1/800 sec, ISO 6400
LL-- 1D Mark III, f/4.0, 135mm, 1/250 sec, ISO 400, Strobed with 4 Alien Bee B800s
R -- 1D Mark III, f/3.2, 70mm, 1/320 sec, ISO 400, Strobed with 4 Alien Bee B800s
The Pass (Bump, Bump Pass, Overhand pass)
These can be dramatic shots that are often easy to focus and capture. Choose a back row player whose face you can see clearly and who you determine is likely to return the serve (or spike). Good teams will pick an opposing player they want to force to return their serves and they will hit the ball to that person. Lesser teams are happy just to serve the ball inbounds. A weak player may be unable to make the return at all. Even if they can make a play on the ball, a poor pass may compromise the resulting set and therefore impair the opportunity for a successful attack. Here’s where knowledge of the teams can improve your chance of success as a photographer. A good coach will scout the opposition to gain an edge. So can you!
Note: a ‘Bump’ is an underhand pass.
Consider the following images of players digging for the return:
Three of the shots were taken from a vantage point quite close to the floor and the fourth (upper right) was shot from a very high angle looking down on the athlete. The image gains drama if the camera is at or near the floor.
The image on the lower right was taken almost abeam the player and the result is a profile shot. Moving to a 45 degree angle (lower left) gives a improved view of the face and both eyes are visible. Shooting under the net from the opposite side of the court (upper left) gives the best view of the face and especially the eyes. This is a superior quality shot but the sight line will often be blocked by another player. If you are positioned at the end of the court and the serve is being made from near you toward the opposite side, see if you have a clear view to a possible returner, pre-focus on that player, and with a bit of luck, you will get a shot of that player similar to the photograph on the upper left. Try it. As you frame this shot, remember that the players will often move forward and down to the floor as they dig to get a short serve or spike. Get low. Anticipate. Change the focus point if it will help frame the shot and capture the ball in the image. You will often guess incorrectly and focus on the wrong player as you anticipate the return. That’s OK. It’s part of the challenge. Welcome to volleyball photography.
UL-- 1D X, f/3.5, 200mm, 1/1000, ISO 3200, 70-200mm f/2.8L IS II
LL-- 1D X, f/2.8, 182mm, 1/1000, ISO 3200, 70-200mm f/2.8L IS II
UR-- 1D Mark IV, f/2.8, 400mm, 1/1000, ISO 1600
LR-- 1D Mark III, f/4.5, 85mm, 1/250, ISO 400, Strobed with 4 Alien Bee B800s
The set
The setter typically faces the same side of the court every time which is toward the strong side outside hitter (left front for right handed outside hitters). She is most often looking up to see the ball (if it is to be an overhand pass). Position yourself to see her face. Since the setter is looking up, a high vantage point is preferred to capture the action and the eyes. I’ll usually use a center focus point, center it on the face, and try to shoot tight as in the image on the right. The full body shot on the left side was framed to capture the sign on the scorers table for context because this was the very first match held at a new high school.
A wider angle will often capture the spiker preparing her move to the net. Both types of images can work.
Left: looking down from the bleachers. Coach’s daughter, brand new “Home of the Hornets.” I knew the paper would love this shot and use it. [Wrong again!]
Right: looking down from a balcony. Note the eyes of the right outside hitter (weak side) locked on the ball to see if the set is coming to her.
L-- 1D Mark IV, f/2.8, 200mm, 1/1000, ISO 4000
R-- 1D X, f/3.2, 300mm, 1/1250, ISO 12,800
The Spike (Hit, Attack)
The spike is considered the pinnacle of action and no gallery is complete without some images of it. Gyms with a balcony and most arenas will offer the opportunity for the photographer to get high and shoot down on the play. This yields views of offensive players where the faces are not obstructed by the top tape of the net, hitters seem to be jumping higher, and focusing is far simpler. The three hitters pictured in the red/black uniforms below were all shot from the top of an arena (see LL event image below) with a 400mm lens on a 1.3 crop factor camera body .
The players on the offensive left and right front are the outside hitters. For right handed attackers (the majority), the left front is the key position and left side hitter is hitting from her strong side. She is often the best spiker and most athletic. The other front row players are the middle and the right. Shoot these three tight enough to see the intensity/emotion of the players. Full bodies are not required. Strong side (left side for right handers) outside hitters usually approach the net from about 3 steps back. Track them through their approach and hit. Middles and weak side rights will sometimes have set plays to get them in position to attack. Study your team’s front row strategies.
Spikers hitting on their strong side will start out looking toward the setter/ball and their faces will rotate with their bodies as they strike the ball (UL). Positioning yourself 30 to 80 degrees to the net is ideal. Any less and you risk having the hitting arm blocking the face. The face will follow the flight of the ball. Middles will often hit sets that are lower and have more tempo than the typical higher set to strong side outside. They may aim left or right with their spikes to avoid a blocker.
If you can’t get high, you’ll have to focus through the net. The white tape on top of the net is often problematic for obscuring the face. Get higher or lower if you need to. In the LR shot below, the background is dark and the black netting is almost invisible against it. This helped me be able to focus on yellow #23. If the netting is interfering with auto focus, first try adjusting the cameras focus settings (number of aux points, location of focus point, sensitivity etc). Sometimes you can use a low focus point aimed on the legs below the net to get a good result. Every camera model is different and you may need to experiment to see which settings track best. Remember in your framing that hitters will jump and reach up to hit the ball. Allow room at the top of the frame and choose your focus points accordingly. Tight, properly focused images of spikers are challenging to capture but worth the effort.
The dof at 300mm and 50 feet is 1 to 1 1/2 feet at f/2.8 depending on crop factor.
Tighter is better. Tighter is more challenging. Lots more.
LL, UL, UR-- 1D Mark IV, f/2.8, 400mm, 1/1000, ISO 1600 High vantage point looking down.
LR-- 1D Mark IV, f/2.8, 300mm, 1/1000, ISO 4000--Camera is net high so face is close to getting obscured by the tape.
UR, LL: eyes follow the ball on the spike follow through
http://photography-on-the.net/forum/showthread.php?t=1242386
Block
The block has challenges similar to the spike. Try focusing through the net. However, since the blockers are positioned at the net, using a low focal point to focus on the legs may work in a pinch if the auto focus locks on the netting. Use back button focus to pre-focus (use the leg trick only if necessary) and adjust as needed. Don’t forget to frame the shot with space at the top. Blockers often come in pairs and rarely, a trio. Middles are often key blockers. They are usually tall and part of the strategy is to have the middle join an outside to block a spike. A good offense will try to deceive the middle into being out of position. Their goal is to have the spiker hitting against a single blocker rather than a pair of defenders. The tempo and direction of the set is part of that deception.
L-- 1D Mark IV, f/2.8, 400mm, 1/1250, ISO 6400
R-- 1D X, f/3.5, 300mm, 1/1250, 12,800
Jube
Volleyball has jube (jubilation or celebration) that is as good or better than any high school sport. Capturing that jube isn’t hard, it just requires the photographer seek it out. Every team will have one or more players who are exceptionally expressive. Take note of who they are during the games. When it gets to the final 2-4 points in a close game, I will stop shooting action and begin focusing almost exclusively on emotional jube shots. The proper time to switch will be marked by a soaring intensity that is unmistakable. Sometimes the celebrations will be directed at teammates and other times toward the coach/bench. Try positioning yourself behind the bench (emotion is often expressed in that direction), track the most animated player(s) and get those emotional peaks and valleys recorded. Get close and fire away in short bursts. After that last point, move around. Include the coaches if possible. Group and individual shots both work. Make the viewer of your images feel the joy and excitement. These shots are a must have.
UL-- 1D Mark IV, f/2.8, 400mm, 1/1000, ISO 1600
UR-- 1D X, f/2.8, 140mm, 1/1000, ISO 3200
LL-- 1D Mark IV, f/2.8, 200mm, 1/1000, ISO 6400
LR-- 1D Mark IV, f/2.8, 135mm, 1/1000, ISO 6400
The Event
There is a photo story behind and around every match. The venue, cheerleaders, fans, timeouts, faces in the crowd, anything associated with the contest can be a source for an image. Supply the viewer with an experience of the event.
UL-- 1D Mark IV, f/2.8, 400mm, 1/640, ISO 2000
UR-- 1D X, f/2.8, 70mm, 1/1000, ISO 6400
LR-- 1D Mark IV, f/4.0, 15mm, 1/800, ISO 3200
LL-- 1D Mark III, f/2.8, 16mm, 1/800. ISO 3200
Nitty Gritty
The tutorial so far has covered great ways to get the typical shots in volleyball.
BUT... ... . Something’s missing.
What’s missing is the heart, the soul, the hand to hand combat aspect of the game. There is something powerful, vibrant and dynamic about images where you get physically close to the action and capture net play when two or more players are battling at or above the net. Get low to the floor, be as close as permitted, use medium focal lengths and shoot when the peak action is in close quarters at the net. Focus can be tough, faces difficult to see, other players can block your view, access can be hard or impossible to get, plus there is no guarantee you’ll get a great shot anyway. Nonetheless, it is worth the try--especially on teams that have active, talented, middle hitters. The action will be fast and a responsive camera body and lens really help. Don’t try to shoot the outside hitter on the far side of the court. Too far away. Find closer action. If you are sitting on the side next to the strong side outside hitter, try a wide angle view of her spike when the opponents are doing a double block. You won’t see the face of the spiker but she will seem to be 10 feet in the air and the blockers will be prominent in the image. It’s fun to try this shot.
You can tell I love the nitty gritty part of the game. Just know that it can be frustrating to capture. Start with the conventional shots. Add these for spice.
UL, LR-- 1D Mark III, f/2.2, 135mm, 1/1000, ISO 3200
UR-- 1D X, f/2.8, 102mm, 1/800, iSO 6400
LL-- 1D Mark IV, f/4.5, 65mm, 1/1000, ISO 12,800
Lighting, Gear, Camera Settings, and Venues
Light has a huge role in determining which camera bodies and lenses can be used as well as affecting the final image quality. There is rarely any excess quantity of light and that drives the exposure settings. Use f/2.8 lenses (or faster) if at all possible. An f/4.0 lens will have half as much light to focus, require either a slower SS or higher ISO, and have a wider depth of field (dof). A 70-200mm f/2.8 lens is a great place to start for volleyball and much of sports photography in general. Since I use a variety of focal lengths, my lenses for volleyball are now all f/2.8. Shooters on a tight budget may want to try the 85mm f/1.8, the wonderful 135mm f/2.0 or other fast primes they already own. Ultra large apertures bring in more light but at the expense of a very shallow depth of field. My images are made exclusively with Canon gear but Nikon makes excellent products as well. Don’t change brands to chase the latest offering from a manufacturer. Trading lenses to match the body is far too large a hassle. I prefer a SS of 1/1000 and that speed will allow you to read the ball. Slightly slower is OK, especially for non-telephoto focal lengths. Use a SS of at least 1/640 unless you choose slower speeds for artistic reasons or because low light and high ISO noise force it. Camera bodies that have good image quality at ISO 6400 are wonderful and increasingly available for modest budgets. ISO 3200 at f/2.8 will work if the lighting is above average. Take a few test shots to determine your exposure settings and then enter those in Manual mode. I use the histogram and chimp on the lcd to evaluate the exposure. Expose to the right but don’t burn out the highlights. If you don’t use the histogram or don’t know how to use it, learn and use it now. That knowledge will help in all of your photography, not just volleyball, to properly expose and post process your images.
Mandates for energy efficiency have been a boon to lighting advances. Light is getting brighter with improved color rendering at many facilities in the US. Notice the photos on the right side of the jube shots above. They were shot at the same venue (a large arena), at almost exactly the same spot but a year apart. The LR image was taken in 2011 and the UR 2012. Improved lighting not only added a full stop of light but the improvement in skin tones (and other colors) is unmistakable. It was obvious to me just walking in the door that something had changed for the better. The skin tones in the earlier year appeared jaundiced even to the naked eye. The next year was great. Too many sports photographers consider only the quantity of light but not the quality of the light spectrum. We all know that golden hour light produces superior image quality when shooting outdoors but fail to consider that indoor light quality can vary as well.
These improvements are happening in high schools both old and new. Many of my older 1D Mark III images here were taken using 4 Alien Bee B800 strobes bounced off the ceiling. With the combination of improved lighting and camera sensor technology, I haven’t shot VB with strobes since 2010. Hurray! Some leagues never allowed flash anyway. That strobing experience has been helpful to me because timing the one exposure is crucial with strobes. Skillful timing helps even if you shoot in a 2 or 3 frame burst. Prior to the season, I’ll attend a practice or two and shoot single shots just to work on my timing. A Canon 70D will have a shutter lag of 65 milliseconds compared to a 1D X at only 36 milliseconds. That lag, along with your reaction time, must be accounted for in your technique. The adjustment will come quickly but if you don’t practice, you might find the exposures in your first match are just a tad too late.
All my shooting is done in RAW. I know some of you shoot for a newspaper on a deadline and need jpeg and if so, fine. If you have a choice, shoot RAW. Light cycling, noise, lighting spectra and changes in light because of brightly illuminated electronic billboards can all demand correction is post and RAW will do that best.
When you are focusing through the net, be sure to experiment with the number of auxiliary focus points, sensitivity, and switching speed for your auto focus. Since you are likely to be using large apertures, the shallow dof will reveal when the focus is on the net rather than the player. The brightness of the background and uniforms compared to the black netting can also affect which setting will track players best. Be sure the camera dioptric adjustment is set for your eyes so you can tell, in the viewfinder, when the focus strays. Being able to discern when focus leaves a player and locks on the net isn’t easy but it is hugely helpful in boosting your ‘keeper’ rate.
At a new venue, take a minute to assess where you can stand/sit/kneel, the backgrounds available, and what types of shots you can get. Most likely, you can’t get them all. Optimize the backgrounds for color, cleanliness, and setting. Nobody captures every type of shot at a single match. Capture what you can. Make a plan. Since it is unlikely that you will have access to both sides of the court, the setter will face your side for one game and have her back to you during the other game when the teams switch sides. The same issue (reversed) will apply to the serve shots. Decide when/how you want to capture those shots and front line action vs back row and remember to get some jube if the games are tight. Study your results, learn from them, modify your plan for next time, and keep shooting.
Don’t forget to have fun! You are there to capture young people totally alive and fully engaged during an event conducted for sport. Let their joy and enthusiasm infuse you and your images.
Phil Zivnuska
Samples: Find the types of images you like and replicate them in your gym with your team.
http://photography-on-the.net/forum/showthread.php?t=1224971
http://photography-on-the.net/forum/showthread.php?t=1232710
http://photography-on-the.net/forum/showthread.php?t=1226359
http://photography-on-the.net/forum/showthread.php?t=1221560
http://photography-on-the.net/forum/showthread.php?t=938979
http://photography-on-the.net/forum/showthread.php?t=775247
copyright 2013 Philip S. Zivnuska
zivnuska.zenfolio.com
Bonus Tip
Shooting through the net is always a challenge. Here's a tip to help. When you shoot through a net, the net is typically black. Camera focusing systems like to grab onto the contrast between the black net and a bright uniform and shift the focus to that net. Consider the following two photos:
1/1000 sec. f/2.8 400mm ISO 6400
1/1000 sec. f/2.8 300mm ISO 6400
Notice that the net is nearly invisible against the dark blue or the black uniform. At the same time, the netting is clearly visible against the light colored floor. Use that fact as part of your focusing strategy. When there are dark uniforms, place your focus point in the middle of the uniform where there is no contrast with the net and the net is essentially invisible for the camera. The only contrast available is from the bright number of the player and that's good.
Life gets more difficult with light uniforms.
1/1000 sec. f/2.8 300mm ISO 6400
In this case, I will focus on the black shorts, black knee pads or even black shoes just to avoid having the focus jump to the net. This won't work every time (At least not for me!) but it helps improve the odds when focusing is just plain tough.
A few more things. Try using few, if any, auxiliary focus points. I use four. The more aux focus points the more likely the camera will find something other than the player to focus upon. On a blocking shot, like the above, if the blockers are standing in position, I will try to get the focus on the player(s) (in this case I used the black shorts as my target) and then release the back button (thereby holding the focus) as I raise my framing to get the tops of the hands for the block and fire the shutter button.
Please don't think these ideas are fool proof. This photographer has plenty of out of focus shots to prove I've been fooled plenty of times! Volleyball photography is a challenge and it can get extremely challenging when long focal lengths and larger apertures combine to produce a tiny depth of field.
Phil Zivnuska
Once you master the rules, you are ready to break the rules.
]]>
How to Photograph Football
by Phil Zivnuska
Insights for Photographers New to the Game
Football is a great game that offers terrific opportunities for the photographer. There is plenty of action occurring simultaneously in different places. There are also significant challenges, especially for those who begin their football photography careers at the high school level. Attempting to capture fast moving action as darkness approaches is a challenge for even gifted, experienced, shooters. This tutorial is directed toward but not limited to those shooting high school football since it is not only the most difficult but because this is where many photographers get their first exposure to the game. A thorough knowledge of dslr fundamentals will be required so novices may occasionally need to expand their skill set.
The Prime Directive--Remember that the game is about the student athletes on the field, not about you, not about your pictures. The hierarchy of courtesy has the student athletes, AD, coaches officials, parents, and fans all above the photographer. Stay out of harms way, blend into the background, be respectful, and if you are told to do something by an official or administrator, do it. If you disagree, comply now and talk it over calmly at a later date. Build cooperative relationships with those who have authority/responsibility for conducting the game. Contact the AD ahead of time and learn the local rules for access. Get permission well in advance of the event. Talk to the AD or administrators before the contest to see where you may and may not go to photograph. Don't push the limits. Did I mention building cooperative relationships with those who have authority/responsibility for conducting the game?
Access to the field, court, or track is gradually getting more restrictive. You are a guest and have been granted privileges. Using those privileges with humility, grace, and courtesy will help insure access for your photography colleagues who come along after you. We need to work together responsibly for the benefit of all.
Know the Game--It's quite possible to photograph a football game without much knowledge of the game or the teams. Lots of folks do exactly that. However, those who know the game and the teams will be able to anticipate the action much better than those who don't. That means better positioning for more compelling action and better images. Ask yourself. Who are the best players on the offense and defense of each team? Does this team prefer to run or pass? If they pass, who are the leading receivers? If they run, do they run between the tackles or do they have a speedster who likes to run wide? Who are the "Big Hitters" on special teams? Does one team prefer to run or throw to one side of the field more than the other? Which formations typically mean pass and which ones mean a run is more likely?
If you know the answers to those questions, you will be able to play the percentages and put yourself in position for a 'lucky' shot.
Shoot Early in the Day (Pre-game), Early in the Game, Early in the Season--
Given the choice between golden hour sunlight and ultra high ISO (or flash), the decision is easy. Use all the natural light that mother nature is going to provide.
The first opportunity is to shoot the pre-game activities. There is a small army of people who arrive at about 5pm (or earlier) to prepare for that 7pm kickoff. These include the booster club folks, the barbecue crew, tailgaters, concession stand workers, announcer, the AD, color guard, dance team, and the band. These folks make the game an event and they enjoy pictures of themselves too. BTW, those who can make your life easy or difficult (AD, coaches, administrators) are here now.
Secondly, shoot the early part of the game. Depending on your purposes, you may be able to get the shots you need in the first half of the game when there is considerable ambient light available. Even that small opening will close soon enough. On September 1 in my home town of Wichita Kansas, sunset is at 8pm. By the end of October, the sun will be down at 6:30. That is a huge difference for Friday night football photography.
Shoot the warm ups before kickoff. This is a great time to get portrait type shots of players in uniform. There is no problem getting lots of shots of players who may not see much game time. Their parents love them too and would love to buy pictures. You can get uncommonly close to them during this time.
Don't forget the refs and coaches.
Images made with good ambient light are far more compelling than those done under the lights or with flash. Shadows are much less of a problem, ISOs are lower, and you can take full advantage of the burst mode in your camera. Shoot the heck out of the first half in those early season games.
1/1000 seconds, f/3.5, ISO 800, September 7, 2012 at 7:06:38 pm. You gotta love that light!
Remember that you are losing daylight as each week goes by. Some of us shoot every game all season long and have to cope with darker and darker conditions. If you have a choice, and lots of you do, shoot the early season games. Those early games provide opportunities for yearbook shots, images for the end of year banquet, programs, scrapbooks, publicity etc.
Positioning--
A. Get Low. The general rule for sports photography is to get low when taking your photographs. This will enable the athletes to look larger and give your images a different perspective than fans are used to. This usually means kneeling or sometimes even sitting on the ground as often as you can. Yes, this can be tiring, especially for an old geezer like me but that is what is required. Some shooters do this, others don't. The better ones do. Get some knee pads if you need them.
B. Get to the End Zone as Soon as You Have the Reach. The goal of the offense is to get into the end zone, the player with the ball will be looking in that direction most of the time, those players will be getting closer and closer to you, and there is a good view from sideline to sideline. Station yourself a few yards behind the end line when you have enough focal length to reach to the line of scrimmage and get a useable image. There is usually a dashed line to indicate the proper buffer distance from the field of play. Don't push it. Give extra space. There is no need to be so close to the field that the photographer interferes with the action or puts himself or players in danger. I'm usually 5-7 yards behind the end line. YMMV.
If the offense is backed up against its own end zone, this is a terrific time to get shots of the defense attacking. Try to get a shot of the eyes of the middle linebacker.
Having empty space behind your subject always helps isolate him from the background. This is often quite easy to do when you are shooting from the end zone.
Touchdown!
C. Try 2 Yards Behind or 15-20 yards Ahead of the Line of Scrimmage. If you are 2 yards behind the line, your view won't be blocked by the line judge or by the guy holding the down marker. On a run play, if the runner is heading wide, he will be running right at you for an excellent photo opportunity.
If the quarterback goes back to pass and you are on the side where his body faces you (and you should be), then get a shot of him.
One last thing about shooting just behind the line of scrimmage, this is also a great spot to shoot line play. I'll often grab a shot of a lineman immediately after the snap of the ball and then re-aim my camera on the ball carrier. There is a lot of action from the linemen on every play so don't forget to get a few images of that.
Downfield positioning is dependent on focal length. Twenty yards would be fine if you are shooting a 70-200mm lens. If you are shooting a 300 or 400mm, the distances will get closer to 50 yards. This also depends on whether you are shooting a full frame or crop camera body.
Before we leave the topic of positioning, there are a few other items we need to discuss. The sideline between the 25 yard lines is reserved for the teams. Therefore, you will be shooting from outside that area. That means adjusting your technique to accommodate this restriction. As you move from one end of the field to the other, use this opportunity to get images on the sideline. Coaches, athletes, trainers tending injured players, meetings of the offense and defense when the other squad is on the field, all can be compelling sideline images.
"Can you hear me now?"
As the offense approaches midfield, an you may find yourself at the 25 yard line, 25 to 40 yards downfield waiting for the action to approach (because you can't be between the 25s) and not having a long enough lens with sufficient reach. That is just one of the reasons many experienced football photographers will shoot with two cameras. One body will often have the 70-200mm zoom and the second camera will use a super telephoto lens. However, this is not a requirement and many fine images can be obtained using nothing longer than 200mm. Shorter focal lengths can be used but you will need to be more patient in letting the action come to you.
Portrait vs Landscape--
The general principle is that you want to fill the frame with the action. If you want to shoot an individual player, that can usually be optimized by shooting portrait.
When positioning or focal length results in a situation where the full height of a player can be captured in landscape orientation, the extra width available can be used to include other elements besides the player with the ball.
September 19, 7:38pm
When shooting mega-tight on the quarterback, I like to shoot landscape to include the arm with the ball reaching back as the front arm reaches forward.
A few words about special teams.
Special teams often furnish key plays in a game. A blocked punt or kick can be a huge turning point. The only problem is that you never know when it is going to occur. Don't be afraid to shoot 10 punts and come up with nothing. Get behind the punter/kicker and shoot through the kick. It's worth the effort for the day when you capture that key block. One other idea is instead of shooting the kicker's leg striking the ball, get the reaction shot when he learns whether the kick is good or not. That is often far more compelling.
It's Time for Some Tech Talk
Shoot RAW--
When I first wrote this tutorial in 2009, my advice was to shoot jpeg. No more. The improvements in software and storage space make the handling of RAW files easy and seamless. The amount of information contained in RAW files is staggering. If you are skeptical or just undecided, perhaps a before and after RAW image can convince you. I was setting up to photograph two football players for a pre season preview edition of a high school sports magazine. One of the players stood in the frame while I tested the exposure of the sky.
RAW Image Straight Out of the Camera
The exposure was adjusted, a gelled flash was added, the players got their uniforms on, and a final image was obtained. Later, I needed an improperly exposed test image to see just how much detail could be pulled out of a picture that would otherwise be unusable. Here is the same RAW image after post processing in Lightroom.
RAW Image after Processing in Lightroom
It's the same image! Now this isn't perfect and it's certainly not meant to be a justification for poor exposures in camera but if this level of recovery is possible in a poor image, just imagine what can be done to improve a shot with minor flaws. Take another look at the shoes in the before RAW image. Would you ever imagine that this file could produce the after image?
I make mistakes. RAW helps me correct and produce the best result possible. Even if you never make an error, RAW will allow you to get better results for your final product. Shoot RAW.
Settings--
Shoot aperture preferred (Av) when the light is variable from clouds or the setting sun. The faces are inside helmets and hence shadow so add about +1/3 stop of exposure compensation. It's fine if a small portion of a white uniform burns out if that helps you see faces more clearly. That can be especially important in photographing athletes of color. Manual mode is fine if the light is stable and you have experience with it. Servo focus is a must, set to auto white balance (AWB), and I use the back button focus technique. Shutter speeds should be 1/640 sec or faster and I prefer 1/1000 sec if the light and ISO capabilities of my camera allow it. Large apertures like f/2.8 give faster SS and blur backgrounds. At night with flash, I'll stop down to f/3.5 to f/5.0 to get more DOF (depth of field) since backgrounds are dark and therefore I don't need to blur them. I'm shooting Manual at the maximum sync speed (often 1/200 sec or 1/250 sec) for flash. Speaking of flash and low light, know how high you are able to push the ISO in your camera and still get acceptable image quality.
Built in 'pop up' flashes don't have enough power to be useful. Something similar to the Canon 580 or 600 series flashes is needed.
The 400mm f/2.8 lens is the supreme field sport lens because of the long reach, sharp images, and large aperture to blur backgrounds and stop action. The 70-200 f/2.8 is commonly seen because of its versatility and lower cost in an f/2.8 lens. The Sigma 120-300 f/2.8 EX DG HSM lens is also popular. Both Nikon and Canon make excellent products that will produce terrific results. Image stabilization is not required at the high shutter speeds used for sports. At least one of your lenses should be 200mm or longer. Using an f/2.8 or faster lens is recommended for Friday night football. An f/5.6 lens has 1/4 the light available for focus and that means more difficulty in low light focus, slower shutter speeds, higher ISOs, and less background blur. All are undesirable.
One more thing. If you are shooting a camera body that has Auto ISO capability, set your camera on Manual, your aperture and SS as desired and your ISO to Auto. This is a great way to shoot. It gives the best image quality in variable lighting conditions. Don't forget to add exposure compensation as needed.
Ok, I've been telling you to avoid shooting late in the game and/or late in the season. But some of us have to shoot all the games and many of the big games occur in October when twilight ends not long after the game begins. Now what?
Nighttime Football--High ISO vs Flash, Which is Better?
Answer----It's whatever gets you the best image. The type of photography that I do requires clearly visible faces. It also requires that the colors look as close to correct as possible. Some of you hate the look of flashed photography for high school football. You can't use the fps capability of your camera, there is red-eye to deal with, awkward shadows can be problematic, ghosting is an issue, and yes, the colors don't look the same. On the other hand, if you want to get light inside the helmet to see a player's face, flash will do it plus some venues are so dark that even a high ISO (20,000) won't do well. Shadows are something that must be addressed as well. Yes, the newest camera bodies are great at high ISO (>6400) but what if my body is marginal, or worse, at that level?
My bottom line is the following: The complete photographer must be able to shoot both high ISO and flashed. Once you have mastered both techniques, you can decide for yourself which way will get the best image for your venue, for your location at that venue, and for your equipment. My flash is going to be used a lot more on a 30D compared to a 1D Mark IV because of the limited ISO capability of the former. That's OK.
Let's break down the factors that I mentioned. In order to do that, I'm going to show you some ugly football images. There will be some good ones too but you need to see the pros and cons of each approach.
High ISO is not enough at some venues. The following image was taken at 7:23 pm on October 4. It was at a small rural high school about 15 miles from my house. The gear can't be blamed, it was shot with a Canon 1D X, and a 400mm f/2.8L IS II. The settings were 1/800 sec, f/2.8, ISO 20,000!
There is just no way to make this into a useable image. You might think that the problem was the result of poor, outdated lighting and that explanation is partially correct but only partially. Look at the highlights on the runners left arm, shoulder, and the top of his helmet. Compare those light levels to those of his face inside the helmet. As we can see, the problem is as much the result of shadows as it is the stadium lighting. Like most high school stadiums, this one has two (sometimes venues will have 3) light poles on each side of the field. They are located about the 15 to 20 yard line. Once a team gets inside the 15, the light comes from behind the player and there is typically no light coming from the goal line side of the player.
You may be thinking that my local field allows me to shoot at ISO 6400 and get good quality images. That may be true toward the center of the field but shadows can wreak havoc once you get down close to the goal line. Like this:
Or this
Supplemental lighting is the key for dealing in situations where the shadows get objectionable. So, how do you know when the shadows are bad enough to warrant flash? It's as plane as day. You only need to look for it. Once you see it, once you see the light and shadows in real time, your photography will never be the same. Sports photography, landscape photography, portrait, all will be transformed once you see the light.
The next time you are at a night game, go to the end zone as the team approaches from midfield. When it gets to the 15 or 20 yard line, watch for the shadows to appear on the player's uniforms. It will be most obvious on the white pants but you can easily see it even on colors. Down inside the 10, you may wonder why you never saw it before. Develop the discipline to look for those telltale shadows. Once you've seen them you may wonder why you've never seen them before. You are now a better photographer. Look for the light and shadow in your other forms of photography.
Before you think I'm strictly a flash football fan, let me conclude with some examples from the middle of the field where even light is available from all sides of the player.
1/800 sec, f/2.8, ISO 6400
1/800 sec, f/2.8, ISO 16,000
And also two flashed shots from the same game
Notice the 'ghosting' in the flashed images. Not too bad but present nonetheless. Study these photos. Study your own. You can decide for yourself which approach will work best for you. At most venues, my approach has become to shoot ambient until it is completely dark and the offense is inside the 25 yard line. Then I will switch to flash.
If the game is close and it's the 4th quarter, I'm almost always shooting with my 70-200 and my speedlight, a Canon 580 EX II. This is because I want to capture any touchdown and subsequent jube or any reactions from the bench. Spirits will be running high and shadows abound in the end zone and on the sideline. In this case, I wanted to tell the story of a coach instructing his quarterback before getting the ball back to start a final 2-minute game winning drive. If you know where the scoreboard is and think about it, then you can use it to your advantage.
Incidentally, I shoot with the speedlight mounted about 2' below the camera on my monopod. One thing I learned from my friend Fernando who works for the local paper is the importance of getting the shots immediately after the game. He always seems to be where the action is. If a coach is hugging his quarterback, Fernando is between the two of them! Don't you forget that in those big games, there are quality images to be captured after the final gun.
Here is a happy group of players and fans but there is one cheerleader on the lower right who is headed away from the celebration...
It turns out that this senior cheerleader was headed to be with her Dad, the coach who had just broken though to the state championship game after years of trying. This misty eyed moment was one of my favorites of the year.
Two last tips
First, have a plan. What are you there for? What are you trying to capture? Are you trying to capture the event for the yearbook? If so, be sure to get there early and get those shots of the band, the pom-pom dancers, the color guard and the burgers on the grill. If you are strictly an action photographer, find out who the big hitters are on special teams. Who are the leaders of each team. Study the stat sheet. If you are selling your images, you might want to get as many images as possible in the pre-game so you will include as many players as possible. If you have requests for images, make a brief list of who wants to purchase your prints. Decide how you are going to handle darkness. Quit at the end of twilight? Go to high ISO? Speedlights? All three approaches are valid depending on what gear you have and what your goals are. At the beginning of this tutorial I mentioned building cooperative relationships with those who have responsibility/authority for the game. If the coach or AD or Ref would like a photo of something or someone, get it for them and give it to them. They have plenty of people who want something from them and not many who want to do something for them. Have a plan that you could write down on a 3 x 5 notecard.
Second, have a mentor. My mentor, Chico, has been an enormous help to me through the years. Left to my own devices, I will invariably head off on a tangent and lose track of where I want to go. Chico will be the one to remind me of the thing I've forgotten, what I'm missing, or where I'm just plane wrong. Try to have your own mentor. It can be a fellow enthusiast, a photog for the local paper, or even the photographer who did your family portrait.
BTW, don't forget to have fun. You are capturing young people fully engaged in an activity they are doing for sport. Let their joy and enthusiasm infuse and inform your images.
Phil Zivnuska
]]>
Everyone loves to shoot with soft, warm sunlight at their backs. We love the images that can be obtained from either golden hour sunlight or the sunlight that is filtered through puffy cumulus clouds that form a giant soft box in the sky.
But what about those days when the sun is harsh, with no clouds overhead and the athletes are wearing a helmet, cap or visor? The shadows can detract from what would otherwise be a good photo.
The solution can be to shoot into the sun. When the helmet or visor puts the athlete's face in total shadow, the harsh shadow lines are eliminated.
Compare the harsh facial shadows in this image:
With this image shot into the direction of the sun.
Compare this shot with the sun at my back:
With this shot into the setting sun:
As you look at the images shot in the direction of the sun, you will notice that the shoulders and the top of the head appears over exposed or even completely burned out. This is the unavoidable consequence of the over exposure (as metered by the camera) required to properly expose for the face which is now in full shadow. How much exposure compensation is appropriate? Since I often shoot football at +1/3 EC (exposure compensation), I will usually shoot Aperture preferred at +2/3 or even +1.0 EC when shooting into the sun. I use the histogram, the "blinkies", and the LCD to get the exposure correct. A light meter can be used as well. If the light levels are static, you can shoot Manual once you've figured out the proper exposure.
1/3200 sec. f/2.8, 400mm, ISO 400, Canon 1D Mark IV, Canon EF 400mm f/2.8L IS
The bottom line? If the shadows are harsh consider shooting into the sun. Boost the exposure as necessary to properly expose the face. Shooting tight will help the shot. This is an ideal technique when the athletes are wearing head gear but can be used when none is worn as well. Since the athletes are not looking into the sun, their eyes will be wide open. Let the top of the shoulders and head burn out if necessary.
Sometimes I shoot into the sun by choice and other times by necessity. Either way, it is a good technique to have available and a must to have as part of the complete photographer's bag of tricks.
Phil Zivnuska
Coming August 15, my updated How to Photograph Football. The original, published in 2009 has over 50,000 hits.
http://photography-on-the.net/forum/showthread.php?t=735799
The new one will be better.
]]>
Burst shooting is a valid photographic technique. Which one of the following images would you have captured using a one shot technique?
At the end of the day, all that matters is whether or not you've captured the image. If you are wasting your time exposing frames that have little to no chance or producing a good shot, you will know soon enough. Don't be afraid to push the button!
]]>
Jubilation: noun A feeling of great happiness or triumph.
Jube
Shots of 'Jube' or jubilation are vastly underestimated in importance for many sports photographers. If you are submitting your photographs to a newspaper, magazine or even a high school yearbook, don't be surprised if an image of celebration gets top billing over your action shots. A good way to check and see what images are selling is to check the ESPN photo wire.
espn.go.com/espn/photos
You may be surprised to see how often it is the reaction rather than the action that is the image that gets chosen to tell the story.
If you are shooting a hard fought or important game, there is a good chance there will be good jube shots near the end of that game. It's often more important to position yourself to capture that than to shoot the last minute of the game. So, position yourself to capture jube. In some sports, that's relatively easy. In volleyball, there is usually one or two players who are especially expressive. When a close game gets near the end, stay focused on those players and be ready to react as they do. The players will often face the bench as they react in pure jubilation.
They will react individually:
Or in groups.
And it can be in any sport.
Jube photos tell the story of the game as well as action photos. Be sure to include them in your gallery of the game.
Phil Zivnuska
I'm putting the final touches on my "How to Photograph Football" tutorial. It will appear on August 15, 2014.
]]>
Sports photographers, especially new ones, often concentrate so much on capturing action that they neglect factors that affect image quality. One way to improve the vibrance and saturation of colors while reducing haze is to use a circular polarizing filter when conditions warrant. Landscape photographers often use them in their work but they are rarely seen at sporting events. I like them in sports photography whenever my images will include a lot of sky or if I am dealing with low sun angles where reflected light may be an issue. Those days when the skies are an ugly milky white can't always be avoided but a CPL will draw out whatever definition in the clouds is possible.
A circular polarizing filter is a photographic filter that screws on to the end of a lens (usually) and reduces or eliminates reflected sunlight. The size will depend on the size of the lens. Both 77mm and 82mm are popular sizes. Quality is variable and so are the prices. Read the reviews and get a good one. These filters rotate to maximize their effect and so it will be necessary to recalibrate when changing from portrait orientation to landscape. It is important to note that the effect is apparent as one looks through the viewfinder. Simply look in the viewfinder while rotating the filter and you will see the polarizing effect maximize, then minimize, then maximize again. WYSIWYG so when the scene has the best appearance to your eye, that will be the best for your capture. When reflections are gone, the colors will appear richer, skies bluer, clouds whiter, and haze will be reduced. It comes at the expense of 1 to 2 stops of light.
Light loss is less of an issue than you might expect. Remember that we are talking about reflected sunlight so by definition we won't be using it for indoor, night, or even overcast days. That means there will be ample light for fast shutter speeds at fairly low ISOs for good image quality. The polarizer has minimal effect when shooting into the sun or with the sun at your back and it's most useful when shooting at 90 degrees to the sun. It's also possible to have variable effects when shooting with extremely wide angled lenses because different areas of the image will be at different angles to the sun. Check and double check the viewfinder!
What types of sports images can use a circular polarizer?
Pole vault. To the naked eye, the sky was almost all a murky white with no definition. With the polarizer, the sky became at least a little interesting.
Long jump
And the high jump
Try a circular polarizing filter for your landscape images and then use those polarizing properties to best advantage in sports. Nearly everyone loves images with bold colors that are free of glare or haze.
Phil Zivnuska
I'm already working on my updated "How to Photography Football" that will be published August 15, 2014. The original version has nearly 50,000 hits and the updated tutorial will be even better with 5 more years of expertise.
]]>
We must start with fundamentals. In this case, the fundamentals are the elements that will make for a good shot. Those are focus, face, peak action, and backgrounds. For me, faces are essential. In order to see faces, get to the event early and observe the athlete as he/she approaches the bar. Observe the jump to determine what vantage point will give the best facial view. Snap a few practice frames if you need to. It's not as simple as shoot from the opposite/same side as the approach. Plus, some jumpers will photograph better from the landing side, some from approach. This is extremely variable at the lower levels of competition such as middle or high school.
The following athlete throws her head back so her face can be photographed very well from the landing side of the bar.
In this shot from the Kansas State Track Meet in 2013, I attempted to photograph this athlete from the landing side. Mediocre result.
In 2014, again at the state meet, I was able to get to a vantage point on the approach side and shoot this burst.
Compare the head position here to that of the jumper in the first shot.
It's the exact same venue, same athlete, just a different side of the bar with a much better view of the face. It's worthwhile to note that the second set of images have a busier background but the better view of the face offsets that fact. However, that does bring us to backgrounds. If you shoot standing, you'll have a better angle to see the face but often a busy background.
These shots are from 2011. In the first shot, there is nice action but a busy distracting background.
Kneeling or sitting on the ground can correct this problem by projecting the jumper against the sky. Note that with this jumper, the photographer must be on the camera right side of the bar. A polarizing filter might have helped give some definition to an ugly, milky white sky.
One other item. If you are going to include the sky in the picture, use a polarizing filter to get the most dramatic sky possible. The polarizer will make the blue of the sky bluer and the white clouds far more dramatic. Put all these elements together and you get shots like this from this (May 30, 2014) weekend.
Standing perspective. Both of the following shots use a circular polarizing filter. With this athlete, the photographer must be on the camera left side of the bar to see the face.
Sitting on the ground, shooting skyward. Wonderful isolation and the polarizer renders a pleasing, colorful sky with defined clouds.
Some final issues to deal with. What about focusing? Is it better to track the athlete through the approach or to pre-focus on the bar and let the athlete jump into the focus plane? If I can track the athlete through the whole approach, I will track in servo focus through the jump. That is often not possible when shooting from the landing side due to obstacles and/or because the athlete takes an extreme angle during his approach. In those cases, I back button pre-focus on the label in the center of the bar and shoot a burst as the athlete jumps. In this case, I prefer to use a smaller aperture to give me extra latitude from an expanded depth of field. At 70mm focal length, full frame, 15 feet away from the bar, using f/5.6, I'll have a depth of field of about 4.8 feet. If you are shooting against the sky, there is no need for background blur so make the focusing easy on yourself by using a small aperture. A fast shutter speed is easy to obtain outdoors. Use 1/1000sec or faster.
Conclusions
Watch the warm ups to determine what possible camera location has the best view of the jumpers face. Check the possible backgrounds. If you can shoot from a low vantage point, the athlete may be isolated against the sky instead of a cluttered stadium Consider using a circular polarizing filter to make the sky more striking. Use large apertures to blur a cluttered background. A small aperture will give more leeway in depth of field and can be helpful when background blur isn't needed (ex. sky background). Different jumpers may need to be shot from different locations.
Next time, more on circular polarizing filters.
Phil Zivnuska
Coming August 15, 2014 will be my updated: How to Photograph Football. My version from 2009 has generated almost 50,000 hits. The new one will be even better.
]]>
The Shot Put is an event for powerful men and ladies. If you shoot high school sports, it can be a challenge to photograph this event in a way that is complimentary to the appearance of both ladies and the men. For men, there is usually less of a problem if the athlete's face is contorted. High school girls may be more sensitive about how they appear in photos. Depending on how the image is to be used, both men and women might like to have a photo of themselves competing that shows intensity yet is pleasing from a photogenic aspect.
Here's an approach that can be used for both sexes and also might be helpful if access is limited, the background is distracting, or the sun angle is troublesome. Consider shooting from behind the athlete instead of the conventional position in front.
Consider the problems with this:
Compared to this:
Or this:
Compared to this:
Or this:
Compared to this:
This is not to say that shooting behind the athlete will always be a better vantage point. The same issues of light and background can conspire to work in the opposite direction. Additionally, the action of the launch of the shot put can be compelling and gender stereotypes of what looks appealing may just be flat wrong. What I am suggesting is that when you go to photograph the shot put, consider the light, background, access, desires of the athlete, and how the image is to be used when you choose where you, the photographer, should position yourself.
Phil Zivnuska
]]>
Get your tour from Chief Tsosie's tours of Antelope Canyon. Rob is a great guide.
www.antelopeslotcanyon.com
Next time, back to sports with a tip for the shot put.
Phil Zivnuska
]]>
When I shoot an event, I like to try different things to attempt to improve my images. It might involve a new angle or tweaking my settings to trade SS for ISO or aperture. I'm always trying something to work the images. Recently, a tennis tournament was held at my favorite tennis venue. Access and backgrounds at Goddard, Kansas are the best for tennis in this area. It was a perfect opportunity to try a new technique--new to me at least.
Last fall, there was a ladies high school tournament at that site. When shooting from the end of the court across the net to the other end, I had the 400mm f/2.8L IS II and was trying to capture the player when hitting either the forehand or backhand. The problem was in choosing where to select the focus point. If the forehand placed the player on camera right and the ball and racquet on the left then the backhand was the reverse and the situation was the opposite for left handers. There wasn't enough time to move focus points between strokes so I tried something else. I tried a few shots with the 61 point auto selection AF mode plus iTR (face recognition) AF so I could stay focused on the athlete regardless of which side of the court he/she moved toward. It seemed to work but I needed to test it further.
With this springs mens tournament at Goddard, I decided to shoot the whole tournament with the full 61 point auto selection with iTR and just see how well it worked out.
It was great!
Goddard has wonderful backgrounds that become a soft buttery blue blur when shooting with the 400 at a large aperture (f/2.8 to f/3.5). When the player has a solid colored uniform, it makes it easy for the camera to use color to help track the skin tones against the solid colors. Additionally, the face recognition technology has an excellent opportunity to perform. The photographer simply initializes the focus on the player's face and the X will track that face as long as it stays within the focus area. The camera displays which of the 61 points are being used so you can easily see if the camera is locked on the appropriate spot. The day of this tournament was marked by winds from 25 to 35mph and I had my hands full keeping a steady aim. Whenever I messed up my aiming, the displayed focus points clearly and immediately showed that fact and I was able to re-acquire the proper target. Unlike yours truly, the 1DX was flawless. I was stunned to see that not only was the player in focus but the face recognition technology kept the eyes sharp. Every time. Wow. Let me be clear, I make plenty of mistakes but the X did not. It was remarkable.
It also worked with the 70-200mm
Keep in mind that at 30 feet, the 400mm will have a depth of field of about 4 inches. On these shots, I'm able to count the young man's eyelashes in each shot. Originally, I was skeptical of this technology but now I'm a believer--for tennis anyway.
Rudy Winston of Canon recommended giving this a try (on one of his training videos) and I'm glad he did. Try it!
Phil Zivnuska
]]>
The first thing to do is to get your lens as close as possible to the fence or net. I don't place the lens touching the fence, just close. It can be so close that your left hand touches the fence at the end of your lens cap. If you are behind the plate, be sure you and your lens won't be hit by a deflected pitch. Have your lens location such that the spaces between the links are maximized for the clearest view.
Second, use a fast lens. You want the largest diameter lens you can use. That will maximize the view and minimize the effect of your obstruction.
Third, try to shoot perpendicular to the fence. Anything more than a very slight angle and the metal or net will have a greater and greater effect in degrading the image quality.
Here is an image taken with the 400mm f/2.8L IS and a 1D Mark IV through a chain link fence. This large diameter lens is more than a match for a chain-link fence. You can see the detail and sharpness.
This was taken using the 300mm f/2.8 IS and again the 1D Mark IV.
While the larger diameter super-telephoto lenses are best, fine images can be obtained using something far less expensive. Here a 70-200mm f/2.8L IS is used through chain-link moments before sundown. The body is a 1D Mark III in this photo from 2010.
Pixel peepers will be able to tell that there is a slight loss of detail in images shot through a fence but that will only be apparent at very large print sizes and even then, the differences will be subtle. Remember, use fast, long lenses, get close to the fence and shoot directly through the spaces. One last tip: These images are exceptional in part because of the light. Late afternoon golden hour light is low in the sky. When the diamond is laid out in the conventional orientation, that light will come from the west and illuminate the face and especially the eyes of the right handed pitcher without a shadow from the cap.
Phil Zivnuska
]]>
By Phil Zivnuska
The Long Jump and its cousin the Triple Jump are relatively straight forward to photograph but there are several simple techniques to improve your ordinary images and make them noteworthy.
The biggest photographic problems are poor backgrounds. The typical high school track meet will have numerous obstructions in the background and other competitors will be standing, sitting, loitering, or otherwise just be hanging out in the area you would prefer to be clean for your image. Nothing says "Who Cares" like a disinterested high school student appearing in the background of your capture. Additionally, the athletes who aren't competing at that moment will be wearing an assortment of coats, hoodies, shirts etc. and they will often look a bit tattered.
Fortunately, there are strategies to employ. First, the runway has to be clear for the long jumper to run on his approach. If you are lined up directly in line with the runway, that will allow you to have at least the area directly behind the jumper clear.
Next, be sure you are shooting at a large aperture, perhaps f/2.8 or at least something close to that. That will assure as much background blur as possible.
Third, get low. A low angle allows you to view the jumper against the sky. For this shot, I was literally laying in the dirt with my elbows on the ground. My position was right next to the officials with the rakes.
This extreme position was required to isolate the jumper against the sky instead of the cluttered group of onlookers.
When you are about to shoot a jumper, keep an eye on them all the way through from beginning to end. There can be a lot of intensity as the athlete runs to the takeoff point.
The landing is always a popular shot due to the spray of sand.
I wrote earlier about aligning yourself with the runway. At most high schools, the football field runs north and south. The long jump and triple jump areas also often run north and south on the edge of the field. In the typical 'after school' track meet, this means that the shadows from the setting sun will divide the face of the jumper into sun and shadow. In strong sun, that can make for a compromised image (see immediately above and below).
Moving to the side of the pit will help with the sun angle but as seen earlier, be sure to get extremely low to view the jumper against the sky instead of obstacles. One last tip: If you are going to shoot against the sky as your backdrop, consider using a circular polarizing filter. The sky will be bluer, the clouds look whiter, and the colors will pop.
A polarizing filter was used for the last two images as well as the Derby jumper (in green) further above.
Sometimes, the long jump is pictured directly from the side. This emphasizes the height reached by the competitor. In this case, the background is even more critical to the success of the shot. Consider shooting this with the sun at your back or even shooting into the sun and having the athlete silhouetted against the sky for an artistic view of the event.
Phil Zivnuska
From 2009:
http://photography-on-the.net/forum/showthread.php?t=735799
]]>
The new camera bodies from Canon (1D X, 6D, 5D III, 70D) all have a new feature called Auto Exposure Lock with Hold. I'll call it AE HOLD. This is similar but different than AE Lock. Depending on which of these two features you select, that feature can be selected by using the * button on the back of the body. Different bodies may have other buttons which may be programmed to activate it as well.
The crux of the change is this. Depressing the * button in AE Lock locks the exposure setting of the moment when you depress the * button. It only locks it for one exposure unless you continue to depress the * button or push the shutter button halfway down within 2 seconds of the previous exposure. That's not likely to happen, especially if there is any substantive time between exposures. If you want to lock an exposure for many frames over a period of time, you are probably out of luck. Enter AE HOLD (Auto Exposure Lock with Hold).
When AE HOLD is chosen (in the camera menus) instead of AE Lock, the * button is depressed and the exposure of that moment is preserved as the exposure for the camera. So far, that is the same as AE Lock. Either choice has an icon visible inside the viewfinder when selected. The difference is that in AE HOLD, the exposure is held until the * button is depressed a second time or the camera goes to sleep. Taking a photo does NOT cancel the setting. You may choose to keep the body awake for up to 30 minutes if you like.
With the outdoor track and field season nearly upon us, this feature can be quite handy for the action sports photographer. When shooting events like the pole vault or high jump, your perspective will often have the athlete set against a backdrop of sky. This can be by necessity or by choice to eliminate distracting backgrounds. That sky can throw off your exposure selected by the camera and compromise your image. If you have the time and opportunity, determining the desired exposure and shooting Manual is a great way to go. However, if cloud conditions are variable and/or you are on the run moving from one event to another you may not have the time to determine the ideal exposure and program it into Manual. Here's a shortcut that is fast, easy, and uses the new AE HOLD feature.
Imagine that you've just arrived at the pole vault pit. There is a bright sky with broken clouds and you want to photograph the competitors who will jump next. If you shoot Av, the bright sky will throw your exposure off. Try this instead. Using Av, aim your camera at a competitor on the ground who is in roughly the same direction and the same light as you will be shooting. Don't choose someone in shadow if your vaulter will be in sun. Try to avoid using someone with a totally black or white uniform as your exposure model. Press the * button for AE HOLD. The *H icon will appear in the viewfinder. Your exposure is locked and being held for you as long as the *H icon remains. Go ahead and shoot vaulter after vaulter with a constant exposure setting. If variable clouds/sun change the light, simple depress the * button a second time to remove the AE HOLD. Repeat setting the AE HOLD under the new conditions in the same manner as originally done and fire away.
Phil Zivnuska
If you have other applications for exposure hold, please share them with the group. PZ
Coming 1 April 2014, How to Photograph the Long Jump
]]>
Action photographers will often spend large sums of money, as much as they can afford, in order to purchase a camera body with the most advanced focusing system possible. They will tweak the focus point location, the number of auxiliary focus points, how fast or slow the focus changes from one object to another, the case of focus tracking and how the camera will react to acceleration. Sadly, many photogs will omit adjusting the adjustment available on almost all dslrs that assists your most important focus aid--Your Eyes!
It's vitally important to be able to discern when your camera's focus system is locked on the desired subject and when the camera has locked onto a subject close to the desired but not exactly the one intended. That can be the difference between a tack sharp image and one that is disappointingly soft. If you can't tell the difference in the viewfinder, don't be surprised if you camera's focus remains locked momentarily off target even if you've re-aimed the focus point properly. You can often adjust the length of the lag before the camera refocuses but there will always be a slight lag. You often hear action photogs complain that the focus is misplaced even though the focus point is properly located at the moment of exposure. More often than not, the focus point was misplaced earlier and the focus had not yet relocked on the target.
How can you improve your eyes ability to see proper focus? With the dioptric adjustment.
Many shooters have visual impairments that can be improved upon with an adjustment of the diopter of the viewfinder. That adjustment is usually located adjacent to the viewfinder. It may be to the left or right depending on the manufacturer. Check your owners manual. A Canon installation is shown below.
Adjust the wheel until the image appears as sharp as possible. Note the amount of adjustment and repeat this several times in order to get a consistent outcome. It should be that simple. For most folks, it is. However, some people have a discrepancy in excess of the maximum adjustment. This can occur when a photog uses glasses but wants to shoot without them for some reason. Be aware that some camera manufacturers offer adjustment lenses that dramatically extend the amount of adjustment available. You may want to consult your optometrist for a recommendation of how much diopter adjustment you will require.
You are ready to shoot. Now that you can tell when the focus has drifted off target and are using back button focus (yes, back button focus), you can use the "Bump Focus" technique to correct.
Bump focus refers to the practice of releasing and immediately re-pressing the back button for focus. This will expedite the acquisition of a new focus lock on the subject centered on the focus point. In fast moving sports with numerous targets such a basketball or football, it is easy for the focus system to lock on another player or a referee. Proper dioptric adjustment lets you recognize when you need to acquire a new lock with a bump focus. A higher keeper rate is your reward.
Phil Zivnuska
Volleyball shooters
Can you tell in the viewfinder when you are focused on the player and when you are focused on the net? Not without a proper dioptric adjustment!
]]>
Everyone needs someone to critically evaluate their work. In effect, everyone needs an editor or someone who can look at your images with fresh eyes. This is due to several reasons. We all tend to get in a rut where we make the same mistakes over and over. I see this from photographers who only shoot landscape or just portrait orientation. It can be something we do such as chronically making the white balance too warm or saturation too high on our galleries. On the other hand, it may be something we omit such as the failure to include jube shots or emotional shots of the coaches or fans. Your eyes may lock on the compelling action in an image and fail to notice that you are not paying enough attention to the cluttered backgrounds. Mentors can be hugely helpful in these cases.
The role of mentor is not to be taken lightly. To do this properly, time is required to really look at your photos in detail. Then the mentor must be willing to take the time and effort required to offer a detailed critique. When I say critique, understand that I'm not referring to criticism alone. A proper evaluation should include the positive aspects as well as the negative. We all have egos and an unrelenting barrage of complaints won't be helpful for long. This is something to remember when you are mentoring as well as being mentored. There is an old rule of thumb that says when critiquing, one should start with two things you like about the image(s) before starting in on the items to improve upon for the next shoot. Ideally, this should be someone with a breadth of experience.
Where can you get one of these people who will offer their time and expertise for no money? Surprisingly, there are lots of folks who will do this in the photography community but it may require the establishment of a relationship before you can expect significant help. There are likely many professional or skilled non-professional photographers in your community. Do you know any of them personally? If so, I'd start there. If not, do you know an experienced employee at a photography store? How about an editor at the local paper? Perhaps a person at the high school who edits the yearbook or paper? I've had the privilege of getting to know several highly skilled photographers just by taking the time to introduce myself at high school events where both of us are shooting. When you meet and greet a photog for the third or fourth time, it becomes much easier to engage in a conversation about the art and science of sports photography.
My mentor is Mike "Chico" LaBarbera. We became best friends in 9th grade (46 years ago) and he is the one who encouraged me to start sports photography. I cringe when I think of how terrible my early images actually were and how wonderful I thought they were! Fortunately, Mike was patient and he knew how to suggest just one or two improvements at a time and he was skilled in suggesting things that were appropriate to my skill level. We only see each other in person about once or twice per year. We talk photography once or twice per week and Mike evaluates my images on zenfolio several times per month. That is enormously useful.
The electronic age offers its own opportunities for growth. Photography forums are very helpful. Personally, my current favorite is
photography-on-the.net/forum/
also known as the Canon forum. There is a photo sharing forum for sports where you can post images and get feedback. The critiques can sometimes be harsh but the proper attitude to take is that even an unfairly negative evaluation can contain useful information for future events. It won't take long before you know who is talented and who is a poseur. There are incredibly talented folks who post there (and other forums too) and I'm always pleasantly surprised by how these gifted photographers are willing to share their insights.
This is the best time in the history of mankind to learn photography. Dive in. Join the party. The technology is incredible. Use it to realize your photographic vision. Have a mentor help guide your journey. Make it your task of tasks to do it now.
Phil Zivnuska
]]>
Many photographers have a very limited understanding of depth of field. That understanding is often limited to the notion that larger apertures (smaller aperture numbers) are associated with a small depth of field. That's useful to clean up distracting backgrounds but there's more the action photographer should know. The focal length of the lens has a huge role in determining the depth of field and that fact is both useful and often unappreciated.
First, let's consider the typical situation, long focal length (300mm) and large (f/2.8) aperture. Here the combination produces a creamy background that makes the player pop off the page.
But what if you want the other effect? A large depth of field.
This is exactly the situation I was in two weeks ago. My goal was to capture basketball players on the court and include the overhead scoreboard. Both needed to be in focus. My mentor Mike 'Chico' LaBarbera was visiting from Eau Claire, Wisconsin and he was using my 1D X and the 70-200mm f/2.8 IS II. That left me using the 1D IV with a 24-70mm f/2.8 II. My buddy Mark Weaver had strobe lights set up but wasn't using them for this tournament game. This gave me control over the two key factors--Aperture and Focal Length. The first thing I did was to zoom to the wide (short focal length) end of the lens, 24mm. Then because I was using the stobes, a small aperture was chosen, f/8.0, with only a modest increase in ISO to 640. I pre-focused on the backboard, about 12 feet away.
Small apertures and short focal lengths = large Depth Of Field. So, how large is that DOF?
There is a handy DOF calculator on the internet.
www.dofmaster.com/dofjs.html
Plugging in the values of 1D Mark IV, 24mm, f/8.0, and 12 feet yielded the DOF.
Everything from five and a half feet to infinity was going to be in focus!
Because the DOF was going to be quite large, I modified my technique to take advantage. I always use back button focus so once I pre-focused on the back board, I just avoided the back button and my focus would remain fixed at about 12 feet. There was no need to worry about focusing because everything was going to be in focus. The camera was set on the ground for visual effect and because the focal length was so wide, aiming merely consisted of pointing the camera toward the area of action with a slight upward tilt. No looking through the viewfinder. No focus tracking. Just rough aiming 'from the hip'. Not even from the hip since the camera was literally on the ground.
Here is the result.
The Garden City Buffaloes beat the defense downcourt and seal the win.
How far can you take these principles? Well, if you want to show three wrestlers and the arena where the state championships are held, you can shoot at 12mm (fisheye) and f/5.0 from 5 feet to get a DOF that extends from 27 inches to infinity. The arena, the crowd and these three top wrestlers are all part of the story.
Let's take a closer look at the role of the lens focal length in depth of field. Consider the case where a photographer is using a Canon 7D to photograph sports and that he is at f/8.0 at a distance of 12 feet. I've been alluding to the fact that focal length is important in calculating DOF. Let's check the DOF at 24mm and at 200mm under those conditions.
24mm focal length DOF = 286 Feet From 6 ft to 292 ft.
200mm focal length DOF = 4 Inches! Just 12 feet +/- 2 inches
Consider focal length before aperture as you plan your depth of field.
Put the depth of field calculator and the principles of DOF to work in your images for your purposes. The focal length of the lens is a key aspect of that calculation.
Phil Zivnuska
PS Don't forget that you can often pre-focus and shoot "From the Hip" when necessary at those wide focal lengths! Think of how you might use this DOF information with a wide angle remote during the upcoming track season to obtain a memorable shot that average shooters won't think to get.
]]>
Focus is non-negotiable. It has to be sharp. If it isn't, toss the pic in the trash. High ISO noise can be dealt with in post production but if the image is blurry from either motion blur or a misplaced focus, that image cannot be recovered. Second, a good image must have a face and newspapers prefer to see two faces. Shakespeare wrote: "The Eyes are the window to your soul." If your image of the face gets a look at the eyes, that's good. If you are tight enough to have those eyes reveal the emotion, intensity, and character of the athlete, i.e. his soul, that's outstanding.
The action captured should be peak action. If you look at the image and see that it is just after the tag or just after the athlete completed the play and is starting to relax, you've missed the shot. Last, if there is an object used in the sport, that object should be included in the image. It can be a ball, a puck, a shuttlecock, whatever. If the athletes use it, have it in the picture. When you have an image that requires a peculiar crop to include the object, that's probably a sign that the photo won't work.
Now that you know the rules, let's break them. First, consider two of the greatest sports photos of all time. These are iconic images for those old enough to remember them.
Y.A. Tittle was the NFL MVP in 1963. On this play in late 1964, he suffered a bone-jarring hit while throwing. The pass was intercepted and returned for a touchdown. The 38 year old Tittle, a great and valiant warrior, bloodied and injured, was finished. No game action, no ball here, and the image quality is poor by today's standards, but this memorable moment fifty years ago, yielded one of the most enduring sports images of all time. This photo was taken by the late Morris Berman. Mr. Berman submitted this photo to his editor who refused to print it. He wanted action. The editor knew the 'rules' of a good sports photograph but was too rigid to recognize greatness that fell outside the lines. Grain or noise in the image? Horizon off? Who cares.
Fair Use--Commentary
Muhammad Ali referred to himself as the "Greatest of All-Time." When he defeated Sonny Liston, the world paused to view this brash, supremely talented fighter. This iconic image from 1965 didn't capture the decisive punch and although it wasn't peak action, it was the emotional peak of this fight and his career. Notice all the pro photographers in the background who were in the wrong place at the wrong time. We aren't the only ones who miss great moments! Think of peak action in a larger sense where it can include peak emotion and great storytelling. Once again, we could quibble about image quality (noise and contrast) but that would miss the point.
Fair Use--Commentary
Most of us will never shoot all-time greats but we have the opportunity to shoot excellent images that break the rules. These captures will be a smaller percentage of our total but really add something. Be sure to look for peaks of emotion or intensity--not just action. Jube shots are important examples of this peak emotion. Here are some other examples from high school athletic contests.
Can you hear me now?
1/1600 sec. f/5, 300mm, ISO 1600, Canon 1D Mark III, Canon EF 300mm f/2.8L IS
The talented freshman makes a mistake--and knows it.
1/800 sec. 200mm, f/2.8, ISO 6400, Canon 1D X, Canon EF 70-200mm f/2.8L IS II
Pure athleticism.
1/8000 sec. f/3.2, 400mm, ISO 400, Canon 1D Mark IV, Canon EF 400mm f/2.8L IS
]]>
Consider the following image. My task was to take a photo of two football players who were small in stature but were large in importance to their team. In order to check exposure on the sky, I took a shot with one of the players. It is straight out of the camera after importing into Lightroom.
As you can see, the sky was darker than desired and the player was almost totally black. It was only a test image to meter the sky but since it was taken in RAW, it was an interesting challenge to see how much detail could be recovered. The answer was, quite a bit. Lots more than anyone would expect from a badly exposed photo.
Take a look at the skin tones and especially the shoes. Yes, it's the same image. The adjustments were done in Lightroom. Everything visible in #2 was present in the RAW file of #1. If that level of transformation is possible on a poor exposure, just think of what is possible for a properly exposed image. Some may claim that they always get the perfect image straight out of the camera and therefore don't need to process with RAW but I submit that in most situations, it is impossible to control all the factors that go into a good photograph. One other thing to consider is that even if you are happy with your image now and you currently don't have the post processing skills to improve your picture, non-destructive processing in Lightroom, Aperture, etc. will allow you to go back years from now and give new life and perhaps an alternative interpretation of an old image. There are other reasons for using RAW but those will have to wait for another blog post.
The final image used a gelled speedlight (580 EX II, 1/2 CTO gel) to obtain the following shot:
3.
1/300 sec, f/10, 16mm, ISO 100, Flash, Canon 1D Mark IV, Canon EF 16-35mm f/2.8 L II
Phil Zivnuska
]]>
On November 30, I had a stroke!
Strokes are the pits. In my case, it was related to a prescription that interacted with the coumadin that I had taken uneventfully for many (12) years for my atrial fibrillation. It caused me a week's stay in the coronary intensive care ward of a hospital and then another week as an inpatient at a rehab hospital learning to walk again.
On the plus side, the consensus of my doctors is that I can expect a 90-100% recovery. However, no one is able to say whether that will take two months or six or nine. Progress has been excellent.
Two weeks ago (this is written January 1, 2014), I was not allowed to stand up unless I had a walker next to me, a grab belt around my chest, and a therapist to assist me. A week ago, I started walking unassisted around the house. On December 30th and 31st, I returned to work (I'm a dentist). My hands work fine and the main issue for me is balance in walking. Those were long days. I hit the wall about 3pm on the first day. My endurance is gone with exertion. Nonetheless, it is great to be working. My improvement is noticeable and visible every day.
Photography? I'll be back at it in two months or so. This blog? I ask for your patience. This is an adventure where I don't know how everything turns out.
Until then, here are some pics from my last event. These are from the Kansas 6A football championship. My first hint of trouble was when my walk into the stadium was with a slight limp. At first I thought it was due to a tweak of my left knee. Wrong. Big trouble was on the way.
BTW, that thing you always wanted to do? Get it done. Now.
Merry Christmas and Happy New Year!
Phil Zivnuska
]]>
When I first started shooting in 2007, I purchased a 1D III in an attempt to use a good body to fix bad light. The following light is bad, bad, bad. The wall actually looked that awful to the naked eye. The red and green colors were not a transitory illusion.
Even with a fine 1D III camera body, the IQ was awful.
There is no amount of post production that can save that image. It can't be done.
This shot was taken a year later. It's from the same gym, exactly the same spot, same daughter, same opposing team and same camera. The difference was the light from two Alien Bee B800s bounced off the ceiling.
The improvement in colors and skin tones is undeniable.
At this point, it is important to note the good news. There are several factors acting to improve the IQ (image quality) for photographs taken with ambient gym light. The need for more efficient lighting, driven by tight budgets and government regulations, has created improved illumination for middle and high schools across the US. The improvement has been in both quality and quantity. Modern camera bodies have also improved. It is no longer unusual to see images taken at ISO 6400 that are excellent. Processing software has noise reduction features that are wonderful. Lightroom and Photoshop are very good at NR and Noiseware is terrific. However, there are still some facilities that retain the old, dark, buzzy, off color light that just can't be fixed.
The answer for those gyms is supplemental lighting. Here, I'll address strobing.
Some shooters use speed lights and regardless of the supplemental source, that source can be used as a direct light or bounced off the ceiling or wall. My work is done using bounced strobes (Alien Bee B800s). Strobes are usually much more powerful than speed lights. Bouncing reduces the reflected light by about a stop compared with direct light. Direct light gives more shadows than indirect. Some people prefer the look of direct. It is a matter of personal choice.
Location
The favored location for the lights (usually 2) is to have one light near each corner of the gym on one end of the court.
Here a total of 4 lights, two in each corner, were used.
Use the KISS principal. Keep It Simple and Symmetrical.
Symmetry is the best way to avoid having bright and dark areas on the gym floor. Uniform light levels (for the front court) will eliminate any need to adjust exposure on the run during game action. Sometimes the wall is so close to the end line that it is difficult or impossible to bounce off the ceiling. In those cases, just bounce off the back wall.
Keep the light at your back. That is, shoot from behind the baseline. Aim the lights to hit the ceiling on a line to bounce toward the top of the key. The ideal quality check is to walk the front court with a light meter to aid in the aiming of lights and to even out the light levels.
Power
Strobes should be at full power for bounced flash. Best results will be obtained when the light is 3 stops above ambient or more. Alien Bees will have shorter flash times at full power than they do when set at lower levels. That's right. All though it seems counterintuitive, full power means short duration. Speedlights are the opposite. More power + short duration = Good IQ. If you are less than 3 stops above ambient, your pictures will tend to have increasing amounts of ghosting from the ambient light. Since most strobed images are shot at 1/250 or other max sync speed, any ambient light will reveal motion blur. Strobed light won't because the flash will be about 1/1000 seconds long. See manufacturers specs.
Strobes have much more power than speed lights but they require a power source. That means either access to an electrical outlet (and therefore a possible trip hazard) or a battery pack of some sort.
Triggers
Triggering remote strobes can be done with cords or wireless radio. Cords are often problematic because of the distances involved and the potential trip hazard. There are several radio triggers available at widely differing prices. I use Pocket Wizard units. They are the gold standard for reliability and range. The sending unit is mounted on the camera hot shoe and the receivers are at the strobes.
As you can tell, strobing requires a lot of work and a lot of gear. You will need lights, radio receivers for each light, appropriate cords, a radio sending unit for your camera body, clamps or lightstands for each light, and provisions for power cords or battery packs. Shooting strobes eliminates burst shooting because of recharge time. For my B800s, that means about one shot every 1.2 seconds. Ambient shots are much easier to get. However, when you are in a dark gym and you want the best quality, strobes are unbeatable.
My daughter in 8th grade. 1/250 sec, f/6.3, 70mm ISO 640. Canon 1D Mark III, Canon EF 70-200mm f/2.8L IS. I've got a 20-30 standout print of this image. The detail is so good that one can count the stitches on her jersey and the dimples on the ball.
1/250 sec, f/5.6, 70mm, ISO 800, Canon 1D Mark IV, Canon EF 70-200mm f/2.8L IS
The isolation provided by light fall off is a plus. With strobes, you can shoot at f/4.0 with no problems. The larger dof from smaller apertures give more focus leeway and increased sharpness. The lower ISOs used mean more detail and less noise. White balance problems from light cycling are non-existent. There is a lot to be said for the image quality available from strobed images.
1/250 sec, f/4.0, 70mm, ISO 400. Canon 1D Mark IV, Canon EF 70-200mm f/2.8L IS
The lighting improvements mentioned at the beginning of this blog has greatly reduced the amount of strobing that I do. However, strobed images still set the standard for IQ and have an important place at venues with poor light.
Phil Zivnuska
]]>
If you have the chance to shoot JUCO football, make it a point to shoot rising stars. The defensive end pictured below is Tank Carradine as seen in his days playing for the Butler County Grizzlies. Later, he starred for the Florida State Seminoles and is now playing for the San Francisco 49ers.
1/3200 sec. f/2.8, 400mm, ISO 400, Canon 1D Mark IV, Canon EF 400mm f/2.8L IS
On that same team was quarterback Zach Mettenberger. He left Butler and is now a very high profile player for the LSU Tigers.
1/800 sec, f/3.5, 400mm, ISO 400 Canon 1D Mark IV, f/3.5, Canon EF 400mm f/2.8L IS
The opportunity to photograph rising stars requires no exceptional talent, just some homework. Today's JUCO stars are the D1 and possibly pro players of the future. The feature shots you take today may have value in the future. That may be in cash, creating a portfolio, or in obtaining credentials for higher levels of competition.
1/1250 sec, f/4.0, 560mm, ISO 125, Canon 1D X, Canon EF 400mm f/2.8L IS II Plus 1.4x TC III
1/1250 sec, f/4.0, 560mm, ISO 640, Canon 1D X, Canon EF 400mm f/2.8L IS II Plus 1.4x TC III
1/1250 sec, f/4.0, 560mm, ISO 320, Canon 1D X, Canon EF 400mm f/2.8L IS II Plus 1.4x TC III
One last item. Dont forget to get some shots of the coaches. They are on their way up the ladder just as you are. Do them a favor and they just may return it.
This shot of the head coach is still present on the team website.
1/3200 sec, f/3.5, 400mm, ISO 1600, Canon 1D Mark III, Canon EF 400mm f/2.8L IS
The assistant head coach.
1/1250 sec, 560mm, f/4.0, ISO 125, Canon 1D X, Canon EF 400mm f/2.8L IS II Plus 1.4x TC III
Every coach's wife likes to see her husband depicted in a favorable light. Don't underestimate the power of that!
;-)
Phil Zivnuska
]]>
Frank Mason Fr. // 5-11//185 //Petersburg Virginia
Wayne Selden JR. Fr.//6-5//230//Roxbury, Mass
Andrew White III So.//6-6//210//Richmond, VA
Naadir Tharpe Jr.//5-11//170 Worchester, Mass.
Joel Embiid Fr.//7-0//250//Yaoundem Cameroon
Andrew Wiggins Fr.//6-8//200//Vaughan, Ontario (Best Pictures of him on the Net IMHO). He is a preseason All-American and Adidas is reputedly ready to offer him $180,000,000 for a shoe endorsement.
Check the muscle tone on this remarkable athlete.
Conner Frankamp Fr.//6-0//165//Wichita, Kansas
Tarik Black Sr.//6-9//260//Memphis, Tenn.
Jamari Traylor So.//6-8//220//Chicago, IL
Perry Ellis So.//6-8//225//Wichita, KS
Coach Self (center) and the KU assistant coaches
The images were shot with the Canon 1D X and the Canon EF 70-200mm f/2.8 IS II with two exceptions. The first Frank Mason and the second Conner Frankamp images were shot with the Canon 1D Mark IV and the Canon EF 300mm f/2.8 IS.
If you have a friend who follows college basketball, have him take a look at these photos. Wiggins is receiving a huge amount of publicity and there are not yet many good action images of him playing college basketball.
Phil Zivnuska
]]>
In Praise of Gaffer Tape
Gaffer tape is one of those non-secret, secrets that lots of photographers use regularly but others have never even heard of. It is an inexpensive cotton cloth tape that is durable and holds strong yet has the ability to be readily removed from a surface without leaving any residue. As the name Gaffer implies, this tape is often used in electrical applications to hold wires to wood, carpet, tile or any other flooring material. In photographic applications, this tape can mitigate a possible trip hazard from wires of all types. The lack of a residue will be appreciated by the maintenance staff and is a must for many venues.
Since it is a cloth material, it is useful to cover metal or other surfaces that can be cold or hot to the touch. If you own a monopod or tripod and frequently find yourself holding cold surfaces, simply wrap the area with gaffer tape and voila, instant comfort. A similar improvement can be for offending areas of a camera body. This tape is also used for the lens caps of Canon 'Big White' lenses. It makes touching the cap comfortable and is a nice reinforcement when the lens cap has a crack.
Since we're speaking of monopods, let me mention another use. When I shoot high school football, I clamp a speed light to my monopod using hose clamps. Wrapping the monopod shaft with 3 turns of gaffer tape will prevent the clamps from scratching the metal and keeps the clamps from sliding.
If you've ever had lens switches move inadvertently, a small piece of gaffer tape can prevent that from recurring and if you want the focus to remain unchanged for a remote set-up, gaffer is the ticket. Camera bodies can benefit from some tape applied to covers that tend to come loose or open. When I ship a body to Canon for inspection and cleaning, I'll tape over the area exposed by the removal of the battery.
This material also makes a great impromptu clamp for temporary positioning of speed lights, PocketWizards, or even a light stand--especially if a light is mounted on the end of a monopod. Take your shots and toss the used tape. It's fast, cheap and easy.
There are many wonderful ways to attach gels to a speed light. All too often however, I find myself with the need to attach a 1/2 cto or other gel and no way to do it. I just put some short lengths of gaffer on my 580 EX II so if I ever need it, I can remove and use a bit to attach a gel. It peels off when I'm done with no ill effects.
One last use is to mark repeat locations on a floor or other surface. This can be handy for camera remotes or any application that will be repeated from time to time.
OTHER IDEAS: How do you use gaffer tape? Post your ideas. Thanks.
Phil Zivnuska
]]>
Compared to an f/4.0 lens, the f/2.8 lens will let in twice as much light and that light can be used to increase shutter speed, lower ISO, or both. Indoor sports or outdoor events in low light can push the image quality capabilities of a camera body to the limits. Having the ability to get twice as much light is a good thing. BTW, compared to an f/5.6 lens, the 2.8 will garner four times as much light.
There are three other reasons that are important. First, the faster lens supplies more light for focusing. Even if the lens is shot at f/22, the lens supplies focusing light based upon its largest aperture i.e. f/2.8. That's extremely helpful in low light levels. The second reason is bokeh. The wider the aperture used, the smaller the depth of field (dof) and the better the bokeh compared to small apertures. That can be vital when the backgrounds are busy and distracting. To be a bit crude, a soft blue glow in the background is much better than a port-o-potty in sharp focus. Last, the fast super telephoto lens can be used with a 1.4 or 2.0 teleconverter and most camera bodies will still be able to focus.
Gathering more light means larger diameter lenses with more glass and that means heavier. Remember, you don't have to shoot at the maximum aperture to get the extra light for focusing. You the photographer are in control of your gear and hence, your image.
[I hope you won't mind looking at some young ladies in addition to traditional sports images]
1/1000 sec. f/2.8, 35mm, ISO 3200, Canon 1D Mark IV, Canon EF 16-35mm f/2.8L II
1/1250 sec. f/2.8, 38mm, ISO 100, Canon 1D Mark IV, Canon EF 24-70 f/2.8L II
1/2500 sec. f/2.8, 200mm, ISO 1600, Canon 1D Mark III, Canon EF 70-200mm f/2.8L IS
Fast lenses have uses beyond sports. These two high school ladies are playing the wicked step sisters of Cinderella in the school play.
1/500 sec. f/2.8, 300mm, ISO 3200, Canon 1D Mark III, Canon EF 300mm f/2.8L IS
1/1000 sec. f/2.8, 400mm, ISO 640, Canon 1D X, Canon EF 400mm f/2.8L IS
Don't forget, just because it is an f/2.8 lens, that doesn't mean you have to shoot at that aperture. Fast L lenses are high quality at any aperture.
1/250 sec. f/5.6, 35mm, ISO 100, Canon 1D Mark IV, Canon EF 16-35mm f/2.8L II, 580 EX II with hand-held Rogue Flashbender
One last thought. Used lenses can give great value. My first 400mm, an f/2.8L IS was purchased used. I had it for three years, used it heavily, and sold it for the same price I paid. I then purchased a flawless Canon 400mm f/2.8L IS II used and saved well over $1,000 compared to a new one. That's the lens I use today. Buying and later selling a used Canon EF 400mm f/2.8L IS can be justified if the net cost is below what an occasional rental would cost. The similar calculation can be made for any of the 'Big White' super telephotos. Consider that if your circumstances permit.
Phil Zivnuska
]]>
Reproducing this tutorial in any form, in whole or in part, without written permission of Philip S. Zivnuska is prohibited.
How to Photograph Volleyball
By Phil Zivnuska
You might think it would be easy. After all, there are only 6 players on each team and the court is not all that big. Indoor volleyball, however, is one of the more challenging sports to photograph. The action is fast, the lighting marginal, players usually face the net and that net gets in the way of focusing. The key elements are the same as in most sports photographs; focus, face (especially the eyes), action, and the ball. “Shoot Tight and Crop Tighter” applies to volleyball too. This tutorial will discuss the elements needed to capture the 7 types of indoor volleyball photographs. A solid knowledge of dslr fundamentals is required. I write as tight as I shoot, so let’s start.
Your efforts will be far more successful if you learn the game, scout the teams, and study the players. Volleyball photography doesn’t follow the ball, it constantly anticipates where the ball is going to be and sets up for the shot ahead of time. Where will the serve be aimed? Why? Who will set the ball up for a spike? What direction will she (he) be facing? Which positions (players) will be doing the spiking and how do they approach the net from their respective positions? Don’t try to capture every hit of the ball. It can’t be done. Think one or two volleys ahead. Consider where you should be positioned to get the best capture of a particular position. Frame and focus on the player who will be hitting the ball before the ball gets there. The more you know about the game, the higher your capture rate will be. The examples here will be from ladies high school volleyball. If you shoot at this level, you will see that players who are novices will be unpredictable due to a lower skill level. Better teams will have a predictable strategy and the best teams will be sophisticated in strategy and disguise their intentions in order to fool the opposition and often you too!
The Prime Directive--Remember that the game is about the student athletes on the court, not about you, not about your pictures. The hierarchy of courtesy has the student athletes, AD, coaches, officials, parents, and fans all above the photographer. Stay out of harms way, blend into the background, be respectful, and if you are told to do something by an official or administrator, do it. If you disagree, comply now and discuss it at a later date. Build cooperative relationships with those who have authority/responsibility for conducting the game. Contact the AD ahead of time and learn the local rules for access. Get permission well in advance of the event. Talk to the refs before the contest to see where you may and may not go to photograph. Don’t push the limits. Did I mention building cooperative relationships with those who have authority/responsibility for conducting the game?
Philosophy--In my view, the best galleries are those which capture a variety of action from changing perspectives using different focal lengths. In order to accomplish that, I will go high, go low, go long (long focal length lenses), go wide (wider angle lenses), go to the side and go to the ends of the court. Here is a gallery of 8 shots using 8 different lenses at 8 different focal lengths from an assortment of elevations:
http://photography-on-the.net/forum/showthread.php?t=1091324
For the lowest perspective, the camera was resting on the floor. To gain a high perspective, I will haul a 400mm f/2.8L to the top of the rafters (as in the LR Event illustration) if it results in a better image. Obviously, the gear available, the venue, and the access permitted will affect what is possible. The complete photographer will be able to adjust to a variety of circumstances and still get the job done.
We will talk about the gear, the light, camera settings and the venue later. Let’s look at and analyze the 7 types of volleyball images now.
Serve, Pass, Set, Spike, Block, Jube, and Event Images
The Serve
The first image to consider is the serve. This shot is usually easy to focus, repeatable and readily available for capture. Sports photographers often attempt to photograph the moment of impact with the ball and they end up with a shot where the hitting arm blocks the view of the face. Consider the images on the left side of the illustration below. This moment is easy to capture and is often very flattering to the player as the arms provide a beautiful frame for the face. Shoot tight. Let the parents know about your photo. Sell them a print.
Since this position is predictable and repeated several times, it allows the photographer to vary his background. On the upper left, the fans and bleachers provide the setting. The lower left shot uses the scoreboard. Look for a pleasing backdrop and change your position to get a good view of the player and have the crowd, scoreboard or perhaps the flag complete the scene.
The movement is slower at this moment, so a one stop slower shutter speed and lower ISO can be used, if needed, to gain image quality. Taking a moment to think through the settings and background will help give you a winning image.
On a jump serve like on the right, getting low will emphasize the athleticism involved. Shooting from a balcony high on the opposite end of the court with a long telephoto will allow you to look straight at the player and give you a better chance to get a good view of the face. The venue, access and/or lenses available may determine which approach you choose to take.
UL-- 1D X, f/3.2, 300mm, 1/800 sec, ISO 6400
LL-- 1D Mark III, f/4.0, 135mm, 1/250 sec, ISO 400, Strobed with 4 Alien Bee B800s
R -- 1D Mark III, f/3.2, 70mm, 1/320 sec, ISO 400, Strobed with 4 Alien Bee B800s
The Pass (Bump, Bump Pass, Overhand pass)
These can be dramatic shots that are often easy to focus and capture. Choose a back row player whose face you can see clearly and who you determine is likely to return the serve (or spike). Good teams will pick an opposing player they want to force to return their serves and they will hit the ball to that person. Lesser teams are happy just to serve the ball inbounds. A weak player may be unable to make the return at all. Even if they can make a play on the ball, a poor pass may compromise the resulting set and therefore impair the opportunity for a successful attack. Here’s where knowledge of the teams can improve your chance of success as a photographer. A good coach will scout the opposition to gain an edge. So can you!
Note: a ‘Bump’ is an underhand pass.
Consider the following images of players digging for the return:
Three of the shots were taken from a vantage point quite close to the floor and the fourth (upper right) was shot from a very high angle looking down on the athlete. The image gains drama if the camera is at or near the floor.
The image on the lower right was taken almost abeam the player and the result is a profile shot. Moving to a 45 degree angle (lower left) gives a improved view of the face and both eyes are visible. Shooting under the net from the opposite side of the court (upper left) gives the best view of the face and especially the eyes. This is a superior quality shot but the sight line will often be blocked by another player. If you are positioned at the end of the court and the serve is being made from near you toward the opposite side, see if you have a clear view to a possible returner, pre-focus on that player, and with a bit of luck, you will get a shot of that player similar to the photograph on the upper left. Try it. As you frame this shot, remember that the players will often move forward and down to the floor as they dig to get a short serve or spike. Get low. Anticipate. Change the focus point if it will help frame the shot and capture the ball in the image. You will often guess incorrectly and focus on the wrong player as you anticipate the return. That’s OK. It’s part of the challenge. Welcome to volleyball photography.
UL-- 1D X, f/3.5, 200mm, 1/1000, ISO 3200, 70-200mm f/2.8L IS II
LL-- 1D X, f/2.8, 182mm, 1/1000, ISO 3200, 70-200mm f/2.8L IS II
UR-- 1D Mark IV, f/2.8, 400mm, 1/1000, ISO 1600
LR-- 1D Mark III, f/4.5, 85mm, 1/250, ISO 400, Strobed with 4 Alien Bee B800s
The set
The setter typically faces the same side of the court every time which is toward the strong side outside hitter (left front for right handed outside hitters). She is most often looking up to see the ball (if it is to be an overhand pass). Position yourself to see her face. Since the setter is looking up, a high vantage point is preferred to capture the action and the eyes. I’ll usually use a center focus point, center it on the face, and try to shoot tight as in the image on the right. The full body shot on the left side was framed to capture the sign on the scorers table for context because this was the very first match held at a new high school.
A wider angle will often capture the spiker preparing her move to the net. Both types of images can work.
Left: looking down from the bleachers. Coach’s daughter, brand new “Home of the Hornets.” I knew the paper would love this shot and use it. [Wrong again!]
Right: looking down from a balcony. Note the eyes of the right outside hitter (weak side) locked on the ball to see if the set is coming to her.
L-- 1D Mark IV, f/2.8, 200mm, 1/1000, ISO 4000
R-- 1D X, f/3.2, 300mm, 1/1250, ISO 12,800
The Spike (Hit, Attack)
The spike is considered the pinnacle of action and no gallery is complete without some images of it. Gyms with a balcony and most arenas will offer the opportunity for the photographer to get high and shoot down on the play. This yields views of offensive players where the faces are not obstructed by the top tape of the net, hitters seem to be jumping higher, and focusing is far simpler. The three hitters pictured in the red/black uniforms below were all shot from the top of an arena (see LL event image below) with a 400mm lens on a 1.3 crop factor camera body .
The players on the offensive left and right front are the outside hitters. For right handed attackers (the majority), the left front is the key position and left side hitter is hitting from her strong side. She is often the best spiker and most athletic. The other front row players are the middle and the right. Shoot these three tight enough to see the intensity/emotion of the players. Full bodies are not required. Strong side (left side for right handers) outside hitters usually approach the net from about 3 steps back. Track them through their approach and hit. Middles and weak side rights will sometimes have set plays to get them in position to attack. Study your team’s front row strategies.
Spikers hitting on their strong side will start out looking toward the setter/ball and their faces will rotate with their bodies as they strike the ball (UL). Positioning yourself 30 to 80 degrees to the net is ideal. Any less and you risk having the hitting arm blocking the face. The face will follow the flight of the ball. Middles will often hit sets that are lower and have more tempo than the typical higher set to strong side outside. They may aim left or right with their spikes to avoid a blocker.
If you can’t get high, you’ll have to focus through the net. The white tape on top of the net is often problematic for obscuring the face. Get higher or lower if you need to. In the LR shot below, the background is dark and the black netting is almost invisible against it. This helped me be able to focus on yellow #23. If the netting is interfering with auto focus, first try adjusting the cameras focus settings (number of aux points, location of focus point, sensitivity etc). Sometimes you can use a low focus point aimed on the legs below the net to get a good result. Every camera model is different and you may need to experiment to see which settings track best. Remember in your framing that hitters will jump and reach up to hit the ball. Allow room at the top of the frame and choose your focus points accordingly. Tight, properly focused images of spikers are challenging to capture but worth the effort.
The dof at 300mm and 50 feet is 1 to 1 1/2 feet at f/2.8 depending on crop factor.
Tighter is better. Tighter is more challenging. Lots more.
LL, UL, UR-- 1D Mark IV, f/2.8, 400mm, 1/1000, ISO 1600 High vantage point looking down.
LR-- 1D Mark IV, f/2.8, 300mm, 1/1000, ISO 4000--Camera is net high so face is close to getting obscured by the tape.
UR, LL: eyes follow the ball on the spike follow through
http://photography-on-the.net/forum/showthread.php?t=1242386
Block
The block has challenges similar to the spike. Try focusing through the net. However, since the blockers are positioned at the net, using a low focal point to focus on the legs may work in a pinch if the auto focus locks on the netting. Use back button focus to pre-focus (use the leg trick only if necessary) and adjust as needed. Don’t forget to frame the shot with space at the top. Blockers often come in pairs and rarely, a trio. Middles are often key blockers. They are usually tall and part of the strategy is to have the middle join an outside to block a spike. A good offense will try to deceive the middle into being out of position. Their goal is to have the spiker hitting against a single blocker rather than a pair of defenders. The tempo and direction of the set is part of that deception.
L-- 1D Mark IV, f/2.8, 400mm, 1/1250, ISO 6400
R-- 1D X, f/3.5, 300mm, 1/1250, 12,800
Jube
Volleyball has jube (jubilation or celebration) that is as good or better than any high school sport. Capturing that jube isn’t hard, it just requires the photographer seek it out. Every team will have one or more players who are exceptionally expressive. Take note of who they are during the games. When it gets to the final 2-4 points in a close game, I will stop shooting action and begin focusing almost exclusively on emotional jube shots. The proper time to switch will be marked by a soaring intensity that is unmistakable. Sometimes the celebrations will be directed at teammates and other times toward the coach/bench. Try positioning yourself behind the bench (emotion is often expressed in that direction), track the most animated player(s) and get those emotional peaks and valleys recorded. Get close and fire away in short bursts. After that last point, move around. Include the coaches if possible. Group and individual shots both work. Make the viewer of your images feel the joy and excitement. These shots are a must have.
UL-- 1D Mark IV, f/2.8, 400mm, 1/1000, ISO 1600
UR-- 1D X, f/2.8, 140mm, 1/1000, ISO 3200
LL-- 1D Mark IV, f/2.8, 200mm, 1/1000, ISO 6400
LR-- 1D Mark IV, f/2.8, 135mm, 1/1000, ISO 6400
The Event
There is a photo story behind and around every match. The venue, cheerleaders, fans, timeouts, faces in the crowd, anything associated with the contest can be a source for an image. Supply the viewer with an experience of the event.
UL-- 1D Mark IV, f/2.8, 400mm, 1/640, ISO 2000
UR-- 1D X, f/2.8, 70mm, 1/1000, ISO 6400
LR-- 1D Mark IV, f/4.0, 15mm, 1/800, ISO 3200
LL-- 1D Mark III, f/2.8, 16mm, 1/800. ISO 3200
Nitty Gritty
The tutorial so far has covered great ways to get the typical shots in volleyball.
BUT... ... . Something’s missing.
What’s missing is the heart, the soul, the hand to hand combat aspect of the game. There is something powerful, vibrant and dynamic about images where you get physically close to the action and capture net play when two or more players are battling at or above the net. Get low to the floor, be as close as permitted, use medium focal lengths and shoot when the peak action is in close quarters at the net. Focus can be tough, faces difficult to see, other players can block your view, access can be hard or impossible to get, plus there is no guarantee you’ll get a great shot anyway. Nonetheless, it is worth the try--especially on teams that have active, talented, middle hitters. The action will be fast and a responsive camera body and lens really help. Don’t try to shoot the outside hitter on the far side of the court. Too far away. Find closer action. If you are sitting on the side next to the strong side outside hitter, try a wide angle view of her spike when the opponents are doing a double block. You won’t see the face of the spiker but she will seem to be 10 feet in the air and the blockers will be prominent in the image. It’s fun to try this shot.
You can tell I love the nitty gritty part of the game. Just know that it can be frustrating to capture. Start with the conventional shots. Add these for spice.
UL, LR-- 1D Mark III, f/2.2, 135mm, 1/1000, ISO 3200
UR-- 1D X, f/2.8, 102mm, 1/800, iSO 6400
LL-- 1D Mark IV, f/4.5, 65mm, 1/1000, ISO 12,800
Lighting, Gear, Camera Settings, and Venues
Light has a huge role in determining which camera bodies and lenses can be used as well as affecting the final image quality. There is rarely any excess quantity of light and that drives the exposure settings. Use f/2.8 lenses (or faster) if at all possible. An f/4.0 lens will have half as much light to focus, require either a slower SS or higher ISO, and have a wider depth of field (dof). A 70-200mm f/2.8 lens is a great place to start for volleyball and much of sports photography in general. Since I use a variety of focal lengths, my lenses for volleyball are now all f/2.8. Shooters on a tight budget may want to try the 85mm f/1.8, the wonderful 135mm f/2.0 or other fast primes they already own. Ultra large apertures bring in more light but at the expense of a very shallow depth of field. My images are made exclusively with Canon gear but Nikon makes excellent products as well. Don’t change brands to chase the latest offering from a manufacturer. Trading lenses to match the body is far too large a hassle. I prefer a SS of 1/1000 and that speed will allow you to read the ball. Slightly slower is OK, especially for non-telephoto focal lengths. Use a SS of at least 1/640 unless you choose slower speeds for artistic reasons or because low light and high ISO noise force it. Camera bodies that have good image quality at ISO 6400 are wonderful and increasingly available for modest budgets. ISO 3200 at f/2.8 will work if the lighting is above average. Take a few test shots to determine your exposure settings and then enter those in Manual mode. I use the histogram and chimp on the lcd to evaluate the exposure. Expose to the right but don’t burn out the highlights. If you don’t use the histogram or don’t know how to use it, learn and use it now. That knowledge will help in all of your photography, not just volleyball, to properly expose and post process your images.
Mandates for energy efficiency have been a boon to lighting advances. Light is getting brighter with improved color rendering at many facilities in the US. Notice the photos on the right side of the jube shots above. They were shot at the same venue (a large arena), at almost exactly the same spot but a year apart. The LR image was taken in 2011 and the UR 2012. Improved lighting not only added a full stop of light but the improvement in skin tones (and other colors) is unmistakable. It was obvious to me just walking in the door that something had changed for the better. The skin tones in the earlier year appeared jaundiced even to the naked eye. The next year was great. Too many sports photographers consider only the quantity of light but not the quality of the light spectrum. We all know that golden hour light produces superior image quality when shooting outdoors but fail to consider that indoor light quality can vary as well.
These improvements are happening in high schools both old and new. Many of my older 1D Mark III images here were taken using 4 Alien Bee B800 strobes bounced off the ceiling. With the combination of improved lighting and camera sensor technology, I haven’t shot VB with strobes since 2010. Hurray! Some leagues never allowed flash anyway. That strobing experience has been helpful to me because timing the one exposure is crucial with strobes. Skillful timing helps even if you shoot in a 2 or 3 frame burst. Prior to the season, I’ll attend a practice or two and shoot single shots just to work on my timing. A Canon 70D will have a shutter lag of 65 milliseconds compared to a 1D X at only 36 milliseconds. That lag, along with your reaction time, must be accounted for in your technique. The adjustment will come quickly but if you don’t practice, you might find the exposures in your first match are just a tad too late.
All my shooting is done in RAW. I know some of you shoot for a newspaper on a deadline and need jpeg and if so, fine. If you have a choice, shoot RAW. Light cycling, noise, lighting spectra and changes in light because of brightly illuminated electronic billboards can all demand correction is post and RAW will do that best.
When you are focusing through the net, be sure to experiment with the number of auxiliary focus points, sensitivity, and switching speed for your auto focus. Since you are likely to be using large apertures, the shallow dof will reveal when the focus is on the net rather than the player. The brightness of the background and uniforms compared to the black netting can also affect which setting will track players best. Be sure the camera dioptric adjustment is set for your eyes so you can tell, in the viewfinder, when the focus strays. Being able to discern when focus leaves a player and locks on the net isn’t easy but it is hugely helpful in boosting your ‘keeper’ rate.
At a new venue, take a minute to assess where you can stand/sit/kneel, the backgrounds available, and what types of shots you can get. Most likely, you can’t get them all. Optimize the backgrounds for color, cleanliness, and setting. Nobody captures every type of shot at a single match. Capture what you can. Make a plan. Since it is unlikely that you will have access to both sides of the court, the setter will face your side for one game and have her back to you during the other game when the teams switch sides. The same issue (reversed) will apply to the serve shots. Decide when/how you want to capture those shots and front line action vs back row and remember to get some jube if the games are tight. Study your results, learn from them, modify your plan for next time, and keep shooting.
Don’t forget to have fun! You are there to capture young people totally alive and fully engaged during an event conducted for sport. Let their joy and enthusiasm infuse you and your images.
Phil Zivnuska
Samples: Find the types of images you like and replicate them in your gym with your team.
http://photography-on-the.net/forum/showthread.php?t=1224971
http://photography-on-the.net/forum/showthread.php?t=1232710
http://photography-on-the.net/forum/showthread.php?t=1226359
http://photography-on-the.net/forum/showthread.php?t=1221560
http://photography-on-the.net/forum/showthread.php?t=938979
http://photography-on-the.net/forum/showthread.php?t=775247
copyright 2013 Philip S. Zivnuska
zivnuska.zenfolio.com
Bonus Tip
Shooting through the net is always a challenge. Here's a tip to help. When you shoot through a net, the net is typically black. Camera focusing systems like to grab onto the contrast between the black net and a bright uniform and shift the focus to that net. Consider the following two photos:
1/1000 sec. f/2.8 400mm ISO 6400
1/1000 sec. f/2.8 300mm ISO 6400
Notice that the net is nearly invisible against the dark blue or the black uniform. At the same time, the netting is clearly visible against the light colored floor. Use that fact as part of your focusing strategy. When there are dark uniforms, place your focus point in the middle of the uniform where there is no contrast with the net and the net is essentially invisible for the camera. The only contrast available is from the bright number of the player and that's good.
Life gets more difficult with light uniforms.
1/1000 sec. f/2.8 300mm ISO 6400
In this case, I will focus on the black shorts, black knee pads or even black shoes just to avoid having the focus jump to the net. This won't work every time (At least not for me!) but it helps improve the odds when focusing is just plain tough.
A few more things. Try using few, if any, auxiliary focus points. I use four. The more aux focus points the more likely the camera will find something other than the player to focus upon. On a blocking shot, like the above, if the blockers are standing in position, I will try to get the focus on the player(s) (in this case I used the black shorts as my target) and then release the back button (thereby holding the focus) as I raise my framing to get the tops of the hands for the block and fire the shutter button.
Please don't think these ideas are fool proof. This photographer has plenty of out of focus shots to prove I've been fooled plenty of times! Volleyball photography is a challenge and it can get extremely challenging when long focal lengths and larger apertures combine to produce a tiny depth of field.
Phil Zivnuska
Once you master the rules, you are ready to break the rules.
]]>
Phil Zivnuska
1/1000 sec. f/2.8, 120mm, ISO 3200, Canon 1D X, Canon EF 70-200mm f/2.8L IS II
1/800 sec. f/2.5, 135mm, ISO 6400, Canon 1D X, Canon EF 135mm f/2.0L
1/800 sec. f/4.0, 300mm, ISO 6400, Canon 1D Mark IV, Canon EF 300mm f/2.8 IS
1/1000 sec. f/2.8, 300mm, ISO 4000, Canon 1D Mark IV, Canon EF 300mm f/2.8L IS
1/1000 sec. f/2.8, 35mm, ISO 6400, Canon 1D Mark IV, Canon EF 16-35mm f2.8L II
]]>
Without the scoreboard, the image below is just a coach talking to his quarterback. Because the scoreboard is included, we can figure out that it is 4th and 4 for the other team who has a 38-35 lead and the ball with only 2:17 to play in the 4th quarter. This quarterback is going to have a tough challenge coming back if/when there is a change of possession because he has only 1 timeout left. Including the scoreboard shows this to be one of the key moments of the game and adds significance to this interaction between coach and player.
1/250 sec. f/3.5. ISO 1600, 200mm, Canon 1D Mark IV, Canon EF 70-200mm f/2.8L IS, flash
The game was for a berth into the state championship finals. There indeed was a change of possession, the QB did march his team down the field and about two minutes later, he threw this pass into the end zone for a touchdown and the win.
1/250 sec. f/3.5, ISO 1600, 70mm, Canon 1D Mark IV, Canon EF 70-200mm f/2.8L IS, flash
How do you frame this scoreboard shot with the focus you desire?
If you use Back Button Focus as I do, simply put your focus point on your foreground subject, push then release the back button. Your focus is set. Recompose to include the scoreboard and depress the shutter button to fire away. The focus will stay on the spot where you pushed in the back button. The shutter button won't affect the focus. Back Button Focus is a great advantage to the sports photographer because it allows you to have your camera set to servo focus (where it is already set to follow action) and still get the focus where you want it without having to change the location of focus points. That's a huge help when you have only seconds to get the shot focused, change the framing, and then expose the image. The settings to activate a back button and remove the focus from the shutter button will vary with the camera body.
I'll use the same technique in basketball to focus on a free throw shooter and then recompose to include the scoreboard and expose. If it suits your needs, you could then focus on the scoreboard (back button), recompose to include the shooter, and then expose the image (shutter button). Either way, Back Button Focus puts you in artistic control.
1/800 sec. f/2.8, 200mm, ISO 6400, Canon 1D X, Canon EF 70-200mm f/2.8L IS II
1/1000 sec. f/4.5, 105mm, ISO 600, Canon 1D Mark IV, Canon EF 70-200mm f/2.8L IS II
1/800 sec. f/4.0, 27mm, ISO 12,800, Canon 1D X, Canon EF 16-35mm f.2.8L II
If you want the above shot, think ahead and sit down in a spot where the scoreboard appears next to the backboard but is not obscured by it. As an alternative, this shot could have been made to include the scoreboard on the wall instead. The photographer would need to move to camera right to reveal it unobscured. As photographer, you get to choose how to frame the shot. Plan ahead. Don't rely on luck.
The volleyball photography tutorial is coming in September. It will be something special!
Next Time: Daylight for High School Football?
Phil Zivnuska
* "Use a picture. It's worth a thousand words." was originally said by newspaper editor Arthur Brisbane. He was quoted in a 1911 article about journalism. Variations of the quote have also been attributed to Napoleon, an ancient Japanese or Chinese philosopher and also Frederick R. Barnard in 1921.
]]>
